Using: Border Workshop
211
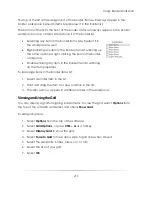
You can also zoom in and out by selecting
zoom
and using the mouse wheel or by
right-clicking an area and selecting
Zoom > Zoom In
or
Zoom Out
from the dropdown
menu.
Viewing at Page Size
To view the entire border area, select
fit page
from the right toolbar. The border will be
displayed at whatever zoom is necessary to view the entire border.
You can also view at page size by right-clicking any border item and selecting
Zoom >
Zoom Reset
from the dropdown menu.
Viewing at Actual Size
To view the border at actual size in pixels, select
actual size
from the right toolbar. The
border will be displayed and zoomed in to show the full editable size.
You can also view actual size by right-clicking any border item and selecting
Zoom >
Zoom Actual Size
from the dropdown menu.
Viewing and Editing Border Properties
At any time in the workshop you can view and edit the border properties. To view and
edit border properties:
1.
Select
border properties
from the left toolbar. A window appears.
2.
Enter a border description.
3.
Enter a filename and location for the border.
4.
Select the page size for the border.
a.
Select
Custom
to enter your own width and height in pixels.
5.
Select the orientation: horizontal or vertical.
6.
Select the resolution in pixels per inch.
7.
Select
Choose…
to change the page color.
8.
Select and check
Rotate 180° when printing
to have the back rotated. This is
useful if you want the back of the border to be flipped upside down compared
to the front. This option is only available if the border has a back.
9.
Select the photo orientation.
Summary of Contents for Studio Solution
Page 1: ...User Guide ...
Page 366: ...Index 366 Zoom 296 ...


