Setting Up: Your Network
53
a.
For Windows XP
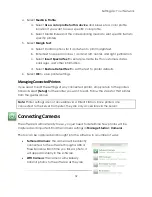
: Select the
Sharing
tab, and select
Share this folder on the
network
. The
Share Name
should be Photos. Select
Allow network users to
change my files
. Select
Apply
. Select
OK
.
b.
For Windows Vista
: Once you have enabled File Sharing, the Photos folder
is automatically shared as a subfolder. If you wish to share the folder
manually, you can disable sharing of public folders and enable sharing
specifically on your photos folder only by
right-clicking
on it and selecting
Share
and allowing all users on your network.
7.
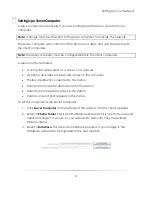
If you are running a firewall on this computer, you will need to disable it to allow
database sharing. Select
Disable Firewall
.
a.
For Windows XP
: The Windows Firewall window appears. Select to turn the
firewall off, or to enable Studio Solution as an exception. To do this, select
the
Exceptions
tab and select
Add Program
. Select
Studio Solution
and
select
OK
.
b.
For Windows Vista
: The Windows Firewall window appears. Select to turn
the firewall off, or to enable Studio Solution as an exception. To do this,
select the
Exceptions
tab and select
Add Program
. Select
Studio Solution
and select
OK
.
8.
Select
Apply
.
Viewing and Managing Client Stations
If you are on the Server Station, you can view all clients attached as Stations to the
Server.
To view all clients:
1.
Select
Server Computer
from the left side of the screen so that a check appears.
2.
Select
View Clients
from the bottom of the server screen.
3.
A window appears showing a list of all connected clients.
a.
The clients are listed by Workstation name and type (client or server).
b.
The Jobs column shows all current print jobs for each client.
c.
The Status column shows all current print jobs sent from each client station.
Select a command at the top of the window to manage clients:
Summary of Contents for Studio Solution
Page 1: ...User Guide ...
Page 366: ...Index 366 Zoom 296 ...

