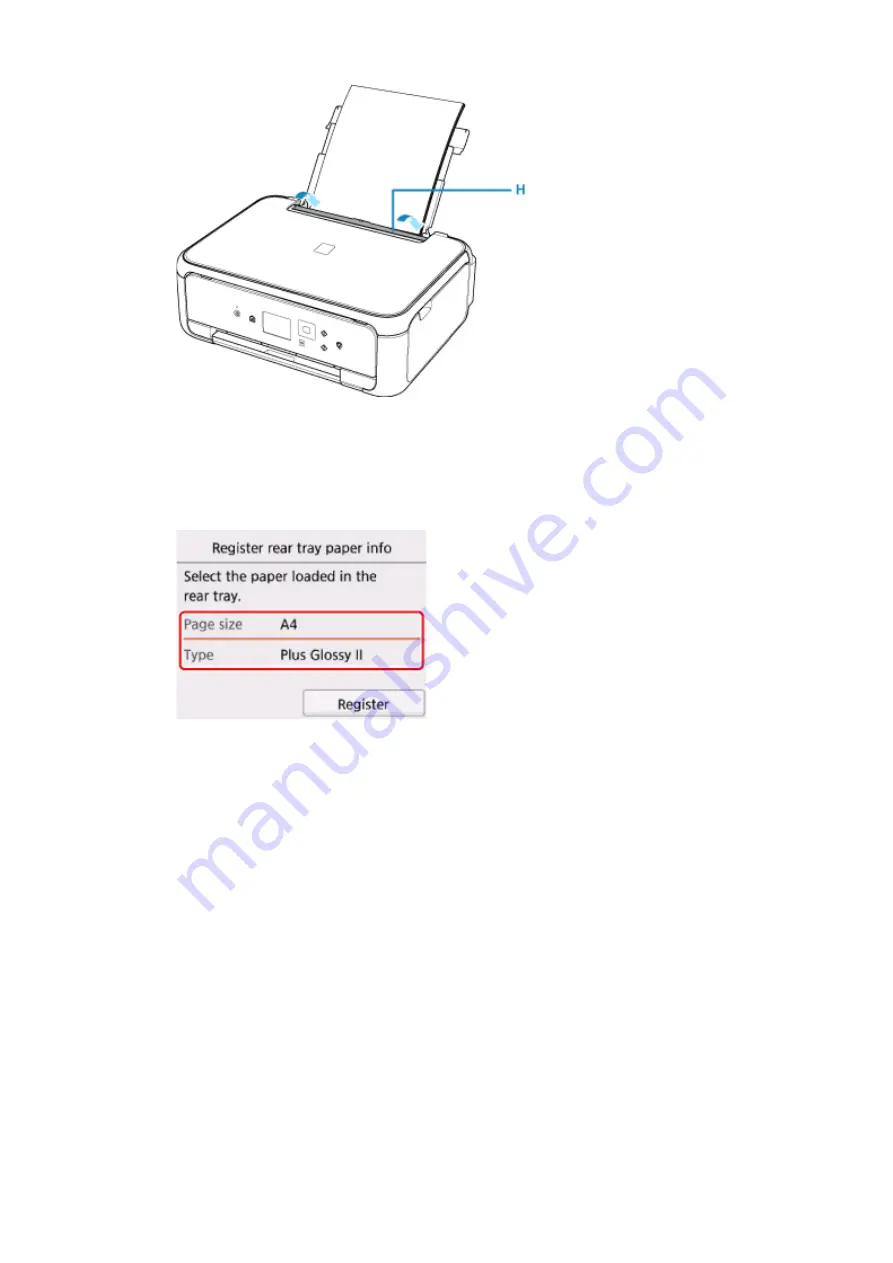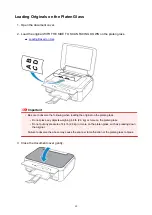
After closing the feed slot cover, the paper information registration screen for the rear tray is displayed on
the LCD.
6. Select the size and type of the loaded paper in the rear tray at
Page size
and
Type
, and then
select
Register
.
7. Open the operation panel (I), pull out the paper output tray (J) and paper output support (K),
and open the output tray extension (L).
Be sure to open the operation panel before printing. If the operation panel is close, the printer does not start
printing.
57
Summary of Contents for TS5160
Page 8: ...5012 343 5100 344 5200 345 5B02 346 6000 347 C000 348...
Page 113: ...Safety Safety Precautions Regulatory Information WEEE EU EEA 113...
Page 134: ...Main Components and Their Use Main Components Power Supply LCD and Operation Panel 134...
Page 135: ...Main Components Front View Rear View Inside View Operation Panel 135...
Page 155: ...For more on setting items on the operation panel Setting Items on Operation Panel 155...
Page 165: ...Language selection Changes the language for the messages and menus on the LCD 165...
Page 206: ...Printing Using Operation Panel Printing Templates Such as Lined or Graph Paper 206...
Page 226: ...Note To set the applications to integrate with see Settings Dialog 226...
Page 228: ...Scanning Multiple Documents at One Time from the ADF Auto Document Feeder 228...
Page 230: ...Scanning Tips Positioning Originals Scanning from Computer 230...
Page 264: ...Other Network Problems Checking Network Information Restoring to Factory Defaults 264...
Page 288: ...Scanning Problems Mac OS Scanning Problems 288...
Page 289: ...Scanning Problems Scanner Does Not Work Scanner Driver Does Not Start 289...
Page 301: ...Errors and Messages An Error Occurs Message Support Code Appears 301...


