Create a Shared Network Folder on a Workstation
Introduction
The information in this section is intended for key operators.
Before creating a shared network folder on a workstation, the following actions must be carried
out first:
• Enable the hotfolder function.
• Create an automated workflow (optional).
• Create a hotfolder.
NOTE
This procedure describes the creation of a shared network folder on a workstation with a
Microsoft
®
Windows
®
XP operating system. Depending on the operating system of your
workstation, the procedure can be different.
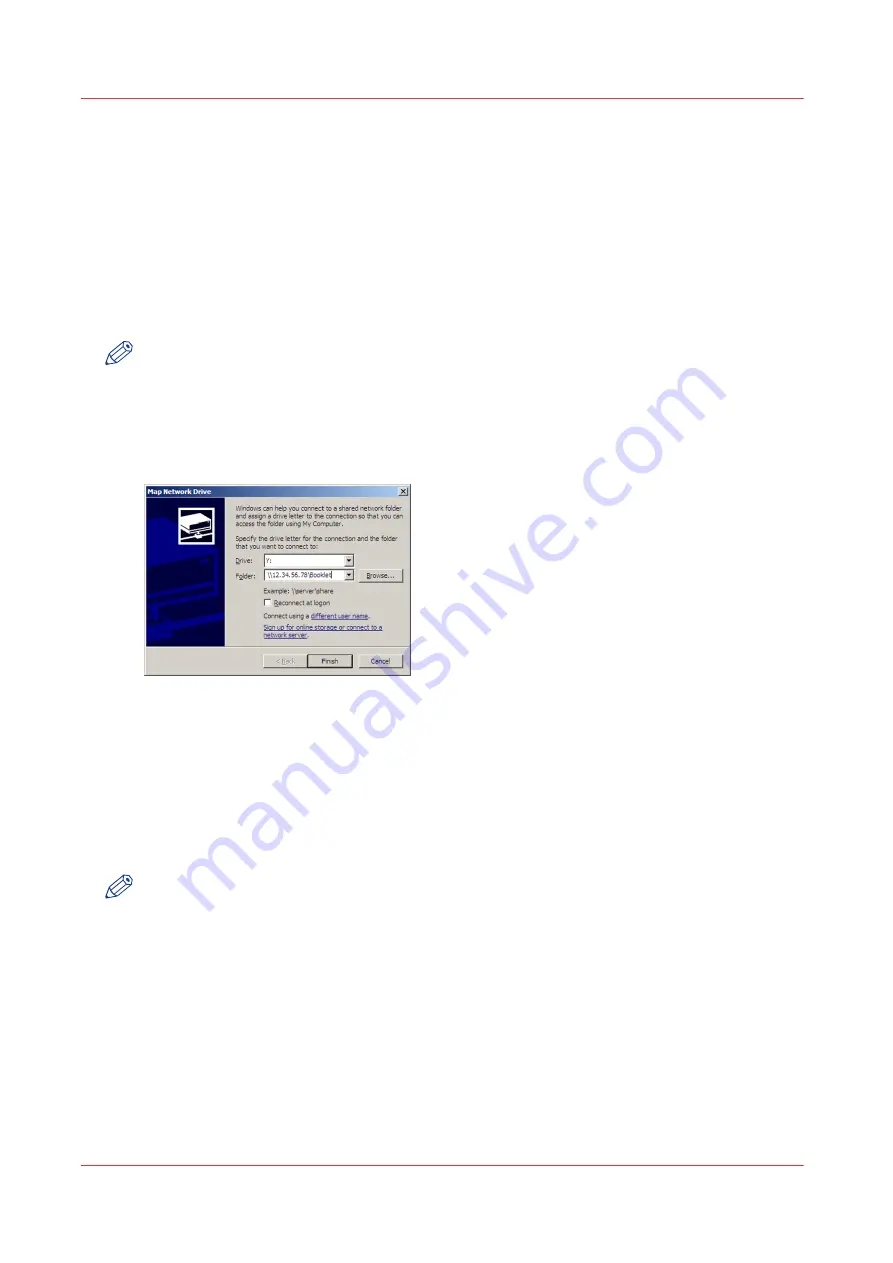
Illustration
[42] Create a shared network drive
Procedure
1.
Open Microsoft
®
Explorer.
2.
Click Tools -> Map Network Drive...
3.
Select a drive letter for the shared network folder.
4.
Enter the name of the shared network folder, for example \\12.34.56.78\Booklet, or click the
'Browse' button to navigate to the required location.
NOTE
Instead of 12.34.56.78 you must enter the host name or IP address of the PRISMAsync controller.
Booklet is the name you gave to the hotfolder when you created the automated workflow.
5.
Click 'Finish'.
A log in screen will appear.
6.
Enter the user name and the password that were defined when the hotfolder function was
enabled in the Settings Editor.
7.
Click 'OK.'
The hotfolder is now ready for use.
8.
If desired, you can create a shortcut to the shared network folder on the desktop of the
workstation.
Create a Shared Network Folder on a Workstation
188
Chapter 6 - Carry Out Print Jobs
Canon varioPRINT 135 Series
Summary of Contents for varioPRINT 110
Page 1: ...varioPRINT 135 Series Operation guide ...
Page 10: ...Chapter 1 Preface ...
Page 15: ...Available User Documentation 14 Chapter 1 Preface Canon varioPRINT 135 Series ...
Page 16: ...Chapter 2 Main Parts ...
Page 30: ...Chapter 3 Power Information ...
Page 36: ...Chapter 4 Adapt Printer Settings to Your Needs ...
Page 54: ...Chapter 5 Media Handling ...
Page 56: ...Introduction to the Media Handling Chapter 5 Media Handling 55 Canon varioPRINT 135 Series ...
Page 75: ...Use the JIS B5 Adapter Option 74 Chapter 5 Media Handling Canon varioPRINT 135 Series ...
Page 122: ...Chapter 6 Carry Out Print Jobs ...
Page 210: ...Chapter 7 Carry Out Copy Jobs ...
Page 247: ...Scan Now and Print Later 246 Chapter 7 Carry Out Copy Jobs Canon varioPRINT 135 Series ...
Page 248: ...Chapter 8 Carry Out Scan Jobs ...
Page 279: ...Optimize the Scan Quality 278 Chapter 8 Carry Out Scan Jobs Canon varioPRINT 135 Series ...
Page 280: ...Chapter 9 Use the DocBox Option ...
Page 312: ...Chapter 10 Removable Hard Disk Option ...
Page 319: ...Troubleshooting 318 Chapter 10 Removable Hard Disk Option Canon varioPRINT 135 Series ...
Page 320: ...Chapter 11 Remote Service ORS Option ...
Page 323: ...Remote Service 322 Chapter 11 Remote Service ORS Option Canon varioPRINT 135 Series ...
Page 324: ...Chapter 12 Remote Monitor Option ...
Page 326: ...Chapter 13 PRISMAsync Remote Manager Option ...
Page 328: ...Chapter 14 Counters ...
Page 332: ...Chapter 15 Accounting ...
Page 350: ...Chapter 16 Add Toner and Staples ...
Page 360: ...Chapter 17 Cleaning ...
Page 371: ...Automatic Drum Cleaning 370 Chapter 17 Cleaning Canon varioPRINT 135 Series ...
Page 372: ...Chapter 18 Printer Operation Care POC ...
Page 424: ...Chapter 19 Troubleshooting ...
Page 428: ...Chapter 20 Software upgrade ...
Page 432: ...Appendix A Specifications ...
Page 443: ...Printer Driver Support 442 Appendix A Specifications Canon varioPRINT 135 Series ...


