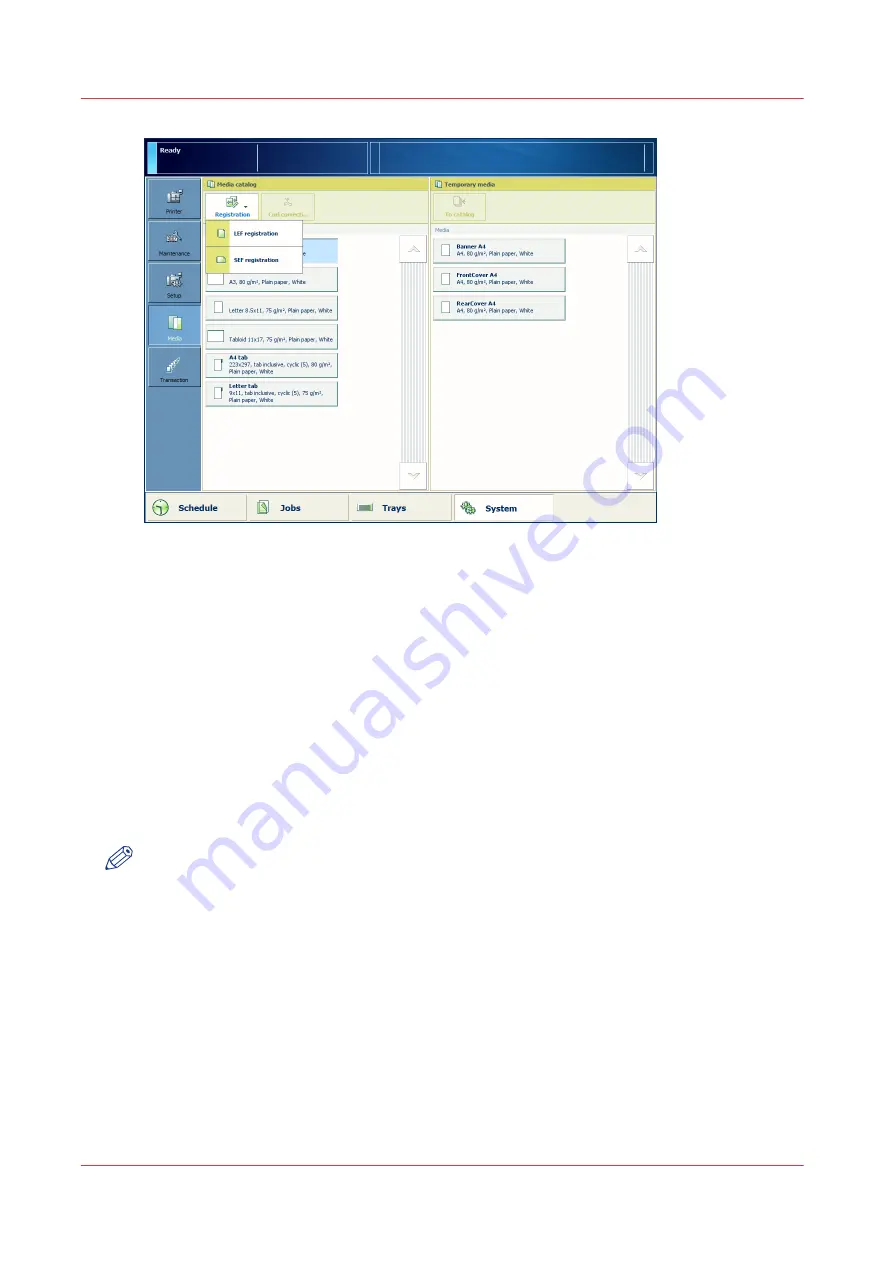
[27] Perform the media registration via the media catalog
2. Touch [Registration].
3. When you start a media registration from the media catalog, select the feed direction for
which you want to perform the media registration. The media registration can be different for
LEF and SEF.
When you start a media registration from the trays view, the feed direction is already
selected.
If the printer is not warmed up, the media registration starts by warming up the printer.
4. Select [Automatic adjustment] or [Manual adjustment]. It is recommended to start with the
automatic media registration adjustment.
At [Automatic adjustment], touch [Start].
When you select [Manual adjustment], go to step 8.
5. Follow the instructions on the control panel to scan the printed registration sheets.
6. You can verify the result of the automatic registration adjustment on the verification chart.
Touch [Print verification chart] to print the verification chart.
NOTE
Depending on the media type and the media size, the dots, circles and lines on the verification
chart do not have to match perfectly.
7. If you perceive that the media registration is not optimal, you must perform a manual media
registration adjustment. But after automatic media registration, the media registration is
optimal in almost all cases.
At the [Manual adjustment], touch [Start].
8. In the manual registration adjustment, you can adjust the registration parameters for the front
side and the back side separately. Only use [Advanced settings] in exceptional cases. Use
[Advanced settings] carefully because these settings influence each other.
Media Registration Quick Start
86
Chapter 5 - Media Handling
Canon varioPRINT 135 Series
Summary of Contents for varioPRINT 110
Page 1: ...varioPRINT 135 Series Operation guide ...
Page 10: ...Chapter 1 Preface ...
Page 15: ...Available User Documentation 14 Chapter 1 Preface Canon varioPRINT 135 Series ...
Page 16: ...Chapter 2 Main Parts ...
Page 30: ...Chapter 3 Power Information ...
Page 36: ...Chapter 4 Adapt Printer Settings to Your Needs ...
Page 54: ...Chapter 5 Media Handling ...
Page 56: ...Introduction to the Media Handling Chapter 5 Media Handling 55 Canon varioPRINT 135 Series ...
Page 75: ...Use the JIS B5 Adapter Option 74 Chapter 5 Media Handling Canon varioPRINT 135 Series ...
Page 122: ...Chapter 6 Carry Out Print Jobs ...
Page 210: ...Chapter 7 Carry Out Copy Jobs ...
Page 247: ...Scan Now and Print Later 246 Chapter 7 Carry Out Copy Jobs Canon varioPRINT 135 Series ...
Page 248: ...Chapter 8 Carry Out Scan Jobs ...
Page 279: ...Optimize the Scan Quality 278 Chapter 8 Carry Out Scan Jobs Canon varioPRINT 135 Series ...
Page 280: ...Chapter 9 Use the DocBox Option ...
Page 312: ...Chapter 10 Removable Hard Disk Option ...
Page 319: ...Troubleshooting 318 Chapter 10 Removable Hard Disk Option Canon varioPRINT 135 Series ...
Page 320: ...Chapter 11 Remote Service ORS Option ...
Page 323: ...Remote Service 322 Chapter 11 Remote Service ORS Option Canon varioPRINT 135 Series ...
Page 324: ...Chapter 12 Remote Monitor Option ...
Page 326: ...Chapter 13 PRISMAsync Remote Manager Option ...
Page 328: ...Chapter 14 Counters ...
Page 332: ...Chapter 15 Accounting ...
Page 350: ...Chapter 16 Add Toner and Staples ...
Page 360: ...Chapter 17 Cleaning ...
Page 371: ...Automatic Drum Cleaning 370 Chapter 17 Cleaning Canon varioPRINT 135 Series ...
Page 372: ...Chapter 18 Printer Operation Care POC ...
Page 424: ...Chapter 19 Troubleshooting ...
Page 428: ...Chapter 20 Software upgrade ...
Page 432: ...Appendix A Specifications ...
Page 443: ...Printer Driver Support 442 Appendix A Specifications Canon varioPRINT 135 Series ...


