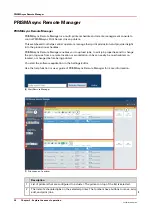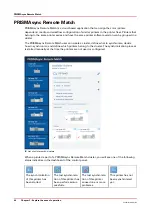
7" x 10" Statement Size Support
Introduction
The smallest media size that this machine supports is 203 x 203 mm / 7.9 x 7.9 inch. The 7" x 10"
Statement Size Support device enables you to print on media with a size of 7 x 10 inches / 178 x
254 mm and on JIS B5.
You can insert this device in your bulk paper tray without modifying your paper tray. This device
is delivered with 'Installation instructions'.
NOTE
If you want to print on 7 x 10 inch media or on JIS B5, this media has to be available in the
media catalog. If the media catalog does not contain 7 x 10 inch media or JIS B5, you will have
to register this media first.
NOTE
If you are printing on 7 x 10 inch media or on JIS B5, it is important that the paper tray contain
enough media. The dashboard informs you when to load media.
NOTE
Remove the device from the paper tray when you want to load other media than the 7 x 10 inch
media or JIS B5.
NOTE
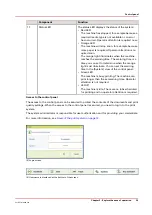
When you use the 7" x 10" Statement Size Support the dashboard informs you to load media
even though there is still a small amount of media present in the paper tray.
How to load the media with the 7" x 10" Statement Size Support
Action
Illustration
1
Open the paper tray
2
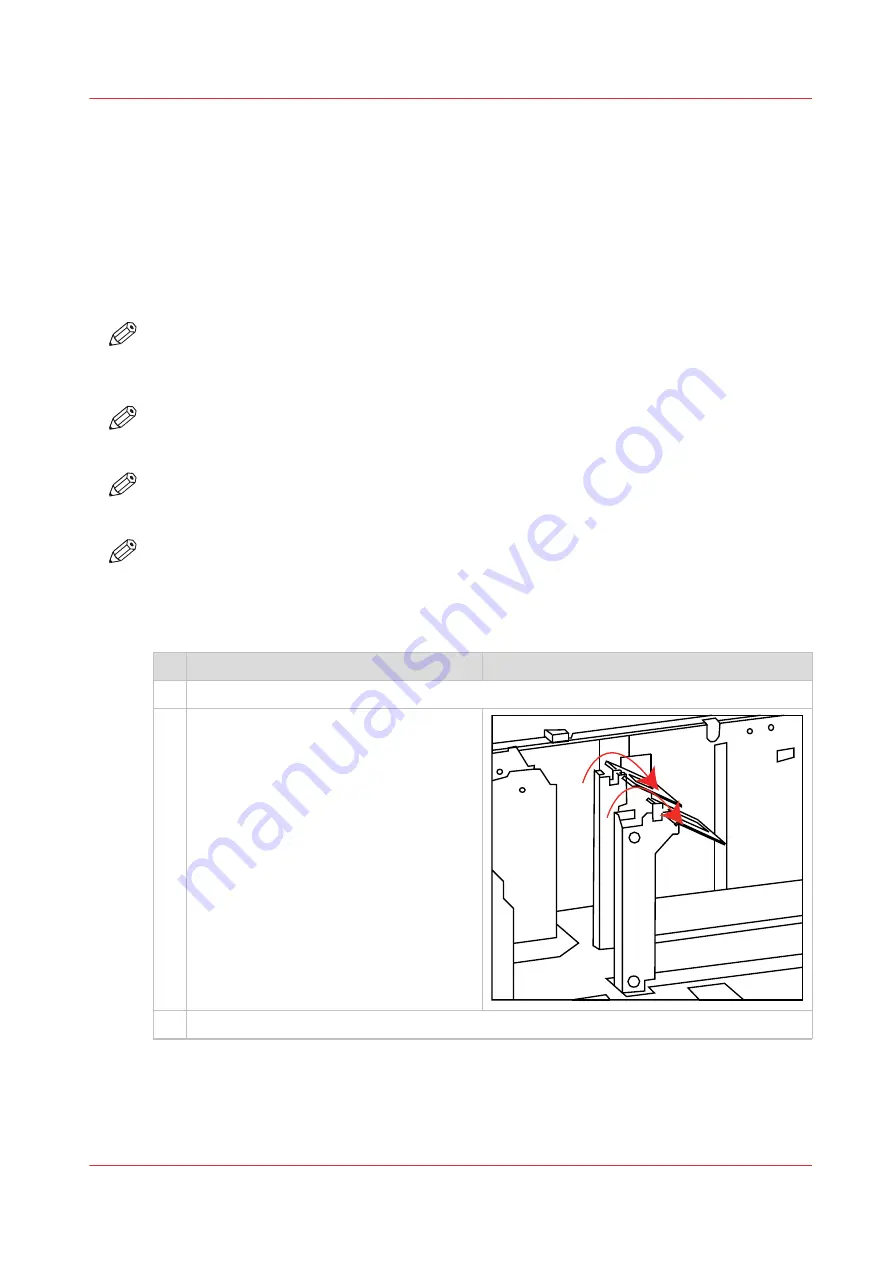
Flip the metal plates over to the right-
hand side.
3
Load the media.
4
7" x 10" Statement Size Support
Chapter 2 - Explore the print system
25
VarioPrint 6000 line
Summary of Contents for VarioPrint 6000 Series
Page 8: ...Contents 8 VarioPrint 6000 line ...
Page 9: ...Chapter 1 Introduction ...
Page 14: ...Information in this operation guide 14 Chapter 1 Introduction VarioPrint 6000 line ...
Page 15: ...Chapter 2 Explore the print system ...
Page 31: ...Chapter 3 Explore the ease of operation ...
Page 46: ...Transaction printing workflow 46 Chapter 3 Explore the ease of operation VarioPrint 6000 line ...
Page 47: ...Chapter 4 Start the print system ...
Page 56: ...Log in to the printer 56 Chapter 4 Start the print system VarioPrint 6000 line ...
Page 63: ...Chapter 5 Prepare the print system ...
Page 101: ...Chapter 6 Prepare the print jobs ...
Page 110: ...Print a page number via PRISMAsync 110 Chapter 6 Prepare the print jobs VarioPrint 6000 line ...
Page 111: ...Chapter 7 Plan the workload remotely ...
Page 115: ...Chapter 8 Plan the jobs ...
Page 127: ...6 Touch OK Move jobs to another destination Chapter 8 Plan the jobs 127 VarioPrint 6000 line ...
Page 139: ...5 Touch OK Create a note for the operator Chapter 8 Plan the jobs 139 VarioPrint 6000 line ...
Page 165: ...Chapter 9 Carry out print jobs ...
Page 232: ...Make an intermediate check print 232 Chapter 9 Carry out print jobs VarioPrint 6000 line ...
Page 233: ...Chapter 10 Keep the system printing ...
Page 246: ...Status indicators 246 Chapter 10 Keep the system printing VarioPrint 6000 line ...
Page 247: ...Chapter 11 Media handling ...
Page 289: ...Chapter 12 Maintain the print system ...
Page 316: ...Close the doors and covers 316 Chapter 12 Maintain the print system VarioPrint 6000 line ...
Page 317: ...Chapter 13 PRISMAlytics Dashboard ...
Page 319: ...Chapter 14 Troubleshooting ...
Page 334: ...Create and download a log file 334 Chapter 14 Troubleshooting VarioPrint 6000 line ...
Page 335: ...Chapter 15 Specifications ...
Page 353: ......


