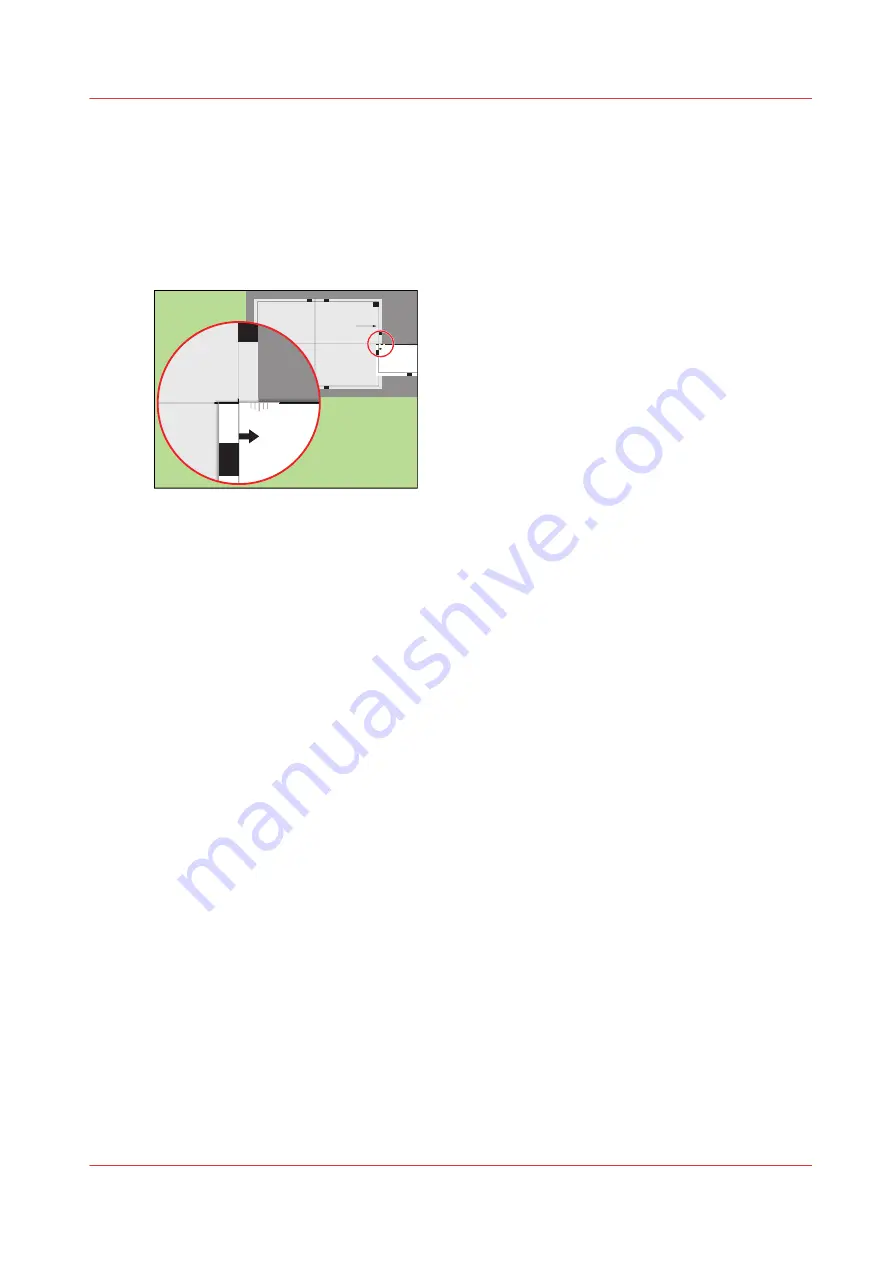
Perform a media registration for large media - Adjust the X-
position of side 2
Procedure
1.
Take the first test sheet.
2.
Align the start of the ruler with point 'N' of the test sheet.
Test bitmap: REGISTRATION
Size: 420 x 297 mm
2006-10-09 / 14:08:22
Page 2
2
Secondary image
K
P
M
L
N
100
0
105
0
1100
1150
120
0
125
0
-50
0
+50
Prima
ry X
imag
e po
sitio
n
Prima
ry Z i
mag
e po
sitio
n
Prima
ry d
iamon
d sh
ape
X len
gth
L
N
-50
0
+50
[105] Align the ruler with 'N'
3.
Read the value at the edge of the test sheet.
4.
Enter the value.
5.
Take the second test sheet.
6.
Repeat the steps 2 - 4.
7.
Take the third test sheet.
8.
Repeat the steps 2 - 4.
Result
A pop-up message appears. The message asks you whether you want to print an extra test sheet
to verify the result of the registration. You can do one of the following.
• Press [Yes] if you want to print an extra test sheet to verify the result.
Wait for the sheet and check the result. Another pop-up message appears. Press [Yes] if the
registration is correct. Press [No] if the registration is not correct. Then the registration
procedure will start again.
• Press [No] if you do not want to print an extra test sheet. The registration procedure will be
finished.
Perform a media registration for large media - Adjust the X-position of side 2
Chapter 11 - Media handling
279
VarioPrint 6000 line
Summary of Contents for VarioPrint 6000 Series
Page 8: ...Contents 8 VarioPrint 6000 line ...
Page 9: ...Chapter 1 Introduction ...
Page 14: ...Information in this operation guide 14 Chapter 1 Introduction VarioPrint 6000 line ...
Page 15: ...Chapter 2 Explore the print system ...
Page 31: ...Chapter 3 Explore the ease of operation ...
Page 46: ...Transaction printing workflow 46 Chapter 3 Explore the ease of operation VarioPrint 6000 line ...
Page 47: ...Chapter 4 Start the print system ...
Page 56: ...Log in to the printer 56 Chapter 4 Start the print system VarioPrint 6000 line ...
Page 63: ...Chapter 5 Prepare the print system ...
Page 101: ...Chapter 6 Prepare the print jobs ...
Page 110: ...Print a page number via PRISMAsync 110 Chapter 6 Prepare the print jobs VarioPrint 6000 line ...
Page 111: ...Chapter 7 Plan the workload remotely ...
Page 115: ...Chapter 8 Plan the jobs ...
Page 127: ...6 Touch OK Move jobs to another destination Chapter 8 Plan the jobs 127 VarioPrint 6000 line ...
Page 139: ...5 Touch OK Create a note for the operator Chapter 8 Plan the jobs 139 VarioPrint 6000 line ...
Page 165: ...Chapter 9 Carry out print jobs ...
Page 232: ...Make an intermediate check print 232 Chapter 9 Carry out print jobs VarioPrint 6000 line ...
Page 233: ...Chapter 10 Keep the system printing ...
Page 246: ...Status indicators 246 Chapter 10 Keep the system printing VarioPrint 6000 line ...
Page 247: ...Chapter 11 Media handling ...
Page 289: ...Chapter 12 Maintain the print system ...
Page 316: ...Close the doors and covers 316 Chapter 12 Maintain the print system VarioPrint 6000 line ...
Page 317: ...Chapter 13 PRISMAlytics Dashboard ...
Page 319: ...Chapter 14 Troubleshooting ...
Page 334: ...Create and download a log file 334 Chapter 14 Troubleshooting VarioPrint 6000 line ...
Page 335: ...Chapter 15 Specifications ...
Page 353: ......


