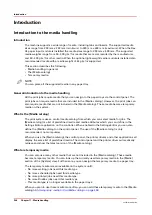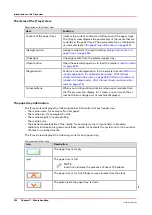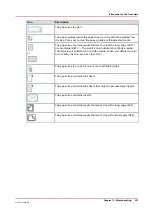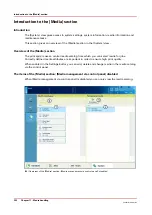
Change the advanced media settings
Introduction
The advanced media settings enables you to print on certain special media.
When all the advanced media settings have their default value, the button for [Advanced media
settings] displays the word [Default]. After you changed one or more settings, this button
displays the word [Custom].
[Default] means that the [Low temperature mode] is [Off], [Double-sheet detection] is [On], the
[Enhanced media mode] is [Off] and the [Paper quality] is set to [Normal].
This section describes when it is recommended to change the advanced media settings.
Furthermore, this section describes how to change the settings.
When to do
[Low temperature mode]
• Pre-printed: The system is able to handle pre-printed media without problems if the guidelines
regarding pre-printed media and inks are taken into account. Contact your local Canon
representative to get a copy of these guidelines. In case media or inks are used that are not
listed in the guidelines, the use of pre-printed media can lead to undesired print quality issues.
To postpone print quality issues arising, a [Low temperature mode] is available on the printer.
It is advised to enable the [Low temperature mode] when there are problems with processing
pre-printed media. The interval between undesired print quality issues will then be increased
significantly (for some temperature sensitive inks, but no guarantee for all inks).
It is advised to enable the [Low temperature mode] when you process pre-printed media.
It takes several minutes until [Low temperature mode] is reached.
The [Low temperature mode] should not be enabled when you use media heavier than 120
g/m
2
. This could lead to print problems.
• A secondary benefit (to pre-printed support) is to save energy. The preheater operates on a
lower temperature.
[Double-sheet detection]
Double-sheet detection warns you if two or more sheets have been separated from the media
stack in a paper tray at the same time. However, it is not always convenient to have the double-
sheet detection enabled, for example when you use transparent media with a cover sheet. Then
you can set the [Double-sheet detection] to [Off]. By factory default, [Double-sheet detection] is
[On].
[Enhanced media mode]
Glossy media can cause a collating or stapling error in the finisher. You can set the [Enhanced
media mode] to [On] to prevent the error. This will decrease the productivity of the printer. By
factory default, the [Enhanced media mode] is [Off]. When you set the [Enhanced media mode] to
[On] and the printer status is [Printing...], the dashboard displays a message that the enhanced
media mode is enabled.
The [Enhanced media mode] is only available on printers that are equipped with an optional
finisher (see
The output locations on page 21
[Paper quality]
Good media is best run with the highest paper quality setting: [Normal].
Lower grade media with respect to paper dust, such as some book papers for example, can leave
more paper dust in the printer. This can lead to ghost images on prints directly after the black
image cleaning procedure or to ghost images of previous pages on prints. When you use lower
Change the advanced media settings
260
Chapter 11 - Media handling
VarioPrint 6000 line
Summary of Contents for VarioPrint 6000 Series
Page 8: ...Contents 8 VarioPrint 6000 line ...
Page 9: ...Chapter 1 Introduction ...
Page 14: ...Information in this operation guide 14 Chapter 1 Introduction VarioPrint 6000 line ...
Page 15: ...Chapter 2 Explore the print system ...
Page 31: ...Chapter 3 Explore the ease of operation ...
Page 46: ...Transaction printing workflow 46 Chapter 3 Explore the ease of operation VarioPrint 6000 line ...
Page 47: ...Chapter 4 Start the print system ...
Page 56: ...Log in to the printer 56 Chapter 4 Start the print system VarioPrint 6000 line ...
Page 63: ...Chapter 5 Prepare the print system ...
Page 101: ...Chapter 6 Prepare the print jobs ...
Page 110: ...Print a page number via PRISMAsync 110 Chapter 6 Prepare the print jobs VarioPrint 6000 line ...
Page 111: ...Chapter 7 Plan the workload remotely ...
Page 115: ...Chapter 8 Plan the jobs ...
Page 127: ...6 Touch OK Move jobs to another destination Chapter 8 Plan the jobs 127 VarioPrint 6000 line ...
Page 139: ...5 Touch OK Create a note for the operator Chapter 8 Plan the jobs 139 VarioPrint 6000 line ...
Page 165: ...Chapter 9 Carry out print jobs ...
Page 232: ...Make an intermediate check print 232 Chapter 9 Carry out print jobs VarioPrint 6000 line ...
Page 233: ...Chapter 10 Keep the system printing ...
Page 246: ...Status indicators 246 Chapter 10 Keep the system printing VarioPrint 6000 line ...
Page 247: ...Chapter 11 Media handling ...
Page 289: ...Chapter 12 Maintain the print system ...
Page 316: ...Close the doors and covers 316 Chapter 12 Maintain the print system VarioPrint 6000 line ...
Page 317: ...Chapter 13 PRISMAlytics Dashboard ...
Page 319: ...Chapter 14 Troubleshooting ...
Page 334: ...Create and download a log file 334 Chapter 14 Troubleshooting VarioPrint 6000 line ...
Page 335: ...Chapter 15 Specifications ...
Page 353: ......


