background image

Summary of Contents for VIXIA HF R32

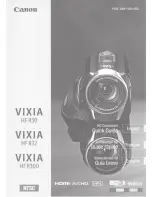
Page 1: ...Canon VIXIA HFR30 VIXIA HFR32 VIXIA HF R300 NTSC ...

Page 2: ...t sunlight fire etc While using the compact power adapter do not wrap it or cover it with apiece of cloth and do not place it in confined narrow spaces CAUTION CAUTION RISK OF ELECTRIC SHOCK DO NOT OPEN TO REDUCE THE RISK OF ELECTRIC SHOCK DO NOT REMOVE COVER OR BACK NO USER SERVICEABLE PARTS INSIDE REFER SERVICING TO QUALIFIED SERVICE PERSONNEL The lightning flash with arrowhead symbol within an ...

Page 3: ...ifications to the equipment unless otherwise specified in the manual If such changes or modifications should be made you could be required to stop operation of the equipment ModeiiD0002 including WLAN Module Model WM217 This device complies with Industry Canada license exempt RSS standard s Operation is subject to the following two conditions 1 this device may not cause interference and 2 this dev...

Page 4: ...rotect the power cord from being walked on or pinched particularly at plugs convenience receptacles and the point where they exit from the apparatus 9 Only use attachments accessories specified by the manufacturer 10 Unplug this apparatus during lightning storms or when unused for long periods of time 11 Refer all servicing to qualified service personnel Servicing is required when the apparatus ha...

Page 5: ...ot try to disassemble or modify it Do not drop it or subject it to shocks Do not get it wet REGIONS OF USE VIXIA HF R32 and VIXIA HF R30 are in compliance as of January 2012 with the radio signal regulations of the regions listed below For details on other regions where they can be used make inquiries with the contacts listed on the back side of this instruction manual Canada Hong Kong S A R USA S...

Page 6: ...nce I DOLBY DIGITAL I STEREO CREATOR Wi Fi Certified WPA WPA2 and the Wi Fi Certified logo are trademarks of the Wi Fi Alliance WPS as used on the camcorder s settings onscreen displays and in this manual signifies Wi Fi Protected Setup DLNA the DLNA Logo and DLNA CERTIFIED are trademarks service marks or certification marks of the Digital Living Network Alliance Other names and products not menti...

Page 7: ...managing editing and playing back movies and Network Utility for transferring recordings wirelessly to a computer l ll lltltl Contains Transfer Utility for saving and transferring movies and music files you can use as background music VIXIA CD ROM Contains the full version Instruction Manual of the camcorder PDF file See the explanation on next page A printed Startup Guide for PIXELA s software is...

Page 8: ...de supplied with the camcorder to complete the connection of the camcorder to your home Wi Fi network And you have the complete information in the full version Instruction Manual PDF file About the Camcorder s PDF Instruction Manual This guide will get you started and show you how to use the most basic functions of your camcorder to shoot video take photos and play back your recordings using the c...

Page 9: ...indows Explorer Mac OS Use Finder and click on the CD ROM icon 4 Click Double click the Disc_Setup exe icon 5 In the installer panel click Instruction Manual of the Camcorder and select your language 6 When the installation is complete click OK then Exit The installer will save the camcorder s Instruction Manual PDF file on the computer and will create a shortcut icon on the desktop for easy acces...

Page 10: ...n PHOTO Take a photo CO 26 Control button Displays a shooting tip for the current story scene j Memory operation PDF 186 Intelligent IS PDF 48 Remaining battery level If the icon appears in yellow or red the battery pack is almost empty Replace 100 75 50 25 0 J OQ J O J O D with a fully charged battery pack Zoom Q 27 Recording mode Q 25 Recording standard Q 20 Current story scene PDF 68 Recommende...

Page 11: ...detection You can have the camcorder automatically detect people s faces and use this information to adjust the focus and set the best exposure and color control settings for beautiful videos and photos PDF 99 White balance Change the setting so different lighting conditions do not affect the colors in your recordings and white objects look truly white PDF 107 Audio level indicator Manually adjust...

Page 12: ...Level marker Display onscreen markers to check your composition and make sure horizontal or vertical lines do not appear crooked in your recordings PDF 173 Wind screen off Wind screen removes the background sound of wind when recording outdoors You may want to turn it off when recording indoors in very quiet surroundings PDF 173 Flicker reduction PDF 173 Control button FILTER 1 Cinema look filters...

Page 13: ...you can upload you recordings wirelessly Important restrictions apply so be sure to refer to Using an Eye Fi card PDF 146 Scene number Playback control buttons CD 31 Data code Displays information depending on the type of recording PDF 66 174 Volume and background music balance controls PDF 55 84 File number PDF 176 Volume controls PDF 56 13 ...

Page 14: ... Open the Edit panel PDF 171 Current photo I Total number of photos Control button b Photo jump PDF 119 Control button _ Slideshow Play back a slideshow of your photos and use your favorite background music PDF 122 Control button Return to the Photos index screen PDF 118 ...

Page 15: ... use DConnect the compact power adapter CD Connect to the adapter for Asia only g Plug into a power outlet l t Connect the camcorder r S Plug into the DC IN terminal I JInsert the battery pack CD Press softly into the battery attachment unit g Slide up until it clicks in place Charging will start when the camcorder is turned off Ei Jj ON OFF CHG u u l Lamp off camcorder turned off Red lamp on char...

Page 16: ...e compact power adapter any electrical equipment that is not expressly recommended for use with this camcorder Do not connect the supplied compact power adapter to voltage converters or special power sources such as those on aircraft DC AC inverters etc CD NOTES We recommend charging the battery pack in temperatures between 10 oc and 30 oc 50 oF and 86 F If either the ambient temperature or the ba...

Page 17: ... prepare battery packs to last 2 to 3 times longer than you think you might need USA and Canada only The Lithium ion polymer battery that powers the product is recyclable Please call 1 800 8 BATIERY for information on how to recycle this battery 17 ...

Page 18: ... it up to 90 degrees down for example to record with your hand extended above a crowd Rotate it up to 180 degrees toward the lens for example to record video of yoursel r 1 Become familiar with the touch m screen In addition to touching buttons to select items you can also drag your finger across the screen for operations such as scrolling menus While applying pressure swipe your finger across the...

Page 19: ...e Camera Mode and e Recording Standard menus Camera mode Touch Camera Mode and then select one of the following camera modes fl1JIID In IAUTOI mode the camcorder takes care of most of the settings M In CMJ mode you have access to all the menus and can use a wide array of advanced functions 18J In mode you can give your recordings a cinematic look and still have access to all the menus See Advanced...

Page 20: ...f you plan on showing your movies on an HDTV then select this option so you can play them back with fantastic quality CF Story Creator mode allows you to create video stories by following a story theme and receiving shooting tips MP4 movies have smaller file sizes so they are much easier to upload to the Web and transfer to other devices ...

Page 21: ...r convenience you can do so after changing the language to your preference See Changing the Time Zone PDF 36 for details Press POWER When the internal clock is not set the Date Time screen will appear m Change the date time CD Touch a field you want to change Touch T or to change the field 1 1 Select your preferred date time format CD Touch one of the control buttons Touch to use 24 hour clock I T...

Page 22: ...s G Press HOME 2 Select the desired language If Other Settings I I Language l Desired language OK X G X 1 l II lC li 1r h tlt l J i r J dl Engftsh r p rol I C I 1 r Jf l jl d d o M J j JI I f I M m iL id IU d ridrJd J Norsk English is the default language CD NOTES If you changed the language by mistake look for the menu option with the mark ...

Page 23: ...sure the indicator is off r 1 Open the memory card slot cover r llnsert the memory card at a slight angle all the way into the 1 1 memory card slot until it clicks Then close the memory card slot cover CD Push the memory card into the memory card slot The memory card slot is at a slight angle toward the lens so be careful not to damage the memory card when inserting it 0 Securely close the cover a...

Page 24: ... Card for the Recordings PDF 40 for details 0 IMPORTANT Memory cards have front and back sides that are not interchangeable Inserting a memory card facing the wrong direction can cause a malfunction of the camcorder For important information regarding the use of SDXC memory cards be sure to refer to SDXC Memory Cards PDF 38 Initialize memory cards when you use them with this camcorder for the firs...

Page 25: ... recording time available on the memory For AVCHD movies select MXP or FXP for better quality or LP for longer recording times For MP4 movies select 4 Mbps for smaller file sizes and faster uploads See Selecting the Video Quality Recording Mode PDF 91 for approximate recording times DPress HOME D m Select the recording mode 6 If Other Settings I I Recording Mode Desired recording mode X 25 ...

Page 26: ...ard be sure to refer to Using an Eye Fi card PDF 146 l lfm START STOP button ACCESS Flashes in red while shooting video and while ascene or photo is being recorded on the memory DOpen the lens cover Before you start recording open the lens cover Move the lens cover switch down to mStart recording movies Press to start recording Press again to pause the recording and record the video on the memory ...

Page 27: ...you want to use One of 38 icons will appear depending on the characteristics of the subject background lighting conditions etc See About the Smart AUTO function PDF 46 for details Intelligent IS In IAUtoI mode the camcorder will automatically select the best IS setting for the situation See Intelligent IS PDF 48 for details Use I M 1or l lE l I mode to access the menus and to change various settin...

Page 28: ...s harder for faster zooms You can also change the zoom speed to one of three constant speeds See Zooming PPil 49 for details In most situations keep at least 1m 3 3 ft away from the subject Using the tele macro function you can reduce this distance to 50 em 1 6 ft at full telephoto The minimum focusing distance at full wide angle is 1 em See Tete Macro PDF 106 for details IQuick Start While record...

Page 29: ...recording I ON OFF CHGl Confirm that the indicator goes out g Pi Make sure the camcorder has finished writing the scenes or photos on the memory before turning it off CD Check that the indicator is off Press IPOWER Close the LCD panel Close the lens cover 29 ...

Page 30: ... back complete stories from the gallery See Playing Back Video PDF 53 Playing Back Stories from the Gallery PDF 79 Viewing Photos PDF 118 for details DPress to set the camcorder to playback mode r l Change the index screen if necessary r l Touch r E to open the r E Index Selection screen Next you can touch the tabs at the top to select the memory and then touch the control button of the desired in...

Page 31: ...memory card is selected PO 142 1 1 Look for the scene or photo you 1 1 want to play back Gl Move toward W to show 15 scenes photos move toward T to show 6 scenes photos Drag your finger left or right for the next previous index page Touch the desired scene or photo to play back Movies The selected scene is played back Playback continues until the end of the last scene in the index screen Touch the...

Page 32: ...laced by the slow playback controls Photos The selected photo is displayed in single photo view Drag your finger left right to browse through the photos one by one Touch the screen to display the playback controls 0 IMPORTANT You may not be able to play back with another device the movies you recorded on the memory card with this camcorder In such case play back the movies on the memory card using...

Page 33: ...I connection has higher picture quality HD than the composite video connection SO D 1 1 Turn on the camcorder Press to turn on the camcorder directly in playback mode 1 1 Play back your movies or photos kl ollo ltv 1 1 as described in the previous pages HDMIOUT ITJ HDMI connection All digital high definition connection See Connection Diagrams Connection PDF 124 for details about additional setting...

Page 34: ...be different We recommend powering the camcorder using the compact power adapter Adjust the volume using the 1V When you play back 16 9 movies on standard 1V sets with a 4 3 aspect ratio the 1V set will switch automatically to widescreen mode if it is compatible with the Video 10 1 system Otherwise change the aspect ratio of the 1V manually See TV Type PDF 174 for details llll ltJ 1111 1111 If you...

Page 35: ...4 Movies and Photos Windows Mac OS PDF 133 for details about installing the software lllll lt JI llll lltl Wi Fi Functions You can transfer files wirelessly directly from the camcorder to your computer or FTP server and upload videos wirelessly to the Web See Wi Fi Functions PDF 149 for details IIIII IIJI llll lltl Memory Save Saving Recordings without aComputer Easily save the whole content of th...

Page 36: ...ries PDF 212 for details Use of genuine Canon accessories is recommended This product is designed to achieve excellent performance when used with genuine Canon accessories Canon shall not be liable for any damage to this product and or accidents such as fire etc caused by the malfunction of non genuine Canon accessories e g a leakage and or explosion of abattery pack Please note that this warranty...

Page 37: ... such non Canon brand items is given by the manufacturer or producer thereof Hthe Equipment contains a hard disk drive Canon USA recommends that data stored on that drive be duplicated or backed up to prevent its loss in the event of failure or other malfunction of such drive Canon USA shall have no responsibility under this limited warranty for use of the Equipment in conjunction with incompatibl...

Page 38: ... USE THE EQUIPMENT REGARDLESS OF THE LEGAL THEORY ON WHICH THE CLAIM IS BASED AND EVEN IF CANON USA HAS BEEN ADVISED OF THE POSSIBILITY OF SUCH DAMAGES NOR SHALL RECOVERY OF ANY KIND AGAINST CANON USA BE GREATER THAN THE PURCHASE PRICE OF THE EQUIPMENT SOLD BY CANON USA AND CAUSING THE ALLEGED DAMAGE WITHOUT LIMITING THE FOREGOING YOU ASSUME ALL RISK AND LIABILITY FOR LOSS DAMAGE OR INJURY TO YOU ...

Page 39: ...rior finish of the Equipment media nor does it apply to Equipment purchased outside Canada If the Equipment contains ahard disk drive Canon Canada recommends that data stored on that drive be duplicated or backed up to prevent its loss in the event of afailure or other malfunction of such drive TO OBTAIN WARRANTY SERVICE Ship your Equipment in its original carton box or equivalent properly packed ...

Page 40: ...o 138 Piso 17 Col Lomas de Chapultepec C P 11000 Mexico D F Mexico CANON U S A INC NEW JERSEY OFFICE 100 Jamesburg Road Jamesburg NJ 08831 USA CENTRO Y CANON LATIN AMERICA INC SURAMERICA 703 Waterford Way Suite 400 Miami FL 33126 USA ASIA CANON HONGKONG COMPANY LTD 19 F The Metropolis Tower 10 Metropolis Drive Hunghom Kowloon Hong Kong Tel 852 3191 2333 Fax 852 2428 3963 For support concerning the...

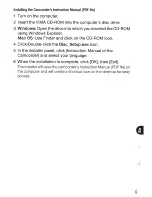
Page 41: ...PUB DIE 0412 000 HD Camcorder Instruction Manual ...

Page 42: ...direct sunlight fire etc While using the compact power adapter do not wrap it or cover it with a piece of cloth and do not place it in confined narrow spaces CAUTION TO REDUCE THE RISK OF ELECTRIC SHOCK DO NOT REMOVE COVER OR BACK NO USER SERVICEABLE PARTS INSIDE REFER SERVICING TO QUALIFIED SERVICE PERSONNEL CAUTION RISK OF ELECTRIC SHOCK DO NOT OPEN The lightning flash with arrowhead symbol with...

Page 43: ...odifications to the equipment unless otherwise specified in the manual If such changes or modifications should be made you could be required to stop operation of the equipment Model ID0002 including WLAN Module Model WM217 This device complies with Industry Canada license exempt RSS standard s Operation is subject to the following two conditions 1 this device may not cause interference and 2 this ...

Page 44: ...10 Unplug this apparatus during lightning storms or when unused for long periods of time 11 Refer all servicing to qualified service personnel Servicing is required when the apparatus has been damaged in any way such as power supply cord or plug is damaged liquid has been spilled or objects have fallen into the apparatus the apparatus has been exposed to rain or moisture does not operate normally ...

Page 45: ...s and in this manual signifies Wi Fi Protected Setup DLNA the DLNA Logo and DLNA CERTIFIED are trademarks service marks or certification marks of the Digital Living Network Alliance Other names and products not mentioned above may be trademarks or registered trademarks of their respective companies This device incorporates exFAT technology licensed from Microsoft Full HD 1080 refers to Canon camco...

Page 46: ...tached storage drive back home You can upload your recordings wirelessly directly from your camcorder to YouTube and Facebook A 160 You can play back the record ings in your camcorder from DLNA compatible TV sets and other DLNA media players con nected to your home network A 164 Transform your movies into compelling video stories just by recording video following simple pre scripted suggestions op...

Page 47: ...us and other settings accordingly for beautiful results Memory Save A 136 Image Stabilization Easily save the whole content of the built in memory or a memory card onto an external hard drive connected directly to the camcorder With no need for a computer this is a very convenient way to save backup copies of your recordings Dynamic IS A 97 compensates for camcorder shake when you shoot video whil...

Page 48: ...b site Upload MP4 movies to your computer A 133 Save your recordings You can also create discs from your recordings Standard Definition Upload AVCHD movies to your computer A 131 You can also choose to convert your AVCHD movies to standard definition files A 142 before uploading High Definition Use the supplied PIXELA s software A 131 Upload your AVCHD movies A 142 or MP4 movies A 148 to the Web o...

Page 49: ...first connecting to an access point A 151 Transfer your recordings wirelessly from the camcorder to a computer or FTP server A 156 Wirelessly connect to a Wi Fi enabled iOS device like an iPhone to upload your recordings A 161 Because you do not need to be near your home network you can even upload videos while traveling Upload your recordings wirelessly to YouTube and Facebook A 160 to share your...

Page 50: ...ver and Adjusting the LCD Screen 26 Basic Operation of the Camcorder 26 Using the Touch Screen 27 Using the Menus 31 Operating Modes 34 First Time Settings 34 Setting the Date and Time 35 Changing the Language 36 Changing the Time Zone 37 Using a Memory Card 37 Memory Cards Compatible for Use with the Camcorder 39 Inserting and Removing a Memory Card 40 Selecting the Memory Built in Memory Memory ...

Page 51: ...d Cinema Style 67 Using Story Creator to Create Compelling Stories 70 Cinema Mode and Cinema Look Filters 72 Video Snapshot 73 Decoration Adding a Personal Touch 79 Playing Back Stories from the Gallery 81 Rating Scenes 82 Playback with Background Music 85 Copying and Moving Scenes Within Between Stories 86 Selecting a Story s Thumbnail Image 87 Changing a Story s Title 89 Advanced Functions 89 Re...

Page 52: ...116 Dividing Scenes Photos 118 Viewing Photos 120 Deleting Photos 122 Slideshow External Connections 123 Terminals on the Camcorder 124 Connection Diagrams 127 Playback on a TV Screen 128 Saving and Sharing Your Recordings 128 Copying Movies and Photos to a Memory Card 131 Saving Recordings on a Computer 136 Memory Save Saving an Entire Memory onto an External Hard Drive 140 Copying Recordings to ...

Page 53: ...64 Wireless Playback on a DLNA Compatible Device Additional Information 168 Appendix Menu Options Lists 168 Main Functions Panel 172 Other Settings Menus 182 Appendix Onscreen Icons and Displays 187 Trouble 187 Troubleshooting 194 List of Messages 205 Do s and Don ts 205 Handling Precautions 209 Maintenance Others 210 Using the Camcorder Abroad 211 General Information 211 Accessories 212 Optional ...

Page 54: ...sic operating procedures POINTS TO CHECK Restrictions or requirements regarding the function described A Reference page number within this manual Text that applies only to the models shown in the icon The following terms are used in this manual When not specified as memory card or built in memory the term memory by itself refers to both Scene refers to one movie unit from the point you press the Y...

Page 55: ... available in the operating mode indicated and indicates that the function is not available The operating mode icons are divided into three groups the first three icons represent the camera mode the second three icons represent the recording standard and the last two represent playback modes For a detailed explanation refer to Operating Modes A 31 The names of physical buttons and switches on the ...

Page 56: ...ries and CD ROMs The following accessories are supplied with the camcorder CA 110E including power cord in Asia only XCA 110 Compact Power Adapter BP 709 Battery PackW XIFC 300PCU S USB Cable HTC 100 S HDMI CableW XQuick Guide XWi Fi Basic Setup Guide Stylus PenW ...

Page 57: ... ImageBrowser EX This CD ROM contains an automatic installer for the supplied software ImageBrowser EX which allows you to save and manage MP4 movies and photos and upload MP4 movies to CANON iMAGE GATEWAY YouTube and Facebook An Internet connection is required for installation Music data Music files that can be used as background music during playback These music files are for exclusive use with ...

Page 58: ... 112 7 AV OUT terminal A 123 125 headphones terminal A 111 8 HDMI OUT terminal A 123 124 9 USB terminal A 123 125 136 140 A q Memory card slot A 39 A a START STOP button A 44 A s DC IN terminal A 20 A d Grip belt A 23 A f Wi Fi antenna only A g Lens cover switch A 24 A h Stereo microphone A 109 113 A h Left side view 1 6 78 9 A q 23 4 5 A a A s A g A d A f Right side view Front view ...

Page 59: ...26 S q POWER button S a ON OFF CHG charge indicator Green On Orange Standby A 51 Red Charging A 20 S s Battery attachment unit A 20 S d Serial number S f Tripod socket A 206 S g BATTERY RELEASE switch A 21 A l Top view A k A j LCD panel S a S s S q S dS f S g Bottom view Back view ...

Page 60: ...e charging times and recording playback times with a fully charged battery pack refer to Charging Recording and Playback Times A 213 1 Plug the power cord into a power outlet For Asia only Connect the power cord to the compact power adapter before plugging the power cord into the power outlet 2 Connect the compact power adapter to the camcorder s DC IN terminal 3 Attach the battery pack to the cam...

Page 61: ...emove the battery pack 1 Slide d in the direction of the arrow and hold it pressed down 2 Slide the battery pack and then pull it out IMPORTANT Turn off the camcorder before connecting or disconnecting the com pact power adapter After pressing P to turn off the camcorder important data is updated in the memory Be sure to wait until the green ON OFF CHG indicator goes out Do not connect to the camc...

Page 62: ...make sure the ON OFF CHG indicator has gone out before restoring the power supply If remaining battery time is an issue you can power the camcorder using the compact power adapter so the battery pack will not be con sumed Charged battery packs continue to discharge naturally Therefore charge them on the day of use or the day before to ensure a full charge Optional battery packs for this camcorder ...

Page 63: ...ton with your thumb You can attach the supplied stylus pen to the grip belt To remove the grip belt 1 Lift the padded handgrip s flap and detach the strap from the Velcro pad 2 Pull the strap to remove it first from the front bracket on the camcorder then to unthread it from the handgrip and finally to remove it from the rear bracket on the camcorder ...

Page 64: ...en the lens cover Rotating the LCD Panel Open the LCD panel 90 degrees You can rotate the panel 90 degrees downward You can rotate the panel 180 degrees toward the lens Rotating the LCD panel 180 degrees can be useful to allow the camcorder to include yourself in the picture when recording with the self timer 180 90 Subject can monitor the LCD screen 180 ...

Page 65: ...ally misfire or appear as black red blue or green dots This has no effect on the recorded image and does not constitute a malfunction For details about how to take care of the touch screen refer to Handling Precautions A 205 Cleaning A 209 You can adjust the screen s brightness using the q LCD Bright ness and LCD Backlight settings When the compact power adapter is connected LCD Backlight will aut...

Page 66: ...m corder will recognize as the main subject of the scene etc Drag While applying pressure swipe your finger up and down or left and right across the screen Used to scroll menus to browse through index screen pages or to adjust slider controls like the volume IMPORTANT The camcorder uses a pressure sensitive touch screen Press firmly when using touch operations In the following cases you may not be...

Page 67: ...s and settings After you press the HOME menu will appear and you can select from the following control buttons The available control buttons depend on whether the camcorder is in recording or playback mode Main Functions This contains functions commonly used while shooting such as focus and exposure Available only in recording mode Other Settings Selecting this control button will open up the Othe...

Page 68: ...r mode A 67 when choosing to record in AVCHD Available only in recording mode For details on how to set the recording standard refer to Recording A 31 Wi Fi Allows you to access the various Wi Fi func tions this camcorder has to offer Available only in playback mode For more details on Wi Fi functions refer to Wi Fi Functions A 149 G Index Selection Use this to switch between the various index scr...

Page 69: ...ng modes Touch Edit to display a panel showing available operations copying deleting etc and then touch the operation you want to perform Touch the control button of the desired function Drag your finger up and down along the scroll bar to display the rest of the panel In mode Touch to scroll up or down In mode for Touch the control button of the desired operation ...

Page 70: ...rag your finger up and down to bring the setting you want to change into the orange selection bar You can also use the and icons for scrolling Menu items not available appear grayed out You can touch any menu item on the screen to bring it directly into the selection bar 5 When the desired menu item is inside the selection bar touch 6 Touch the desired option and touch X You can touch X to close t...

Page 71: ...ype of data the movie is recorded as namely AVCHD or MP4 1 Press to open the HOME menu 2 Touch Recording Standard and then touch the desired recording standard 3 Touch OK Camera mode Operation AUTO mode Let the camcorder take care of most of the settings while you concentrate on recording A 44 Great for beginners or if you just prefer not to bother with detailed camcorder settings Manual mode Enjo...

Page 72: ... this recording standard if you plan to show off your movies and you want to impress your audience with fantastic picture quality é Movies are recorded in AVCHD using Story Creator A 67 which allows you to create compelling video stories Because Story Creator mode records in AVCHD your movies will look amazing when played back on an HDTV By recording movies in MP4 your movies are smaller in size b...

Page 73: ...ording mode and playback mode You can press T when the camcorder is off to turn it on directly in playback mode NOTES When switching to a playback mode the memory selected for playback will be the same currently used for recording Playback mode Operation Playing back movies A 53 Viewing photos A 118 ...

Page 74: ...ay 4 Touch Y M D M D Y or D M Y to select the date format you prefer In some screens the date will be displayed in short form numbers instead of month names but it will still follow the order you selected 5 Touch 24H to use 24 hour clock or leave it unselected to use 12 hour clock AM PM 6 Touch OK to start the clock and close the setup screen NOTES You can adjust the date and time later on with th...

Page 75: ...camcorder is English You can set it to one of 27 languages Operating modes 1 Press 2 Select the desired language NOTES Some control buttons such as ZOOM or PHOTO will appear in English regardless of the language selected Other Settings q Language Desired language OK X ...

Page 76: ...k Operating modes 1 Press 2 Open the Time Zone DST screen 3 Touch to set the home time zone or to set the time zone of your destination when you are traveling 4 Touch Í or Î to set the desired time zone If necessary touch to adjust for daylight saving time 5 Touch X to close the menu Other Settings q Time Zone DST ...

Page 77: ...n Web site When using an SD memory card without a speed class rating you may not be able to record movies depending on the memory card used SD memory cards with a capacity of 64 MB or smaller cannot be used to record movies NOTES About the Speed Class Speed Class is a standard that indicates the mini mum guaranteed data transfer speed of memory cards When you buy a new memory card look for the Spe...

Page 78: ...t data loss After repeatedly recording deleting and editing scenes fragmented memory it will take longer to write data on the memory and recording may stop Save your recordings and initialize the memory Eye Fi Cards This product is not guaranteed to support Eye Fi card functions including wireless transfer In case of an issue with an Eye Fi card please check with the card manufacturer Also note th...

Page 79: ...the memory card slot until it clicks The memory card slot is at a slight angle toward the lens so be careful not to damage the memory card when inserting it Be sure you understand the information provided in Eye Fi Cards A 38 before using an Eye Fi card 4 Close the memory card slot cover and press until it clicks Do not force the cover closed if the memory card is not correctly inserted To remove ...

Page 80: ...to record your movies and photos in the built in mem ory or on a memory card The default memory for recording both is the built in memory Operating modes POINTS TO CHECK Be sure you understand the information provided in Eye Fi Cards A 38 before using an Eye Fi card 1 Press 2 Select the desired memory When selecting the memory you can check the approximate available recording time number of photos...

Page 81: ...ecording The approximate available recording time will now reflect the combined space in the memories used for relay recording NOTES There will be a momentary stop in the scene at the point where the camcorder switches from one memory to another Any of the following actions will deactivate the relay recording function Turning off the camcorder Opening the memory card slot cover Changing the camcor...

Page 82: ...g the compact power adapter Do not disconnect the power source or turn off the camcorder until the initialization is completed 2 Press 3 Initialize the memory 1 Touch this option if you want to physically erase all the data rather than just clear the file allocation table of the memory 2 If you selected the Complete Initialization option you can touch Cancel to cancel the initialization while it i...

Page 83: ...music files from the supplied VIXIA CD ROM to the memory card Windows users Use the supplied software VideoBrowser only or Transfer Utility only For details refer to the Software Guide PDF file of the supplied PIXELA s software Mac OS users Use Finder to transfer music files from the MUSIC folder on the supplied VIXIA CD ROM to the memory card Refer to About the music files A 219 for the folder st...

Page 84: ...anced functions refer to Recording in Manual Mode A 89 Basic Recording Shooting Video and Taking Photos in AUTO Mode With mode you can take great looking videos and photos by let ting the camcorder automatically adjust settings based on the record ing situation Operating modes POINTS TO CHECK Before you begin recording make a test recording first to check that the camcorder is operating correctly ...

Page 85: ... before using an Eye Fi card 2 Open the lens cover switch 3 Press To change the recording standard refer to Recording A 31 4 Set the camcorder to mode To record video Press Y to begin recording Press Y again to pause the recording The ACCESS indicator will flash from time to time while the scene is being recorded You can turn on the scene rating option in recording mode with the r Rate Scenes Reco...

Page 86: ...A 72 Face detection A 99 to get beautiful shots of people every time tracking the subject even if the person moves Touch Track A 101 to track other moving subjects keeping them in focus and using the best settings to record them Story Creator A 67 to transform your movies into compelling video stories by following simple scripts for various scenarios Decoration A 73 to add a fun personal touch usi...

Page 87: ...ay Blue skies light blue Vivid colors green red Sunsets orange Subject People stationary People moving Subjects other than people such as landscapes Close objects Background color of the icon Dark dark blue Subject Spotlight Night scene People stationary People moving Subjects other than people such as landscapes Close objects ...

Page 88: ...verify that Eye Fi cards have been approved in the country region of use See also Using an Eye Fi card A 146 NOTES About the power saving mode If q Power Saving Mode Auto Power Off is set to i On the camcorder will shut off automatically to save power when it is powered by a battery pack and is left without any operation for 5 minutes Press P to turn on the camcorder Intelligent IS Intelligent IS ...

Page 89: ...de A 89 Photos are recorded as JPG files The photo size 1920x1080 and quality cannot be changed At this size a 1 GB memory card can hold approximately 670 photos However the actual number of photos that can be recorded will vary depending on the subject and shooting condi tions Zooming There are two ways you can zoom in and out using the zoom lever on the camcorder or using the zoom controls on th...

Page 90: ...ouch anywhere within the T area to zoom out or anywhere within the S area to zoom in Touch closer to the center for a slow zoom touch closer to the V U icons for faster zooms 3 Touch X to hide the zoom controls Selecting the Zoom Type The camcorder offers three types of zoom optical advanced and digital Operating modes In mode Zoom Type will be set to Optical FUNC ZOOM FUNC Zoom Type Desired zoom ...

Page 91: ...nergy when you are using a battery pack Additionally when you open the LCD panel the camcorder is ready to start recording in approximately 1 second allowing you to record the subject right away The actual time required varies depending on the shooting conditions Operating modes Optical For optical zoom the camcorder uses the optical magnification ratio of the lens Advanced For advanced zoom the c...

Page 92: ...losed while the ACCESS indicator is on or flashing or while the HOME menu or menus contained therein not including the Main Functions panel are being displayed The camcorder may also not enter standby mode when the battery charge is too low Check that the ON OFF CHG indicator changes to orange About standby mode and auto power off The camcorder will power off automatically if left in standby mode ...

Page 93: ...details about basic video shooting refer to AUTO Mode A 44 Basic Playback Playing Back Video You can use the s Data Code setting to choose whether to display the recording date and other information for AVCHD movies when you play back videos A 66 Operating modes 1 Press T 2 Open the Movies or Movies index screen if it is not displayed G Movies or Movies ...

Page 94: ...the playback controls will disappear automatically after a few seconds without operation In playback pause touch the screen again to hide the playback controls Open the index selection screen Memory being read Recording date Division line between recording dates Drag your finger left right for the next previous index page Display the next previous index page Scene s timeline A 64 3D Flip View A 57...

Page 95: ...eginning of the scene Double tap to jump to the previous scene Jump to the beginning of the next scene Pause the playback Fast playback backward forward Display the volume A 55 and background music mix balance A 82 controls Stop the playback Decoration A 73 Volume Recording date Use the s Data Code setting to turn this on and off Not available for MP4 movies Touch several times to increase the pla...

Page 96: ...ing mode You may not be able to play back with this camcorder movies recorded on a memory card using another device NOTES Depending on the recording conditions you may notice brief stops in video or sound playback between scenes During fast slow playback you may notice some anomalies blocky video artifacts banding etc in the playback picture The speed indicated on the screen is approximate Slow re...

Page 97: ... large number of recordings Recording date Drag your finger left to go to the next date with record ings Drag your finger up and down to browse through the scenes recorded in the displayed date Drag your finger right to go to the previous date with recordings Return to the Movies index screen Current scene Total number of scenes recorded on the selected date Touch the scene in the front to play it...

Page 98: ... photos for example You can also select the memory from which you want to play back your recordings Operating modes In any index screen Touch G During single photo view touch the screen once to display the controls then touch f to open the Photos index screen Touch the tab of the desired memory built in memory or memory card Touch a control button to select the content you want to play back ...

Page 99: ...42 Two playback modes for AVCHD movies the Movies index screen vs the gallery In the Movies index screen you can find all the AVCHD mov ies you have recorded conveniently organized by recording date When you play back scenes from the Movies index screen they will be played back in chronological order In the gallery you can find your scenes grouped as video stories If you record movies using the St...

Page 100: ... playback controls 3 Delete the scene Deleting Scenes from the Movies or Movies Index Screen Operating modes 1 Open the Movies or Movies index screen For AVCHD movies to delete all the scenes recorded on a specific date drag your finger left right until the desired date appears in the title bar 2 Delete the scenes When you select Select perform the following procedure to select the individ ual sce...

Page 101: ...tions Deleting a Single Scene from a Story Operating modes 1 Open the list of scenes of the story that contains the scene you want to delete 2 In the Scene List screen drag your finger up down to select the scene you want to delete 3 Touch the orange icon on the left to open the Edit Scene screen 4 Delete the scene date Delete all the scenes recorded on the date shown in the control button For AVC...

Page 102: ...scenes A grayed out rating button indicates that no scenes in the story have been given that particular rating The number of selected scenes appears on the screen Touch the rating button again to remove those scenes from the selection 4 Delete all applicable scenes Touch Stop to interrupt the operation while it is in progress Some scenes may be deleted nevertheless G Gallery Bring the desired stor...

Page 103: ...dings Once deleted scenes cannot be recovered Deleting a story permanently deletes all the scenes it contains When deleting scenes scenes will be removed from the Movies or Movies index screen and from any stories in the gallery they may have belonged to regardless of the method used to delete them Save copies of important scenes before deleting them A 131 Observe the following precautions while t...

Page 104: ...e the movie timeline to break the scene to segments at fixed time intervals ranging from 6 seconds to 6 minutes Operating modes 1 Open the Movies index screen 2 Open the scene s Timeline screen The Timeline screen appears The large thumbnail will show the first frame of the scene Below it the timeline ruler shows frames taken from the scene at fixed intervals 3 Touch the desired frame in the timel...

Page 105: ...cene Drag your finger left along the ruler to display the next 5 frames Scene s recording mode and length Recording date and time Drag your finger right along the ruler to display the previous 5 frames Current scene Total number of scenes Currently selected interval between frames 6 sec Desired interval K ...

Page 106: ... of record ing information about the camera setup etc For MP4 movies the data code is the date of recording You can choose the information to be displayed Operating modes 1 Press 2 Select the information to be displayed NOTES The data code will appear when the screen is touched regardless of the selected option Other Settings y or Data Code Desired option X ...

Page 107: ...ded as a single compelling video story A 79 Operating modes Creating a New Story 1 Press 2 Start Story Creator mode 3 Touch Create New Story and select the desired theme Drag your finger left right to bring the desired story theme to the front 4 Touch Create Story and then select the story scene category Initially the current date will be used as the story s title but you can change it by touching...

Page 108: ...e category Use the displayed recommended length as a reference when recording scenes Scenes will be recorded under the story and story scene currently selected You can also record video snapshot scenes A 72 To select a different story scene category 1 Touch ë including the story scene title at the bottom of the screen 2 Drag your finger up down to select another category and touch the orange icon ...

Page 109: ... Scenes within an Existing Story 1 Press 2 Start Story Creator mode 3 Touch Continue Existing Story and select the desired story Drag your finger left right to bring the desired story to the front and then touch Continue Story 4 Touch ë including the story scene title The list of story scenes will appear The numbers on the right will show how many scenes you have recorded in each story scene categ...

Page 110: ...tic look In this mode you can also use a variety of professional cin ema look filters to create unique movies with a distinctive appearance Operating modes 1 Press 2 Set the camera mode to 3 Select the desired cinema look filter The selected cinema look filter will be applied and its number will appear on the control button Camera Mode OK FILTER 1 Desired cinema look filter OK ...

Page 111: ...eviewing the effect on the screen NOTES Photos cannot be recorded while the camcorder is set to mode 1 Cinema Standard 2 Vivid 3 Cool 4 Nostalgic 5 Sepia 6 Old Movies 7 Dramatic B W Filter number will appear on the control button Filter name Preview the effect on the screen Brief description onscreen guidance ...

Page 112: ...e length recommended for the selected story scene category in Story Creator with the r Video Snapshot Length setting Operating modes 1 Press V A blue border appears on the screen Press V again to return to normal video recording mode 2 Press Y The camcorder records for a few seconds the blue frame serves as a visual progress bar and then automatically returns to record pause mode When the camcorde...

Page 113: ... during playback or just before convert ing them to standard definition only A 142 Decorating Scenes while Recording Operating modes 1 Open the decoration screen The decoration screen will open automatically also when you stow the LCD panel with the touch screen facing out 2 Use a tool from the toolbar as explained in the following procedures 3 Press Y to record movies with your decorations You ca...

Page 114: ...l be included in the recording Ü Image Mix Choose one of 27 different frames to add onto the canvas Image mix can be used in combination with the pens stamps and animated stamps Ý In recording mode pause the live video Touch Ý again to restore the live video You can add decorations to and record the frozen image In playback mode pause the playback Touch Ð to resume playing back the scene ß Minimiz...

Page 115: ...freehand drawings and stamps will be saved in the built in memory only or on a memory card only To load a previously saved canvas In the decoration screen The camcorder will apply the last freehand drawings and stamps that were saved in the built in memory only or on a memory card only To use Animated Stamps 1 Touch The Animated Stamps screen will appear 2 Touch one of the control buttons 3 Touch ...

Page 116: ...ite text on dark background white text or black text 4 Touch the caption and drag it to the desired location To use image mix Operating modes 1 Touch Ü to open the Select Image screen 2 Touch or to select a different image mix frame You can touch one of the memory icons at the bottom of the screen to read image mix frames saved on a different memory only when recording on or playing back scenes fr...

Page 117: ... or Ð or drag your finger along the bottom bar to adjust the overall transparency of the image as necessary 7 Touch K to mix your image with live video Mixing Your Own Images with Live Video You can use images you make on your computer for the image mix Chroma Key function Make sure that the image you want to use has a blue or green area which will be replaced by the live video using Chroma Key mi...

Page 118: ...led in the built in memory will be restored after it is initialized When q Autostart Decoration is set to i On the decora tion screen will open automatically when you stow the LCD panel with the LCD screen facing out Animated stamps and captions cannot be used at the same time When r Rec Media for Movies is set to the built in memory you will not be able to select image mix frames saved on a memor...

Page 119: ...en playing back stories from the gallery you can choose to play back only scenes with a certain rat ing Operating modes 1 Open the gallery Open the G Index Selection screen A 58 Drag your finger right or left to select a story Story s theme Selected story large thumbnail in the front Story s title A 87 Details about the story number of scenes total playback time and editing options List of scenes ...

Page 120: ...he story scene display off Playback controls are the same as when playing back scenes from the Movies or Movies index screen A 55 IMPORTANT Observe the following precautions while the ACCESS indicator is on or flashing Failing to do so may result in permanent data loss Do not open the memory card slot cover Do not disconnect the power source or turn off the camcorder Do not change the camcorder s ...

Page 121: ...ately after recording a scene rating buttons will appear at the bottom of the screen Touch one of the rating buttons to rate the scene from one to three stars You can touch Ì to leave the scene unrated or to classify it in a separate category for example just for outtakes To turn off the scene rating function When the rating buttons appear after recording a scene touch X and then touch Off This wi...

Page 122: ...g Playback Operating modes 1 Play back from the gallery the story that contains the scenes you want to rate 2 During playback of a scene you want to rate pause the playback and rate the scene 3 Touch Ð to resume the playback and rate other scenes in the same way or touch Ñ to return to the gallery Playback with Background Music You can play back movies or a photo slideshow using one of the sup pli...

Page 123: ...os recorded on the memory card you will need to transfer the music tracks to the memory card in advance See the NOTES section A 85 1 Press 2 Open the gallery or Movies index screen 3 Press 4 Select the music track G Gallery or Movies Other Settings s Select Music i On Í or Î to select the desired music track Select the desired music track Adjust the background music balance Play back the original ...

Page 124: ...ck 1 During playback touch the screen to display the playback controls 2 Touch Ý drag your finger along the Music Balance bar to adjust the background music balance as desired and touch K To delete a music track In the Select Music screen touch Í or Î to select the track you want to delete IMPORTANT If you use copyrighted songs and music tracks in your video creations remember that music under cop...

Page 125: ...e memory card Refer to About the music files A 219 for the folder structure of the memory card Transfer music files to the memory card that contains the recordings you want to play back with background music Copying and Moving Scenes Within Between Stories You can copy and move scenes in the gallery within the same story scene category between story scenes in the same story and between stories rec...

Page 126: ...cenes 2 When copying a scene you can touch Stop to interrupt the operation while it is in progress 3 This step is not necessary when moving a scene NOTES You cannot copy or move scenes to the two preexisting stories Unsorted and Video Snapshot Selecting a Story s Thumbnail Image Initially the image used as the story s thumbnail is the first frame of the first scene in the story You can set your fa...

Page 127: ... current date will be used as the story s title but you can change the title later on The title can be up to 14 characters long available characters are limited The title of the two preexisting stories Unsorted and Video Snapshot cannot be changed Operating modes 1 Open the gallery 2 Select the story whose title you want to change Drag your finger right left to bring the desired story to the front...

Page 128: ...sic and video files from the gallery some special characters in the story s title will be changed to an underscore _ in the file name Switch between letters and numbers special characters Change the position of the cursor Delete the character to the cursor s left backspace Caps Lock When the numerical keyboard is displayed switches between set 1 and set 2 of special char acters ...

Page 129: ...mple by using Special Scene recording programs A 95 Operating modes 1 Press P to turn on the camcorder By default movies and photos are recorded in the built in memory You can select the memory that will be used to record movies and photos A 40 Please read the IMPORTANT section A 48 before using an Eye Fi card 2 Open the lens cover switch 3 Press To change the recording standard refer to Recording...

Page 130: ...s on an Eye Fi card will be uploaded automatically after set ting the camcorder to playback mode if you are within the range of a configured network Always verify that Eye Fi cards have been approved in the country region of use See also Using an Eye Fi card A 146 NOTES The zoom Quick Start function power saving modes etc operate the same way in mode as in mode For details refer to AUTO Mode A 44 ...

Page 131: ...tter movie quality select LP mode for longer recording times For MP4 movies you can choose one of two bit rates Bit rate indi cates how much information is recorded in 1 second of video Select 4 Mbps for smaller file sizes and faster uploads The following table gives approximate recording times Operating modes 1 Press 2 Select the recording mode For MP4 movies a single scene can be recorded contin...

Page 132: ...use the supplied software VideoBrowser to create AVCHD discs The camcorder uses a variable bit rate VBR to encode video so the actual recording times will vary depending on the content of the scenes You cannot create a video disc of MP4 movies that is playable on com mercially available players MXP scenes will be converted to an image quality similar to that of FXP scenes ...

Page 133: ...rded continuously for 12 hours at that point the camcorder will stop for about 3 seconds before resuming recording Recording mode MXP FXP XP SP LP Memory 4 GB Memory card 20 min 30 min 40 min 1 hr 10 min 1 hr 30 min 8 GB Memory card Built in memory1 40 min 1 hr 1 hr 25 min 2 hr 20 min 3 hr 16 GB Memory card 1 hr 25 min 2 hr 5 min 2 hr 50 min 4 hr 45 min 6 hr 5 min 32 GB Memory card Built in memory...

Page 134: ... fields per second interlaced Standard frame rate of NTSC analog TV signals PF30 Shooting at 30 frames per second progressive Use this frame rate to easily edit your recordings for example to post them on the Web PF24 Shooting at 24 frames per second progressive Using this frame rate will give your recordings a cinematic look Recording in mode will further enhance the effect Recorded as 60i Defaul...

Page 135: ...ture while you are able to adjust the other settings Operating modes To set the Programmed AE recording program select Programmed AE instead and then touch X The rest of the procedure is not necessary Options Default value ú SCN Portrait The camcorder uses a large aperture to achieve a sharp focus on the sub ject while blurring the background û SCN Sports To record sports scenes such as tennis or ...

Page 136: ...n the screen Œ SCN Low Light Moving subjects may leave a trailing afterimage Picture quality may not be as good as in other modes White points may appear on the screen Autofocus may not work as well as in other modes In such case adjust the focus manually þ SCN Beach To record on a sunny beach without the subject being underexposed ÿ SCN Sunset To record sunsets in vibrant colors Œ SCN Low Light T...

Page 137: ...g conditions Operating modes 1 Press 2 Select the IS mode Options Default value Dynamic Compensates for a higher degree of camcorder shake such as when shooting while walking and is more effec tive as the zoom approaches full wide angle Standard Compensates for a lower degree of camcorder shake such as when shooting while remaining stationary and is suitable for shooting natural looking scenes j O...

Page 138: ...oting opportuni ties This is especially useful when it is difficult to predict when to start recording Operating modes 1 Activate the pre recording function z will appear on the screen Repeat selecting OFF to turn off pre recording Powered IS You can use Powered IS to make the image stabilization even more powerful Powered IS is most effective when you are stationary and zooming in on far subjects...

Page 139: ...creen Closing the LCD panel to set the camcorder to standby mode Touching any of the following control buttons in the Main Functions panel Rec Programs White Balance Faders Decoration or Review Recording Opening the Other Settings menus Face Detection The camcorder automatically detects people s faces and uses this information to select the optimal settings for beautiful videos and pho tos Operati...

Page 140: ...amcorder may mistakenly detect the faces of non human sub jects In such case turn face detection off In certain cases faces may not be detected correctly Typical examples include Faces extremely small large dark or bright in relation to the overall picture Faces turned to the side at a diagonal or partially hidden Face detection cannot be used when the shutter speed used is slower than 1 30 1 24 i...

Page 141: ...double frame will appear around the subject and track it as it moves Touch Cancel to remove the frame and cancel the tracking NOTES Touching somewhere with a color or pattern unique to the subject will make it easier to track However if there is another subject in the vicinity that shares similar characteristics to the selected subject the cam corder may start tracking the incorrect subject Touch ...

Page 142: ...in record pause mode Û to start recording with a fade in Press Y while recording Ü to fade out and pause the recording NOTES When you apply a fader not only the picture but also the sound will fade in or out Faders cannot be used in the following cases While using the Old Movies cinema look filter in mode When recording scenes with decorations When recording video snapshot scenes While pre recordi...

Page 143: ...at appears inside the y frame The Touch AE mark I will flash and the exposure will be adjusted automatically so the area you touched will be correctly exposed You have the option to further adjust the exposure manually as necessary You can touch n instead to adjust the exposure manually without activating the Touch AE function The manual adjustment dial appears and the adjustment value is set at 0...

Page 144: ...owing cases In mode when using a cinema look filter other than Cinema Standard When using the ü SCN Night Scene ý SCN Snow þ SCN Beach ÿ SCN Sunset or œ SCN Spotlight recording program Except in mode when using a cinema look filter other than Cinema Stan dard Manual Focus Adjustment Autofocus may not work well on the following subjects In such case focus manually Operating modes POINTS TO CHECK Ad...

Page 145: ...gnified to help you focus more easily You can also turn off this function with the p Focus Assistance setting The focusing distance displayed will change as you adjust the focus The focusing distance will be displayed for about 2 seconds You can change the units used for the distance display with the q Distance Units setting If you wish to focus on faraway subjects such as mountains or fireworks t...

Page 146: ... automatically when you zoom in to full telephoto and bring the camcorder up close to the subject POINTS TO CHECK Select a recording program other than Š SCN Fireworks Touch again to turn off the tele macro function The camcorder will automatically adjust the zoom to the telephoto end NOTES Any of the following actions will deactivate the tele macro function Turning off the camcorder Pressing T Se...

Page 147: ...balance Point the camcorder at a white object so it fills the whole screen and touch Set WB When the adjustment is completed Šstops flashing and disappears The camcorder will retain the custom white balance even if you turn it off Options Default value à Automatic The camcorder automatically sets the white bal ance for natural looking colors Daylight To record outdoors Tungsten To record under tu...

Page 148: ... color sky sea or forest Under mercury lamps certain types of fluorescent lights and LED lights Self Timer Operating modes For movies only 1 Press 2 Activate the self timer will appear on the screen Repeat selecting j Off to turn off the self timer Movies In record pause mode press Y The camcorder starts recording after a 10 second countdown The countdown appears on the screen Photos In record pau...

Page 149: ... microphone You can display the audio level indicator while recording Operating modes Manual Adjustment of the Audio Recording Level 1 Open the manual audio recording level adjustment screen The audio level indicator and current audio recording level will appear on the screen When p Audio Mix is set to i On two audio level indicators will appear the top one for the built in microphone and the bott...

Page 150: ...ou can choose to display it also when the audio level is adjusted automatically NOTES When you are using a microphone connected to the MIC terminal including the WM V1 Wireless Microphone the audio level indicator will be displayed automatically When the audio level meter reaches the red point 0 dB the sound may be distorted If the audio level is too high and the sound gets distorted activate the ...

Page 151: ...eadphones follow the procedure below to change the function of the terminal from AV output to headphones output Operating modes 1 Press 2 Change the function of the terminal to headphones output 3 Connect the headphones to the AV OUT terminal 4 Adjust the volume as necessary You can also drag your finger along the Headphones bar Ó will appear on the screen Other Settings q AV Headphones Ó Headphon...

Page 152: ...ck mode the function of the AV OUT terminal will return automatically to AV output when you turn off the camcorder Using an External Microphone When recording in very quiet surroundings the built in microphone may pick up the sound of the camcorder s internal machinery In such case we recommend using an external microphone Operating modes Using the WM V1 Wireless Microphone Using the optional WM V...

Page 153: ...phone is connected to the camcorder p Wind Screen will automatically be set to j Off à If the audio level is too high and the sound gets distorted adjust the audio recording level manually A 109 or activate the microphone attenuator with the p Microphone Attenuator setting Audio Mix When recording you can mix audio from the built in microphone with external audio from the MIC terminal and adjust t...

Page 154: ... you may want to print photos from video recorded at a party or create a small video clip using video snapshot scenes from the highlights of an event Operating modes Capturing a Video Snapshot Scene 1 Play back the scene or story from which you want to capture the video snapshot scene 2 Press Y to capture the video snapshot scene The camcorder captures the video snapshot scene for about 4 seconds ...

Page 155: ...nd from the end of the scene the video snapshot scene will be captured starting from the beginning of the following scene During the playback of video snapshot scenes captured from a previ ously recorded movie you may notice some anomalies in the picture sound at the point where the playback switches to a new scene Capturing Photos The size of the captured photos will be 1920x1080 and it cannot be...

Page 156: ...er cut out the rest Operating modes 1 Play back the scene you want to divide 2 Pause the playback at the point where you want to divide the scene 3 Open the scene division screen 4 Bring the scene to a precise point if necessary Playback controls will appear on the screen A 55 Use any special playback modes fast playback frame reverse advance as necessary to locate the desired point 5 Divide the s...

Page 157: ...During the playback of a scene that was divided you may notice some anomalies in the picture sound at the point where the scene was cut The following scenes cannot be divided Video snapshot scenes and other scenes that are too short less than 3 seconds Scenes that were edited using the supplied software VideoBrowser and were then transferred back to the camcorder Scenes cannot be divided within 1 ...

Page 158: ...other photo related operations Viewing Photos Operating modes 1 Press T 2 Open the Photos index screen if it is not displayed 3 Look for the photo you want to play back Move the zoom lever toward T to show 15 photos per page move it toward S to show 6 photos per page G Photos ...

Page 159: ...ough the photos using the scroll bar 1 Touch the screen to display the playback controls 2 Jump through the photos using the scroll bar Open the G Index Selection screen A 58 Memory being read Drag your finger left right for the next previous index page Display the next previous index page While browsing through index pages a larger scroll bar will appear at the bottom of the screen for a few seco...

Page 160: ...ing image files may not be displayed correctly Images not recorded with this camcorder Images edited on a computer Images whose file names have been changed Deleting Photos You can delete those photos that you are not interested in keeping Operating modes Deleting a Single Photo 1 In single photo view select the photo you want to delete 2 Touch the screen to display the playback controls 3 Delete ...

Page 161: ...dual photos you want to delete A checkmark will appear on the photos you touch The total number of selected photos will appear next to the icon Touch a selected photo to remove the checkmark To remove all checkmarks at once touch Remove All Yes 2 After selecting all the desired photos touch OK Options IMPORTANT Be careful when deleting photos Deleted photos cannot be recovered Photos that were pro...

Page 162: ...ideshow to display it in single photo view 4 Touch the screen to display the playback controls then touch Ð to play back the slideshow set to the selected music track During the photo slideshow Touch the screen and drag your finger left and right along the volume bar to adjust the volume Touch the screen and touch Ý to stop the slideshow To change the slideshow s transition effects 1 Press 2 Selec...

Page 163: ...ngle convenient cable This terminal is an HDMI mini receptacle When using a commercially available HDMI cable make sure the HDMI cable is Type A to Type C 3 USB Terminal This terminal is a mini AB receptacle You can use the supplied USB cable to connect to a computer or other digital devices with standard A receptacles or use the optional UA 100 USB Adapter to connect to the camcorder an external ...

Page 164: ...nnector About the HDMITM connection The HDMI High Definition Multimedia Interface connection is a convenient all digital connection using a single cable for both video and audio When you connect the camcorder to an HDTV equipped with an HDMI terminal you can enjoy video and audio playback at the highest quality The HDMI OUT terminal on the camcorder is for output only Do not connect it to an HDMI ...

Page 165: ...e aspect ratio q AV Headphones to Ò AV Connection USB Type Digital data connection Connect to a computer to save your recordings to a compatible digital video recorder to copy your recordings or to an external hard drive to easily save a perfect copy of an entire memory only Red White Yellow STV 250N Stereo Video Cable optional USB Cable supplied Mini B Standard A computer digital recorder Mini B ...

Page 166: ...refer to the Software Guide PDF file of the supplied PIXELA s software To transfer music files from the supplied VIXIA Disc to a memory card in the camcorder in order to use them as background music For details refer to the Software Guide PDF file of the supplied PIXELA s software To save your recordings on a computer To save a memory onto an external hard drive Sound from the built in speaker wil...

Page 167: ...s recorded with x v Color A 176 on an HDTV compatible with this standard additional settings may be required on the connected HDTV Refer to the TV s instruction manual You can also play video directly from your memory card on AVCHD compatible HDTVs and digital recorders with a card slot compatible with the type of memory used We recommend powering the camcorder using the compact power adapter Conn...

Page 168: ...the built in memory tab For AVCHD movies to copy all the scenes recorded on a specific date drag your finger left right until the desired date appears in the title bar 2 Copy the scenes When you select Select perform the following procedure to select the individ ual scenes you want to copy before touching Yes Touch Stop to interrupt the operation while it is in progress To select individual scenes...

Page 169: ...cenes Touch Stop to interrupt the operation while it is in progress Copying a Single Photo Operating modes 1 In single photo view select the photo you want to copy 2 Touch the screen to display the playback controls date Copy all the scenes recorded on the date shown in the con trol button For AVCHD movies only Select Select individual scenes to copy All Scenes Copy all the scenes G Gallery Desire...

Page 170: ...t to copy before touching Yes Touch Stop to interrupt the operation while it is in progress To select individual photos 1 Touch on the individual photos you want to copy A checkmark will appear on the photos you touch The total number of selected photos will appear next to the icon Touch a selected photo to remove the checkmark To remove all checkmarks at once touch Remove All Yes 2 After selectin...

Page 171: ...rd is set to prevent writing If the file numbering is at maximum A 176 If there is no memory card in the memory card slot Scenes that were edited using the supplied software VideoBrowser and were then transferred back to the camcorder cannot be copied to the memory card If there is not enough space on the memory card as many files as pos sible will be copied before stopping the operation Saving Re...

Page 172: ...saved video files cannot be transferred back to the camcorder and music files cannot be transferred from the supplied VIXIA CD ROM to a memory card in the camcorder 2 Open the Movies or Gallery index screen 3 Connect the camcorder to the computer using the supplied USB cable Connection 1 Refer to Connection Diagrams A 125 4 Camcorder Select All for PC only Camcorder When the connection is successf...

Page 173: ... for this camcorder The ImageBrowser EX User Guide will also be installed with the soft ware POINTS TO CHECK Before installing the software make sure your computer is connected to the Internet 1 Turn on the computer 2 Insert the VIXIA CD ROM into the computer s disc drive 3 Windows Open the drive into which you inserted the CD ROM using Windows Explorer Mac OS Click the CD ROM icon on the desktop ...

Page 174: ...et connection and install the software again First time connection to a computer running Windows Windows users only The first time you connect the camcorder to the computer you also need to select the CameraWindow auto launch setting Connecting the Camcorder to a Computer 1 Power the camcorder using the compact power adapter 2 Open the Movies or Photos index screen 3 Connect the camcorder to the c...

Page 175: ...camcorder video files that were previously saved to the computer do not disconnect the USB cable or turn off the cam corder or computer Doing so may result in scenes that cannot be played back on the camcorder Operation may not work correctly depending on the specifications set tings of your computer If you wish to use the recordings on your computer make copies of them first Use the copied files ...

Page 176: ...cted directly to the camcorder You can also use the camcorder to play back your record ings directly from the hard drive Initialize the hard drive A 139 when you use it with this camcorder for the first time If the USB cable supplied with the external hard drive has a standard A connector you will need to use the optional UA 100 USB Adapter or commercially available USB adapter Operating modes Sav...

Page 177: ... Hard Drive screen IMPORTANT Make sure you power the camcorder with the compact power adapter before you save a memory to the external hard drive If the compact power adapter becomes disconnected the connection between the camcorder and the hard drive will end which may lead to the corruption of data in the hard drive NOTES Initialize the external hard drive A 139 when you use it with this cam cor...

Page 178: ...ory and then a memory card the folder name of memory save folders following the first one will end in a numerical suffix The Movies index screen will appear 5 Play back the movies stories and photos as you would do any other memory To switch to another memory save folder touch X and then repeat step 4 6 When you have finished playing back be sure to safely end the connection to the external hard d...

Page 179: ...ompleted 2 Press T to set the camcorder to playback mode 3 Connect the camcorder to the external hard drive using the optional UA 100 USB Adapter Connection 2 Refer to Connection Diagrams A 125 4 Press 5 Initialize the external hard drive 1 Touch this option if you want to physically erase all the data rather than just clear the file allocation table of the hard drive For large capacity hard drive...

Page 180: ...tal video recorder has an SD memory card slot you can use the memory card to copy your movies without connecting the camcorder Make sure the external device is compatible with the type of memory card used Connecting 1 Power the camcorder using the compact power adapter 2 Open the Movies Movies index screen or gallery 3 Connect the camcorder to the digital video recorder using the supplied USB cabl...

Page 181: ...or disc and set the recorder to record pause mode 2 Turn on the camcorder and set it to mode We recommend powering the camcorder using the compact power adapter Verify that q AV Headphones is set to Ò AV 3 Camcorder Locate the scene or story you wish to copy and pause the playback shortly just before the desired scene 4 Camcorder Resume playback By default onscreen displays will be embedded in the...

Page 182: ... PDF file to install the supplied PIXELA s software Converting Scenes into Standard Definition from the Movies Index Screen Operating modes 1 Power the camcorder using the compact power adapter 2 Make sure there is a memory card in the memory card slot with sufficient available space 3 Open the Movies index screen Check that you have selected the built in memory tab To convert all the scenes recor...

Page 183: ... interrupt the operation while it is in progress 7 When the conversion is completed a confirmation screen will appear To select individual scenes step 4 1 Touch on the individual scenes you want to convert A checkmark will appear on the scenes you touch The total number of selected scenes will appear next to the icon Touch a selected scene to remove the checkmark To remove all checkmarks at once t...

Page 184: ...he built in memory tab 2 Select the rating of the stories you want to convert 3 Touch Edit Story Convert HD SD and continue the conversion to standard definition from step 5 in the previous procedure A 143 NOTES When converting scenes from a story All the scenes are merged into one converted SD movie If the converted SD movie is too large it will be split into smaller 10 minute long movies The max...

Page 185: ... card slot cover and do not remove the memory cards Observe the following precautions while the ACCESS indicator is on or flashing Failing to do so may result in permanent data loss Do not open the memory card slot cover Do not disconnect the USB cable Do not disconnect the compact power adapter or turn off the camcorder or the computer NOTES The time required to convert scenes is approximately eq...

Page 186: ...will start automatically 2 Convert the desired movies A 142 If you are within the range of a configured network Web upload will start automatically The status of the wireless communication is shown by the Eye Fi icon as follows grayed out Communication not established white flashing Connecting white continuously on Wireless upload on standby animated Wireless upload in progress Eye Fi Communicatio...

Page 187: ... Fi Card the ACCESS indicator may flash from time to time Wireless communication via the Eye Fi card is available only in playback mode Any wireless transfer in progress will be stopped if you set the camcorder to recording mode Wireless communication via the Eye Fi card is not available when the optional WM V1 Wireless Microphone is attached to the camcorder Any wireless transfer in progress will...

Page 188: ...s make photo albums and more This service may not be available in all countries regions Installation Install the software before you connect the camcorder to the computer for the first time The software is compatible with computers running Windows or Mac OS operating systems Refer to Saving MP4 Movies and Photos Windows Mac OS A 133 Connecting to the Computer and Uploading your Recordings Refer to...

Page 189: ...int commonly referred to as infrastructure mode or directly to an iOS device without using a wireless access point com monly referred to as ad hoc mode The steps you will perform will depend on how you plan to use your recordings Refer to Glossary A 167 for a definition of the frequently used terms in this text iOS device is used in this text to collectively refer to Wi Fi enabled iOS devices Wi F...

Page 190: ... access point on a Wi Fi network A 151 Use this connection if you plan to play back videos on a DLNA compatible TV A 164 connected to the network using a LAN cable iOS device Access point LAN cable HDTV About the camcorder s Wi Fi standard The camcorder s Wi Fi standard complies with the IEEE 802 11b g n protocol and operates in the 2 4 GHz band As such the maximum data transfer rate is 11 Mbps fo...

Page 191: ...al of your wireless router and other devices you will use General requirements Correctly configured Wi Fi network or hotspot that uses the 802 11b g n protocol POINTS TO CHECK Using an unprotected Wi Fi network can expose your files and data to monitoring by unauthorized third parties Be aware of the risks involved When using the camcorder s Wi Fi functions do not cover the right side of the camco...

Page 192: ...t up a new connection point To replace the settings of an existing connection point touch Edit instead and then manually change the settings To delete the settings touch Delete and then Yes You can set up up to three connection points for infrastructure mode 1 to 3 Once set up you can use the same Wi Fi network without any further settings 3 WPS button setup Press and hold the WPS button on your w...

Page 193: ...ou can review the network settings Touch Wi Fi Setup Check Current Configuration Desired connection point 1 to 3 Î or Í K three times when finished To manually assign an IP address step 5 After touching Manual in step 5 An interface similar to the virtual keyboard for text fields A 88 will appear except it will contain only the keys necessary for this step Manual Setup Perform this procedure to wi...

Page 194: ...y detect available nearby Wi Fi networks and display their SSID 3 Touch Í or Î to select the desired access point and then touch OK Wi Fi networks with a stealth function that do not broadcast their network name will not be detected by the camcorder To use such an access point touch Enter Manually and perform the procedure described in To manually enter a wireless access point A 155 If the desired...

Page 195: ...o 3 Î or Í K three times when finished To manually enter a wireless access point step 3 Enter the details of the wireless access point If you select Open you can select No Encryption or WEP If you select Open WEP or Shared Key WEP you will need to specify the WEP index key NOTES The functions available and the setup method will vary depending on the specifications and characteristics of the Wi Fi ...

Page 196: ...General requirements For computers running Windows OS A computer correctly connected to the same network as the camcorder with the supplied software Network Utility correctly installed config ured and running appears in the notification area depending on the OS Network Utility will be installed automatically after you install VideoBrowser For details about the software refer to the Network Utility...

Page 197: ...onnected If several computers connected to the network are running Network Utility a selection screen will appear In such case continue to step 4 otherwise skip to step 5 4 Touch Í or Î to select the specific computer you want to use for transferring files wirelessly from the camcorder and then touch OK 5 When the confirmation screen appears save the settings of the connection point File Transfer ...

Page 198: ...er until the transfer is completed 2 Set the camcorder to playback mode and then press 3 Touch Wi Fi and then touch Transfer Files If the memory card slot cover is open the option will not be available Make sure the cover is closed properly 4 Select the memory that contains the recordings you wish to transfer wirelessly and touch OK You can select more than one memory Touch All files to transfer a...

Page 199: ...ke sure they are safe to delete before deleting them NOTES AVCHD movies transferred using Network Utility will be saved in the Videos folder on the computer by default If you start VideoBrowser after you transfer AVCHD movies the destination folder will automati cally be added to the software s Library MP4 movies transferred using Network Utility will be saved in the same location as AVCHD movies ...

Page 200: ...ty correctly installed configured including your YouTube and Facebook account settings and running is in the notification area Network Utility will be installed automatically after you install VideoBrowser For details about the software refer to the Network Utility Software Guide PDF file on the PIXELA disc in the folder Network Utility Manual English Operating modes Photos can be uploaded to Face...

Page 201: ...ability it can take some time to upload video files Uploading Videos Using an iOS Device You can connect the camcorder to an iOS device to upload your recordings to YouTube and Facebook even when you are away from your home network Make sure you have downloaded and are using the Movie Uploader app provided by PIXELA available for free from the App Store http itunes com apps movieuploader The Wi Fi...

Page 202: ...ct Shared Key WEP you will need to specify the WEP index key Enter an encryption key of your choosing The encryption key must be one of the following 5 or 10 alphanumeric characters 10 or 26 hexadecimal characters 0 9 A F 4 Touch Automatic to automatically obtain an IP address 5 Touch No You can touch Check Current Configuration to review the network settings 6 Save the settings of the connection ...

Page 203: ...ly 3 Camcorder Touch OK The camcorder will connect as a media server 4 iOS device Touch Settings Wi Fi and then turn Wi Fi on A list of active networks will appear 5 iOS device On the network selection screen select the network set in the camcorder If necessary enter the password and then touch Join A checkmark will appear next to the selected network 6 iOS device Use the Movie Uploader app to upl...

Page 204: ... the HDTV you can easily search for recordings in the camcorder and play them back Many DLNA players do not support playback of MP4 movies POINTS TO CHECK If you have not done so already complete the Wi Fi network setup A 151 in advance General requirements An HDTV or other media player certified as a DLNA Digital Media Player DMP correctly configured and connected to the network We recommend usin...

Page 205: ...k your recordings The ACCESS indicator blinks during the connection Refer to the DLNA device s instruction manual for details on the procedure 5 Play back the videos in the folder that appears built in memory or memory card 6 Camcorder When you have finished playing back touch End to end the Wi Fi connection IMPORTANT Do not open the memory card slot cover during the wireless connec tion If playba...

Page 206: ...ove the camcorder closer to the wireless access point Turn off the wireless functions of other wireless devices other than the DLNA compatible device being used for playback Switch the wireless access point to IEEE802 11n and activate channel bonding Refer to its instruction manual for details If these do not improve playback the cause may be due to conditions unique to the surrounding area Use th...

Page 207: ...her without using an access point DLNA Digital Living Network Alliance A standard for easy communication and content sharing among consumer electronic devices comput ers and mobile devices across a home network FTP server An FTP server is an application running on a computer that allows users to transfer files to and from that computer Infrastructure mode A Wi Fi connection in which devices are co...

Page 208: ...wise specified functions available for AVCHD movies include movies made using Story Creator mode Main Functions Panel FUNC Menu Main Functions Panel Recording Modes Control Button Setting options Function AUTO n A Rec Programs Programmed AE z 95 ú SCN Portrait û SCN Sports ü SCN Night Scene ý SCN Snow þ SCN Beach ÿ SCN Sunset Œ SCN Low Light œ SCN Spotlight Š SCN Fireworks z 95 Ä White Balance à A...

Page 209: ... Mic Level m automatic n manual Audio Level Indicator Toggle on or off z z 109 R Faders S Off T Fade Trigger Once U Fade Trigger Always V Wipe Once W Wipe Always z z 102 Ò Decoration Ó Pens and Stamps Animated Stamps Ø Captions 2 z z z 73 Ü image mix Toggle on or off Ý pause live video z z ß minimize toolbar z z z z Pre REC ON OFF z z 98 v Review Recording z z 90 Control Button Setting options Fun...

Page 210: ...layback Pause A From the built in memory Copy date Select All Scenes Select All Scenes 128 From the built in memory Convert HD SD date Select All Scenes 142 Delete date Select All Scenes Select All Scenes This Scene All Scenes This Scene 60 Divide z 116 Network Utility YouTube Facebook YouTube Facebook YouTube Facebook 160 ...

Page 211: ...back Pause A From the built in memory Copy by scene rating 129 From the built in memory Convert HD SD by scene rating 144 Delete or by scene rating This Scene This Scene 60 Delete Story z 63 Story Thumbnail z 86 Edit Title z 87 Copy z 85 Move z 85 Divide z 116 Rating É Ê Ë Ì unrated Í others 81 Control Button Index Screen Single Photo View A From the built in memory Copy Select All Photos z 129 13...

Page 212: ...e i On j Off z z Face Detection Tracking i On j Off z z 99 Auto Backlight Correction i On j Off z z 104 Auto Slow Shutter i On j Off z z Flicker Reduction j Off 50 Hz 60 Hz z z Fader Setting Black Screen White Screen z z 102 Onscreen Markers j Off 3 Level White 4 Level Gray 5 Grid White 6 Grid Gray z z Image Stabilizer Dynamic Standard j Off z z 97 Wind Screen k Automatic j Off à z z Microphone At...

Page 213: ...s change the setting to reduce the effect Flicker reduction can be activated only when the recording program is set to Programmed AE Onscreen Markers You can display a grid or a horizontal line at the cen ter of the screen Use the markers as a reference to make sure your sub ject is framed correctly vertically and or horizontally Using the onscreen markers will not affect the recordings Wind Scree...

Page 214: ...in the correct aspect ratio 4 3 TV TV sets with 4 3 aspect ratio Wide TV TV sets with 16 9 aspect ratio When the TV type is set to 4 3 TV during the playback of video originally recorded with an aspect ratio of 16 9 the picture will not be displayed fullscreen This option is not available when the camcorder is connected to an HDTV using the supplied HDMI cable Menu item Setting options y A Select ...

Page 215: ...ng Play 5 Mbps z 91 9 Mbps 4 Mbps z Frame Rate 1 60i Standard PF30 PF24 z 94 30P 24P z Rec Media for Photos built in memory memory card z z z2 40 Video Snapshot Length 1 C 2 sec D 4 sec F 8 sec z z2 72 114 Story Length Based Toggle on or off z Rate Scenes Recording 1 i On j Off z Available Space in Memory built in memory memory card only z z Used Space in Memory built in memory memory card only z ...

Page 216: ...tes actually usable space It may be slightly smaller than the nominal built in memory capacity listed in the specifications x v Color Uses a color space with an extended gamut to achieve deeper colors closer to real life Use this function to record video only when you intend to play back your recordings on an HDTV compatible with x v Color connected to the camcorder using the supplied HDMI cable I...

Page 217: ...le number will have the file name MVI_0107 MP4 External Hard Drive Info When the camcorder is connected to an exter nal hard drive this setting displays information about the hard drive q System Setup Menu item Setting options y A Output Onscreen Displays 1 i On j Off z z z z Language Dansk Deutsch English Español Français Italiano Magyar Melayu Nederlands Norsk Polski Português Suomi Svenska Türk...

Page 218: ...ndby Off 10 min 20 min 30 min Initialize Initialize Built in Mem Mem Card only z z z z 42 Complete Initialization Toggle on or off Initialize 2 z z 139 Delete Memory Save Folder 2 z z 138 Time Zone DST home time zone or travel time zone New York list of world time zones DST adjustment Toggle on or off z z z z 36 Date Time Date Time Date Format Y M D M D Y D M Y Y year M month D day 24H Toggle on 2...

Page 219: ...age on a TV LCD Backlight Sets the screen to one of three brightness levels You can use this to make the screen brighter when recording in bright places for example Changing the brightness of the LCD screen does not affect the bright ness of your recordings or the brightness of the playback image on a TV Using the bright setting will shorten the effective usage time of the bat tery pack LCD Mirror...

Page 220: ...ration for 5 minutes Approximately 30 seconds before the camcorder shuts off Auto Power Off will appear Operating any of the camcorder s controls while the message is displayed will prevent the camcorder from shutting off In standby mode the camcorder will shut off after the time selected for the Quick Start Standby setting Quick Start Standby Select whether to activate the Quick Start function A ...

Page 221: ...t is set to or mode depending on the TV used turning off the TV will automatically turn off the camcorder even if it is recording at the time We recommend not connecting more than 3 HDMI CEC compatible devices at a time This option is not available when the camcorder is connected to an HDTV using the supplied HDMI cable HDMI Status Displays a screen where you can verify the standard of the output ...

Page 222: ...PHOTO Take a photo A 44 89 115 6 Control button Displays a shooting tip for the current story scene 7 Memory operation A 186 8 Intelligent IS A 48 9 Remaining battery level also remaining battery time when using an optional battery pack A 186 A q Zoom A 50 A a Recording mode A 91 A s Recording standard A 31 A d Current story scene category A 68 touch to return to the list of story scenes A 68 A f ...

Page 223: ...inutes seconds Self timer A 108 S f Image stabilizer A 97 S g Tele macro A 106 S h Remaining recording time On the memory card In the built in memory Relay recording A 41 only S j Frame rate A 94 S k Fader A 102 S l Microphone attenuator A 173 D q Headphone output A 111 D a Custom control button A 180 D s Level marker A 173 D d Wind screen off A 173 D f Flicker reduction A 173 D g Control button F...

Page 224: ...playback AVCHD movies MP4 movies D k Eye Fi wireless communication A 146 D l Scene number F q Playback control buttons A 55 F a Data code A 66 174 F s Volume and background music balance controls A 55 84 F d File number A 176 F f Volume controls A 56 ...

Page 225: ...g Photos F g Control button Edit Open the Edit panel A 171 F h Current photo Total number of photos F j Control button h Photo jump A 119 F k Control button Ð Slideshow A 122 F l Control button f Return to the Photos index screen A 118 ...

Page 226: ...ce or charge the battery pack Depending on the condition of the camcorder or battery the actual battery charge may not match what is displayed on the screen When you attach an empty battery pack the power may turn off without displaying Depending on the conditions under which the camcorder and the battery pack are used the actual battery charge may not be indicated accurately You can display the c...

Page 227: ... battery pack Cannot charge the battery pack Make sure the camcorder is off so charging can start The temperature of the battery pack is outside its operating range approximately 0 40 C 32 104 F Remove the battery pack warm it or let it cool down as necessary and try charging it again Power supply Is the battery charged Is the compact power adapter correctly con nected to the camcorder A 20 Record...

Page 228: ...d The memory is full or it already contains the maximum number of scenes of AVCHD movies 3 999 scenes Delete some recordings A 60 120 or initialize the memory A 42 to free some space The point where Y was pressed does not match the beginning end of the recording There is a slight interval between pressing Y and the actual start end of record ing This is not a malfunction The camcorder will not foc...

Page 229: ...er than usual When the memory contains a large number of scenes some operations may take longer than usual Save your recordings A 131 and initialize the memory A 42 Cannot capture a video snapshot scene from a movie You cannot capture video snapshot scenes from scenes recorded or edited using another device Also you cannot capture scenes that are from movies converted to standard definition only o...

Page 230: ... the screen The camcorder cannot communicate with the optional battery pack attached so the remaining battery charge cannot be displayed lights up in red A memory card error occurred Turn off the camcorder Remove and reinsert the memory card Initialize the memory card if the display does not change back to normal The memory card is full Replace the memory card or delete some recordings A 60 120 to...

Page 231: ... Keep a distance between the camcorder and devices that emit strong electromagnetic fields plasma TVs cellular phones etc Horizontal bands appear on the screen This is a phenomenon typical of CMOS image sensors when recording under some types of fluorescent mercury or sodium lamps This is not a malfunction To reduce the symptoms change the p Flicker Reduction setting Sound is distorted or is recor...

Page 232: ...ion is not available with an Eye Fi card in recording mode or while the optional WM V1 Wireless Microphone is attached to the camcorder Set the camcorder to playback mode or remove the WM V1 Wireless communication is not available with an Eye Fi card when the cam corder has established a wireless connection Make sure the camcorder has ended the con nection Opening the LCD panel may help when the w...

Page 233: ...nnect the camcorder to a different USB port on the computer Cannot save photos on my computer When the memory contains too many photos Windows 2 500 photos or more Macintosh 1 000 photos or more you may not be able to transfer photos to a computer Try using a card reader to transfer the photos on the memory card only To transfer the photos in the built in memory copy them to the memory card in adv...

Page 234: ...line of sight between the wireless router and the camcorder may interfere with the wireless signal Try using the camcorder in a location farther away from such appliances Wi Fi networks with a stealth function that do not broadcast their network name SSID will not be detected by the camcorder during the Wi Fi network setup Perform the setup manu ally A 153 or turn off the stealth function of the w...

Page 235: ... cor rectly You inserted a MultiMedia Card MMC into the camcorder Use a recommended memory card A 37 There was an error creating the file name Set File Numbering to Reset and initialize the memory card A 42 or delete all the photos A 120 and converted SD mov ies A 60 Cannot copy The total size of the scenes you selected to copy exceeds the available space on the memory card Delete some recordings ...

Page 236: ...lized using a computer Initialize the built in mem ory with this camcorder A 42 Cannot play the movies on this memory card Movies cannot be played back from a 64 MB or smaller memory card Use a recommended memory card A 37 Cannot play the movies on this memory card Initialize only using the camcorder The memory card in the camcorder was initialized using a computer Initialize the memory card with ...

Page 237: ...rder Use a recommended memory card A 37 If after the message disappears appears in red perform the following Turn off the cam corder and remove and reinsert the memory card If turns back to green you can resume recording playback If the problem persists save your recordings A 131 and initialize the memory card A 42 Do not disconnect the power source Cannot write data with this connection To write ...

Page 238: ...ents accessing the selected memory Initialize the memory with this camcorder A 42 LCD screen has been dimmed Use the LCD Backlight setting to change the brightness Change the q LCD Backlight setting to Normal or Bright May not be possible to record movies on this memory card You may not be able to record movies on a memory card without a Speed Class rating Replace the memory card with one rated SD...

Page 239: ...CHD scenes 3 999 scenes has been reached Delete some scenes A 60 to free some space Number of stories already at maximum The gallery already contains the maximum number of stories 98 stories in any one given memory Delete some stories A 63 or change the recording memory for movies A 40 Recording was stopped due to insufficient write speed of the memory card The data transfer rate was too high for ...

Page 240: ... pack There are no scenes with the selected rating No scenes have been rated yet Rate the scenes as you like A 81 The criteria you used to select scenes by rating resulted in no applicable scenes Change the criteria used to select scenes by rating This memory card contains scenes Delete all scenes to use relay recording Save your movies A 131 if necessary and delete all the movies from the memory ...

Page 241: ...e the camcorder was writing to the external hard drive Select Recover to try to recover the recordings Quickly erases all files and deletes partitions from the external hard drive Initialize If you initialize the hard drive all data it contains will be lost including any partitioned drives If necessary back up data and then initialize the hard drive with the camcorder The compact power adapter was...

Page 242: ...r of connections or increase the maximum number Cannot log in to FTP server Check that the FTP server s user name and password are correctly configured in the cam corder They are case sensitive so make sure to enter them correctly Make sure permissions for files on the FTP server are set to allow access reading and writing Make sure name of the destination folder on the FTP server consists only of...

Page 243: ...network Transfer speed changed before connecting If the encryption method is set to WEP IEEE 802 11n cannot be used as the protocol for the connection so the connection was established using IEEE 802 11b or IEEE 802 11g To use IEEE 802 11n we recommend setting the encryption method to WPA2 PSK AES WPA PSK AES WPA2 PSK TKIP or WPA PSK TKIP Unable to access configuration files Turn off the camcorder...

Page 244: ... MIC terminal and turn it off Wi Fi connection terminated Cordless phones microwave ovens refrigerators and other appliances may interfere with the wireless signal Try using the camcorder in a location farther away from such appliances The camcorder may not be able to connect to the wireless router if too many devices are accessing the wireless access point Wi Fi error Incorrect authentication met...

Page 245: ...The touch screen s operation is based on detecting applied pressure so you may not be able to correctly operate the touch screen with an additional protective layer Do not leave the camcorder in places subject to high temperatures like the inside of a car parked under direct sunlight or high humidity Do not use the camcorder near strong electromagnetic fields such as above TVs near plasma TVs or m...

Page 246: ... may dam age the camcorder When recording movies try to get a calm stable picture Excessive cam corder movement while shooting and extensive use of fast zooms and panning can result in jittery scenes In extreme cases the playback of such scenes may result in visually induced motion sickness If you expe rience such a reaction stop the playback immediately and take a rest break as necessary Do not i...

Page 247: ...yed after a large number of repeated uses if a fully charged battery pack is left unused or if a battery pack is used for long periods of time in high tem peratures Use the time shown on the screen as an approximation Memory Card We recommend backing up the recordings on the memory card onto your computer Data may be corrupted or lost due to memory card defects or exposure to static electricity Ca...

Page 248: ...der has a built in rechargeable lithium battery to keep the date time and other settings The built in lithium battery is recharged while you use the camcorder however it will discharge completely if you do not use the camcorder for about 3 months To recharge the built in lithium battery Connect the compact power adapter to the camcorder and leave it connected for 24 hours with the camcorder off Di...

Page 249: ...D Touch Screen Clean the LCD touch screen using a clean soft lens cleaning cloth Condensation may form on the surface of the screen when the temper ature changes suddenly Wipe it with a soft dry cloth Condensation Moving the camcorder rapidly between hot and cold temperatures may cause condensation water droplets to form on its internal surfaces Stop using the camcorder if condensation is detected...

Page 250: ... Abroad Power Sources You can use the compact power adapter to operate the camcorder and to charge battery packs in any country with power supply between 100 and 240 V AC 50 60 Hz Consult a Canon Service Center for information on plug adapters for overseas use Playback on a TV Screen You can only play back your recordings on TVs compatible with the NTSC system NTSC is used in the following regions...

Page 251: ...to area TV HDTV Digital video recorder Computer External hard drive Card reader writer Optional accessories not listed below are described in more detail in the following pages 1 Stylus Pen 8 IFC 300PCU S or IFC 400PCU USB 2 CA 110 Compact Power Adapter Cable 3 BP 709 Battery Pack A q HTC 100 S or HTC 100 HDMI Cable 7 Memory card A a STV 250N Stereo Video Cable ...

Page 252: ...minute You can only use and charge these battery packs with camcorders and charg ers compatible with Intelligent System 5 CG 700 Battery Charger Use the battery charger to charge the battery packs Use of genuine Canon accessories is recommended This product is designed to achieve excellent performance when used with genuine Canon accessories Canon shall not be liable for any dam age to this produc...

Page 253: ...etc The following recording and playback times are for AVCHD movies The recording and playback times for MP4 movies are the same as those for SP recording mode Recording AVCHD movies using the built in memory Battery pack BP 709 BP 718 BP 727 Charging conditions Using the camcorder 170 min 310 min 450 min Using the CG 700 Battery Charger 130 min 220 min 315 min Battery pack Recording mode Recordin...

Page 254: ...ng mode Recording maximum Recording typical Playback BP 709 MXP 50 min 25 min 75 min FXP 50 min 25 min 75 min XP 50 min 25 min 75 min SP 55 min 25 min 80 min LP 55 min 25 min 80 min BP 718 MXP 115 min 65 min 170 min FXP 115 min 65 min 170 min XP 120 min 65 min 180 min SP 120 min 65 min 180 min LP 120 min 65 min 180 min BP 727 MXP 170 min 95 min 255 min FXP 175 min 100 min 255 min XP 180 min 100 mi...

Page 255: ...to the camcorder an external hard drive or similar storage device with a standard A cable After doing so you can save an entire memory onto the device Check in advance the USB cable supplied with your external hard drive A s SC 2000 Soft Carrying Case A handy camcorder bag with padded compartments and plenty of space for accessories This mark identifies genuine Canon video accessories When you use...

Page 256: ... extremely high quality prints Video Signal Configuration AVCHD 1080 60i MP4 720P Recordings made with the PF24 PF30 frame rate are converted and recorded on the memory as 60i Recording Media Built in memory 32 GB 8 GB SD SDHC SD High Capacity or SDXC SD eXtended Capacity memory card not included Maximum Recording Time 32 GB built in memory AVCHD movies MXP mode 2 hr 55 min FXP mode 4 hr 10 min XP...

Page 257: ...ro on at full telephoto 1 cm 0 39 in at full wide angle White Balance Auto white balance Custom white balance or Preset white balance settings Daylight Tungsten Minimum Illumination 0 4lx SCN Low Light recording program Shutter speed at 1 2 5 lx Programmed AE recording program Auto slow shutter On Shutter speed at 1 30 Recommended Illumination More than 100 lx Image Stabilization Optical Shift Ima...

Page 258: ... 40 C 32 104 F Dimensions W x H x D excluding the grip belt 54 x 55 x 115 mm 2 1 x 2 2 x 4 5 in Weight camcorder body only 250 g 8 8 oz CA 110 Compact Power Adapter Power supply 100 240 V AC 50 60 Hz Rated output consumption 5 3 V DC 1 5 A 17 VA 100 V 23 VA 240 V Operating temperature 0 40 C 32 104 F Dimensions 49 x 27 x 79 mm 1 9 x 1 1 x 3 1 in Weight 110 g 3 9 oz BP 709 Battery Pack Battery type...

Page 259: ...IC MUSIC_01 WAV to MUSIC_99 WAV About the image files for the Image Mix function The specifications of image files that can be used with the image mix function are as follows Image size 1920x1080 pixels File type Baseline JPEG Color sampling 4 2 2 or 4 2 0 Image files are saved in the memory under the following folders In the built in memory CANON MY_PICT MIX_01 JPG to MIX_99 JPG On the memory car...

Page 260: ... 70 Cinema look filters 70 Condensation 209 Connections to external devices 124 Copying recordings to a memory card 128 D Data code 66 174 Date and time 34 Decoration 73 Deleting Movies 60 Photos 120 Dividing scenes 116 E Edit panel 29 170 Editing stories 85 86 Error messages 194 External microphone 112 Eye Fi card 146 F Face detection 99 Facebook 160 Faders 102 File numbers 176 Fireworks recordin...

Page 261: ...s 44 70 89 Photos 44 89 Recording mode 91 Recording programs 95 Recording standard AVCHD MP4 31 Recording time 93 Relay recording 41 Resetting all camcorder settings 191 Reviewing recordings 90 S Saving recordings 128 Transferring to a computer 131 Using external video recorders 140 Selecting the memory for playback 58 for recording 40 Self timer 108 Serial number 19 Slideshow 122 Smart AUTO 46 Sn...

Page 262: ...222 Additional Information V Video snapshot 72 Volume 55 W White balance 107 Wide angle 49 Wi Fi functions 149 Wind screen 173 Y YouTube 160 Z Zoom 49 Advanced zoom 49 Zoom speed 49 172 only ...

Page 263: ...ive Canon USA shall have no responsibility under this limited warranty for use of the Equipment in conjunction with incompatible peripheral equipment and incompatible software In order to obtain warranty service contact the authorized Canon retail dealer from whom you purchased the Equipment or call the CANON INFORMATION CENTER AT 1 800 OK CANON You will be directed to the nearest service facility...

Page 264: ...D CAUSING THE ALLEGED DAMAGE WITHOUT LIMITING THE FOREGOING YOU ASSUME ALL RISK AND LIABILITY FOR LOSS DAMAGE OR INJURY TO YOU AND YOUR PROPERTY AND TO OTHERS AND THEIR PROPERTY ARISING OUT OF USE MISUSE OR INABILITY TO USE THE EQUIPMENT NOT CAUSED DIRECTLY BY THE NEGLIGENCE OF CANON USA SOME STATES DO NOT ALLOW THE EXCLUSION OR LIMITATION OF INCIDENTAL OR CONSEQUENTIAL DAMAGES SO THE ABOVE LIMITA...

Page 265: ... finish of the Equipment media nor does it apply to Equipment purchased outside Canada If the Equipment contains a hard disk drive Canon Canada recommends that data stored on that drive be duplicated or backed up to prevent its loss in the event of a failure or other malfunction of such drive TO OBTAIN WARRANTY SERVICE Ship your Equipment in its original carton box or equivalent properly packed fu...

Page 266: ...2666 Si vous avez des questions veuillez téléphoner 1 800 OK CANON 1 800 652 2666 sans frais au Canada seulement MÉXICO CANON MEXICANA S DE RL DE CV Blvd Manuel Ávila Camacho No 138 Piso 17 Col Lomas de Chapultepec C P 11000 México D F México CANON U S A INC NEW JERSEY OFFICE 100 Jamesburg Road Jamesburg NJ 08831 USA CENTRO Y CANON LATIN AMERICA INC SURAMÉRICA 703 Waterford Way Suite 400 Miami FL ...

Page 267: ...Startup Guide Guide de demarrage Startanleitung Guia de inicio BBOAHOe pyKOBOACTBO B Sic PIXELA CORPORATION ...

Page 268: ...nd family For more details check the VideoBrowser Software Guide a PDF file in the Manuai English folder of the supplied PIXELA CD ROM Specifically see What you can do with VideoBrowser for available options Adobe Reader 6 or later is required to view the PDF file Installing the software See Installation and System requirements in the VideoBrowser Software Guide PDF file for step by step installat...

Page 269: ...029 toll free 1 1 English Europe United Kingdom Deutschland France Espana 800 1532 4865 toll free gebuhrenfrei numero vert appel gratuit llamanda gratuita 1 1 English Deutsch Fran ais Espariol Other Countries in Europe 44 1489 564 764 1 1 English Deutsch Fran ais Espariol Asia Philippines 63 2 438 0090 1 1 English PUB DIM 1 035 000 PRINTED IN CHINA China q tli 10800 163 0014 Jl 1 1 X CANON INC 201...

Page 270: ......

Page 271: ...corder to a wireless router or access point To learn more about advanced Wi Fi functions and to see more detailed procedures refer to the full version Instruc tion Manual PDF file In this guide the PDF mark indicates the name of the section in the Instruction Manual to which you should refer Use the table of contents or the PDFs search feature to help find the section To install the full version I...

Page 272: ...s router is commonly referred to as infrastructure mode If your wireless router supports Wi Fi Protected Setup WPS setup will be easy and require minimal configuring Perform the following procedure If your wireless router does not support WPS or you wish to manually config ure settings refer to Manual Setup PDF Connecting to a Wi Fi Net work Refer also to the instruction manual of your wireless ro...

Page 273: ...on the camcorder s screen enter it into your wireless router s setup screen In most cases the wireless router s setup screen is accessed using your Web browser For details about how to activate the Wi Fi protected setup refer to the instruction manual of your wireless router 4 Within 2 minutes touch OK on the camcorder s screen You can touch Stop and then OK to interrupt the Wi Fi Protected Setup ...

Page 274: ...ion as part of the manual setup 8 Uploading Recordings to YouTube and Facebook You can upload movies to YouTube and movies and photos to Face book using the supplied software Network Utility running on a Win dows computer For a full explanation refer to the full version Instruction Manual PDF Uploading Recordings to YouTube and Facebook Access point Computer General requirements A computer correct...

Page 275: ...frequently in this text The documentation for your wireless router may also contain a glossary you can refer to Access Point A wireless access point yVAP is a device that allows wireless devices like your camcorder to connect to a wired network includ ing to the Internet using the Wi Fi standard In most cases this will be your wireless router Ad hoc mode A Wi Fi connection made directly from one d...

Page 276: ...Manual PDF file Multiple access points detected Try the operation again There are multiple wireless routers access points sending out aWPS signal at the same time Try the operation again later or perform Wi Fi Protected Setup using the PIN code option Unable to complete WPS Turn off the camcorder and wireless router After ashort while turn them on again and try again If the problem persists perfor...

Page 277: ......

Page 278: ...o B io PIXELA CORPORATION VideoBrowser ver 2 0 ...

Page 279: ...Donnees musicales I Donnees graphiques canon VI XIA HF R30 I HF R32 HF R300 089 2482 ltJ Sl vracte i c os9 n hma fabrique en Chtne 1 0 Q MP4 ...

Page 280: ...SISTANCE For service and technical assistance on this product please caii1 800 0K CANON 1 800 652 2666 or log onto www usa canon com support There is no charge to register for the benefits offered Product registration and benefits are limited to US residents only For complete description and restrictions see registration screen for your product PRINTED IN CHINA IMPRIME EN CHINE IMPRESO EN CHINA DI...

Page 281: ...escope maintenant Rendez vous sur www canon ca enregistrement ou composez le 1 800 0K Canon 1 800 652 2666 PROFITEZ DES AVANTAGES DE L ENREGISTREMENT DE VOTRE PRODUIT Soyez informe automatiquement des mises aniveau de pilotes micrologiciels et logiciels Recevez des renseignements actualises sur les produits et les promotions de Canon Canada Inc Vous faites partie de nos clients privih gi s Ace tit...

Page 282: ... votre facture La garantie s applique dans le pays ou le produit a ete achete Veuillez lire attentivement toute I information portant sur Ia garantie Cette information se trouve dans le guide de l utilisateur I MODEL I SERIAL NO Date of Purchase MODELE N DE SERlE Date d achat Purchaser s Name Nom d acheteur Address Adresse Dealer s Name Nom de marchand Address Adresse Model DIGITAL VIDEO CAMCORDER...

Page 283: ...a english cs E mail support also available Internet support for French at www canon ca francais cs E mail support also available Telephone assistance from a Canon Canada Customer Care representative free of charge during regular business hours at 1 800 0K CANON 1 800 652 2666 Canon Canada Vous pouvez obtenir du soutien technique pour vos produits comme suit Soutien technique en anglais sur Interne...

Reviews: