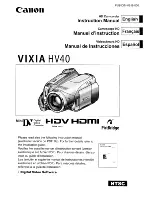
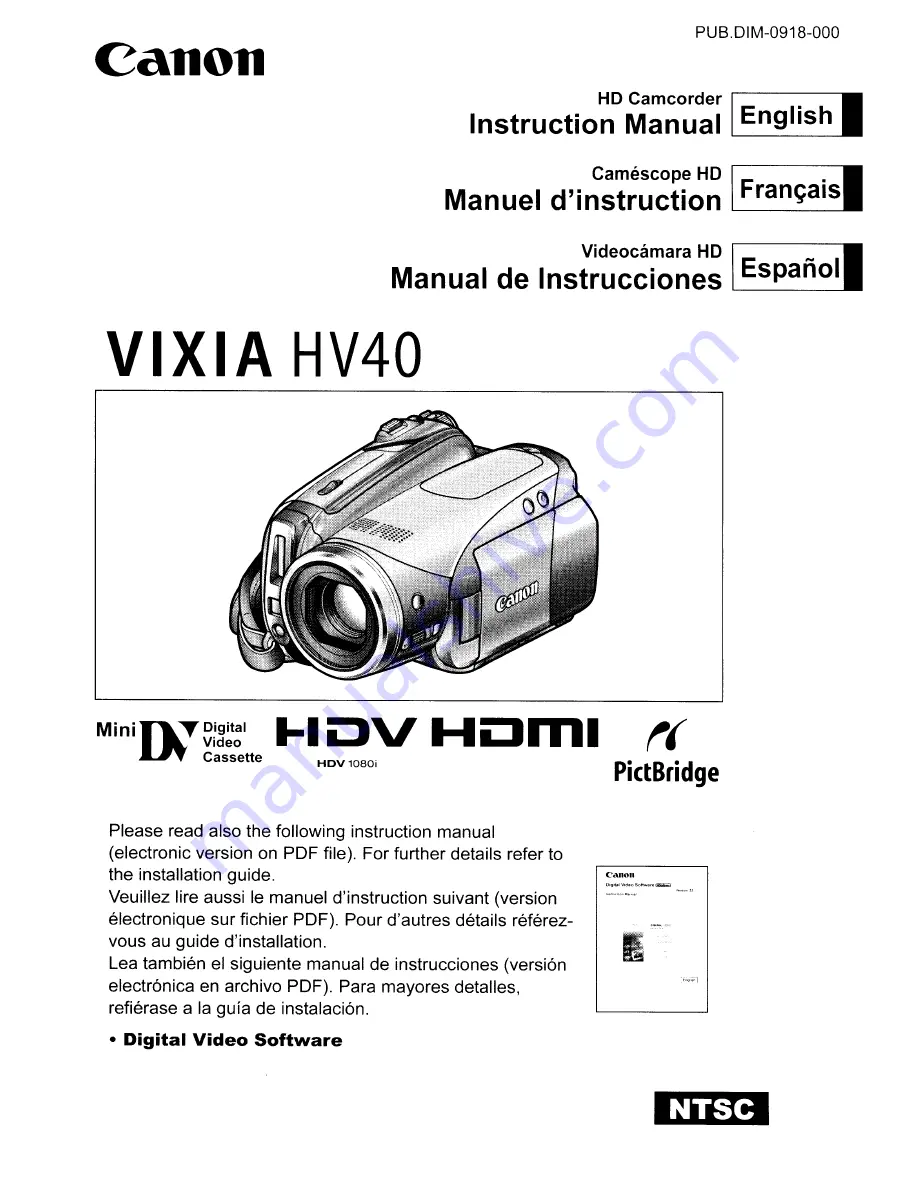
background image

Summary of Contents for Vixia HV40

Page 1: ...se read also the following instruction manual electronic version on PDF file For further details refer to the installation guide Veuillez lire aussi Ie manuel d instruction suivant version electronique sur fichier PDF Pour d autres details referez vous au guide d installation Lea tambien el siguiente manual de instrucciones version electronica en archivo PDF Para mayores detalles refierase a la gu...

Page 2: ...ce will not occur in a particular installation If this equipment does cause harmful interference to radio or television reception which can be determined by turning the equipment off and on the user is encouraged to try to correct the interference by one or more of the following measures Reorient or relocate the receiving antenna Increase the separation between the equipment and receiver Connect t...

Page 3: ...t may be of sufficient magnitude to constitute a risk of electric shock to persons CAUTION TO REDUCE THE RISK OF ELECTRIC SHOCK DO NOT REMOVE COVER OR BACK NO USER SERVICEABLE PARTS INSIDE REFER SERVICING TO QUALIFIED SERVICE PERSONNEL The exclamation point within an equilateral triangle is intended to alert the user to the presence of important operating and maintenance servicing instructions in ...

Page 4: ...gs on the product and in the operating instructions should be adhered to 16 Follow Instructions All operating and maintenance instructions should be followed 17 Cleaning Unplug this product from the wall outlet before cleaning Do not use liquid or aerosol cleaners The product should be cleaned only as recommended in this manual 18 Accessories Do not use accessories not recommended in this manual a...

Page 5: ... product from the wall outlet and all power sources including battery and refer servicing to qualified service personnel under the following conditions a When the power supply cord or plug is damaged b If any liquid has been spilled onto or objects have fallen into the product c If the product has been exposed to rain or water d If the product does not operate normally even if you follow the opera...

Page 6: ...supply between 100 and 240 V AC For areas where 120 V At power is not used you will need a special plug adapter Contact your nearest Canon Service Center for further information IThis Class B digital apparatus complies with Canadian ICES 003 ...

Page 7: ...4 times the number of pixels in standard definition TV broadcasts resulting in eye catching colors and richly detailed video recordings 1 080 lines o Q s o How to play back your HDV recordings On a high definition TV HDTV lIJ 72 HDV recordings will be played back in their original high quality On standard definition TVs lIJ 73 HDV recordings will be down converted to match the resolution of the TV...

Page 8: ...gs Changing the Language 26 Changing the Time Zone 26 Setting the Date and Time 27 Basic Functions Recording Recording Movies 28 Recording Still Images 29 Zooming 30 Playback Playing Back Movies 31 Adjusting the Volume Speaker and Headphones 32 Returning to a Pre marked Position 33 Locating the End of the Last Scene 34 Locating Scenes by Recording Date 34 Viewing Still Images 35 Magnifying the Pla...

Page 9: ...Audio Recording Level 65 Digital Effects 67 Editing Functions Still Image Options Erasing Still Images 69 Protecting Still Images 69 Initializing the Memory Card 70 External Connections Connecting to a TV or VCR Connection Diagrams 71 Playback on a TV Screen 74 Recording to a VCR or Digital Video Recorder 75 Analog Line In Recording 76 Digital Video Dubbing 77 Analog Digital Conversion 78 Connecti...

Page 10: ...and other countries MiniW is a trademark HOV and the HOV logo are trademarks of Sony Corporation and Victor Company of Japan Ltd JVC HOMI the HDMI logo and High Definition Multimedia Interface are trademarks or registered trademarks of HOMI Licensing LLC Other names and products not mentioned above may be trademarks or registered trademarks of their respective companies ANY USE OF THIS PRODUCT OTH...

Page 11: ... Dat and Time lDATEiTlME SETUP J Buttons and switches to be operated II you do not use ttle camcorder for about 3 months the built In rechargeable lithium battery may discharge completely and the dale and lime selling may be lost In such case recharge lhe bUill In lithium battery W 98 and set the lIme zone date and lime again Yoo can also change file date format W 47 1 Press 2 Select the r Icon an...

Page 12: ...en the guide contains multiple pages NEXT and the page number icon will appear at the bottom position Push the joystick T toward NEXT to display the next page of the guide About the Operating Modes The camcorder s operating mode is determined by the positions of the switch and the Icrol switch In the manual l indicates that a function is available in the operating mode shown and indicates that the...

Page 13: ...A Customers only Register your product online at www registercanon com Protect your product We will keep the model number and date of purchase of your new Canon product on file to help you refer to this information in the event of an insurance claim such as loss or theft Receive information on new products and promotions Upon your request we will send you information on Canon new products and prom...

Page 14: ...are button OJ 82 85 J USB terminal OJ 80 CARD access indicator OJ 29 CHARGE indicator OJ 20 Memory card slot OJ 22 Icrol c g tape card switch OJ 12 Mode switch OJ 48 Terminal cover MIC microphone terminal OJ 66 3 AV terminal OJ 71 o headphones terminal OJ 32 COMPONENT OUT terminal OJ 71 Grip belt OJ 23 Instant AF sensor OJ 39 Flash OJ 63 Mini video light OJ 64 Remote sensor OJ 23 Names of buttons ...

Page 15: ...y pause button OJ 31 START STOP button OJ 28 j Serial number The serial number label is located on the back surface of the battery attachment unit Remove the battery pack to find it lilll qij J switch OJ 12 stop button OJ 31 MAGNIFY button OJ 53 HDVIDV terminal OJ 71 80 rewind button OJ 31 Zoom out W wide angle button OJ 30 RESET button OJ 89 START STOP button OJ 28 Joystick OJ 12 Viewfinder OJ 23...

Page 16: ...ton OJ 33 TV SCREEN button OJ 45 X2 button OJ 31 Q1 STOP button OJ 31 II button OJ 31 PLAY button OJ 31 PAUSE II button OJ 31 jJ Zoom buttons OJ 30 FF button OJ 31 WCARD buttons OJ 35 DISP on screen display button OJ 61 PHOTO button OJ 29 WDATE SEARCH buttons OJ 34 REW button OJ 31 SLOW button OJ 31 _ _ _ J _ _ _ J ell b ...

Page 17: ... Q c n o CAMERA c gj Recording Still Images I CD Recording program CD 48 White balance CD 54 Image effect CD 55 Digital effects CD 67 Still image quality size simultaneous recording CD 57 j Function assigned to the CUSTOM key CD 61 Focus assist functions CD 45 Level marker CD 45 Condensation warning CD 99 Mini video light CD 64 Remote sensor off CD 46 Audio level indicator microphone CD 65 Zoom CD...

Page 18: ...I Getting to Know the Camcorder ...

Page 19: ...ges PLAY eJl Playing Movies 363 6307 l jj 14 14 j CD Image number OJ 42 Current image Total number of images Q Histogram OJ 62 P 204Sx1536 MF SV 0 16MB J F2 8 l 0 00 1 30 L OCT 25 2009 9 20 AM Image protection mark OJ 69 Still image quality size Date and time of recording J Recording program OJ 48 Manual focus OJ 53 Light metering mode OJ 58 Manual exposure OJ 52 Q1J Flash OJ 63 White balance OJ 5...

Page 20: ...g a battery pack When the compact power adapter is connected even if a battery is attached its power will not be consumed ONCE THE BAnERY PACK IS FULLY CHARGED 1 Disconnect the compact power adapter from the camcorder 2 Unplug the power cord from the power outlet and the compact power adapter To REMOVE THE BAnERY PACK Slide BATTERY RELEASE in the direction of the arrow and hold it pressed down Sli...

Page 21: ...ime will vary depending on the surrounding temperature and the battery pack s initial charge condition In cold places the effective usage time of the battery will decrease Battery Pack NB 2LH Bp 2L13 BP 2L14 BP 2L24H Charging Time 130 min 200 min 225 min 370 min lB Maximum Recording Time Viewfinder 70 min 120 min 150 min 240 min LCD NORMAL 65 min 115 min 140 min 230 min LCD BRIGHT 65 min 110 min 1...

Page 22: ...ith the cassette compartment while it is opening or closing automatically or attempt to close the cover before the cassette compartment has fully retracted Be careful not to get your fingers caught in the cassette compartment cover CD__t __ J If the camcorder is connected to a power source cassettes can be inserted removed even if the IiI 1IaD switch is set to _ CHG Inserting and Removing a Memory...

Page 23: ...oller Inserting the Battery Lithium Button Battery CR2025 The Wireless Controller 1 Turn on the camcorder The lens cover will open automatically 2 Adjust the viewfinder Keep the LCD panel closed to use the viewfinder and adjust the dioptric adjustment lever as necessary 3 Fasten the grip belt Adjust the grip belt so that you can reach the zoom lever with your index finger and the START STOP button...

Page 24: ...ewfinder screen Using the bright setting will shorten the effective usage time of the battery pack You can also adjust the brightness of the LCD from the menu I 45 J DISP You can rotate the panel 180 degrees toward the lens allowing the subject to monitor the LCD screen while you use the viewfinder Rotating the panel 180 degrees is also useful if you wish to include yourself when recording with th...

Page 25: ...d to press 8 and make further selections Follow the additional operation guides that will appear on the screen such as the icon small arrows etc Sefecting an Option from the Setup Menus FUNC g 1 Press r F UN C 2 Select A T the rE3 icon and press 8 to open the setup menus You can also hold FUNG pressed down for more than 1 second to open directly the setup menus screen 3 Select A T the desired menu...

Page 26: ...UNC 2 Select the ri3 icon and press 8 to open the setup menus 3 Select DATE TIME SETUP and press 8 4 Select c T ZONE DST and press 8 The time zone setting appears The default setting is New York S Select your time zone and press 8 To adjust for daylight saving time select the time zone with the mark next to the area 6 Press FUNC to close the menu Default value I J lJ J 19 ll11j1Tn J flf e p 1Ie p ...

Page 27: ...ate will be indicated with blinking up down arrows 5 Change AT each field of the date and time and move to the next field 6 Press to start the clock 7 Press FUNC j to close the menu 1 If you do not use the camcorder for about 3 months the built in rechargeable lithium battery may discharge completely and the date and time setting may be lost In such case recharge the built in lithium battery CD 98...

Page 28: ... will enter the stop mode if left in record pause e mode for 4 mtnutes 30 seconds To resume recording press START STOP When recording in very loud places such as fireworks shows or concerts sound may 1 Set the mode switch to P 2 If the joystick guide does not appear on screen press to display it 3 Push the joystick toward g If 9 does not appear on the joystick guide repeatedly push the joystick T ...

Page 29: ...s for 5 minutes CD 46 To restore the power turn the camcorder off and then on again About the LCD and viewfinder screen The screens are produced using extremely high precision manufacturing techniques with more than 99 99 of the pixels operating to specification Less than 0 01 of the pixels may occasionally misfire or appear as black red blue or green dots This has no effect on the recorded image ...

Page 30: ... lever toward W to zoom out wide angle Move it toward T to zoom in telephoto You can also change the zoom speed CD 39 You can select one of three fixed zoom speeds or a variable speed that depends on how you operate the zoom lever Press gently for a slow zoom press harder for faster zooms You can also use the T and W buttons on the wireless controller or the LCD panel The zoom speed with these but...

Page 31: ...roblems at the point where the standard of the recording HDV DV changes CO 12 Playback Playing Back Movies Play back the tape on the LCD display or close the LCD panel to use the viewfinder Special Playback Modes To enter most special playback modes you need to operate the buttons on the wireless controller CO 16 There is no sound during the special playback modes Special playback mode Initial mod...

Page 32: ...sting the Volume of the Speaker IJ 12 I t dlldlllil 1 If the joystick guide does not appear on screen press 8 to display it 2 Push the joystick toward or G to adjust the volume To turn off the volume completely keep pressing until the volume icon changes to I J You can press 8 again to hide the joystick guide during playback Using Headphones The headphones are connected to the AV O terminal which ...

Page 33: ...you connect the headphones while the terminal is set to AV output only noise will be output When using headphones make sure to lower the volume to an appropriate level The sound of the built in speaker will be muted when you close the LCD panel when you connect the stereo video cable to the AV O terminal or when the AV O terminal is set to 0 PHONES 6 Press FUNC I o appears Note that if the joystic...

Page 34: ... are sections recorded in different standards HDV DV on the same tape the date search may not work correctly CDNOTES Press 1 111 or II on the wireless controller Press more than once to search for further date changes up to 10 times To cancel the search press STOP I FUNC 1 Press FUNC 2 Select END SEARCH and press 8 3 Select EXECUTE and press 8 END SEARCH appears The camcorder rewinds fast forwards...

Page 35: ...camcorder Images edited on or uploaded from a computer Images whose file names have been changed IJ 12 I Viewing Still Images 1 Holding the lock button pressed down set the Iil lIiB switch to PLAY 2 Move the I JOI switch to cg memory card 3 Select the still image You can use the joystick to move through the still images even if the joystick guide above does not appear on the screen Image Jump You ...

Page 36: ...image is magnified by 2 times and a frame appears indicating the position of the magnified area To further enlarge the image move the zoom lever toward T To reduce the magnification move the zoom lever toward W will appear for images that cannot be enlarged 2 Select the enlarged area of the picture with the joystick To cancel the magnification move the zoom lever toward W until the frame disappear...

Page 37: ...e EVALUATIVE CENTWEIGHTAVERAGE e SPOT I II cc Mode switch P PROGRAM AE il JSHUTIER PRIO AE B JAPERTURE PRIO AE 1Ol CINE MODE Special scene recording programs PORTRAIT SPORTS J NIGHT DSNOW fJBEACH CSUNSET mSPOTLlGHT IfIFIREWORKS CAMERld j only Menu Options Lists Menu items not available appear grayed out For details about how to select an item refer to Using the Menus OJ 25 FUNC Menu Options I_L ig...

Page 38: ...ER I P_RO_T_EC_T I CO 69 I_S_Ll_DE_S_HO_W 1 CO 36 I CO 83 Size LW 1920x1 080 L 2048x1536 M 1440x1080 5640x480 Quality 18 SUPER FINE FINE NORMAL CANCEL EXECUTE CANCEL EXECUTE Size When HD STANDARD is set to one of the widescreen 16 9 modes IHovl HDV lIHIDlH30 HDV PF30 BHDVB24 HDV PF24 BH VB24F HDV 24F or DV WIDE Ell STILL I REC OFF LW 1920x1 080 SW 848x480 When HD STANDARD is set to TIl lJ DV NORMA...

Page 39: ... how you operate the zoom lever Press lightly for a slow zoom press harder for faster ZOOIllS The fastest zoom speed can be achieved with w m VARIABLE Among the fixed zoom speeds SPEED 3 is the fastest and al SPEED 1 the slowest IZOOM SPEED I AI j OFF mI 40X fE B 200X Determines the operation of the digital zoom When activated the camcorder will switch automatically to the digital zoom when you zo...

Page 40: ...e 24p so this setting is ideal for editing 24p video During playbac 24F appears on the screen DV WIDE Standard definition video with 16 9 aspect ratio l l DV NORMAL Standard definition video with 4 3 aspect ratio We recommend not mixing recordings made in different video standards on the same tape When 30 HDV PF3D HHovH24 HDV PF24 or 24F HDV 24F is combined with the I JI CINE MODE recording progra...

Page 41: ...laying back a widescreen recording TV sets compatible with the Video 10 1 system will automatically switch to wide 16 9 mode Otherwise change the aspect ratio of the TV manually To play back on a TV with normal aspect ratio 4 3 change the TV TYPE setting accordingly al 43 I I Ilil I lSel STD PLAY m LONG PLAY When HD STANDARD is set to one of the DV standards you can change the video quality and as...

Page 42: ...mode the following menu options are divided into two menus PLAY OUT SETUP1 and PLAY OUT SETUP2 this will be indicated with the respective menu icon IPLAYBACK STD I IINITIALIZE r m ON mJ OFF IFILE NOS I 1 lf 111 R I 1r J Iii RESET CONTINUOUS Select the image numbering method to be used when you insert a new memory card Images are automatically assigned consecutive image numbers from 0101 to 9900 an...

Page 43: ...ed on two channels II J LlR Left and Right channels stereo Main Sub tracks bilingual II LlL Left channel only stereo Main track only bilingual q R R Right channel only stereo Sub track only bilingual NORMAL TV WIDE TV In order to display the picture in full and in the correct aspect ratio select the setting according to the type of television to which you will connect the camcorder NORMAL TV TV se...

Page 44: ...according to the specifications you want to use for playback on a high definition TV Refer to the table below When the playback standard selected is different from that of the original recording no video will be output This setting will be unavailable while the camcorder is connected to an external device using the HOMI cable IDVOUTPUT I Settings for Video Output from the COMPONENT OUT Terminal Vi...

Page 45: ...e activated with the CUSTOM key OJ 61 I_A_UD_IO_LE_V_EL I OJ 65 I l Il alj maN gOFF IIIDISPLAY SETUP About the HOMI OUT display HOMI OUT appears at the bottom of the PLAY OUT SETUP2 menu screen in IPLlY i Jirl mode IIB PLAY OUT SETUP menu in other modes This is not a selectable menu option but rather an information item that displays the specification of the video output when the camcorder is conn...

Page 46: ...I ASST FUNC MARKERS Ble MAGNIFY IMAGN REC I H II s _ J mi ON OFF In order to save power when the camcorder is powered by a battery pack it will automatically shut off if left without any operation for 5 minutes Approximately 30 seconds before the camcorder shuts off the message AUTO POWER OFF will appear 1i1fI DATE e TIME m 6 DATE TIME iii CAMERA DATA mi ON OFF When you start playing back a tape o...

Page 47: ...r s firmware This menu option is usually grayed out DATEITIME SETUP l_l_ ZO_N_E_ D_ST 1 CO 26 I_D_AT_E_IT_IM_E CO 27 IDATE FORMAT YM D 2009 1 1 AM 12 00 M D Y JAN 1 2009 12 00 AM D M Y 1 JAN 2009 12 00 AM Changes the date format for on screen displays and for date printing c Q J n CD c s J n o J rn ...

Page 48: ...amcorder uses a large aperture achieving a focus on the subject while blurring other distracting details SPORTS Use this mode to record sports scenes such as tennis or golf IS JNIGHT Use this mode to record in low light conditions JSNOW Use this mode to record in bright ski resorts It prevents the subject from being underexposed IfJBEACH Use this mode to record on a sunny beach It prevents the sub...

Page 49: ... 24F to get the enhanced effect of the 24p Cinema Mode fQ g Icon of the currently selected Recording Program IFUNC j II 0 CINE MODE Setting the 24p Cinema Mode Q D J C 1 Q T1 C J C o J tJ IYES P Flexible Recording Changing the Aperture and Shutter Speed Use the automatic exposure AE program or give priority to the exposure value or the shutter speed Do not move the mode switch to mID during the ac...

Page 50: ...ving subjects or a slow shutter speed to add motion blur emphasizing the feel of movement FUNC l Icon of the currently selected Recording Program Set the aperture value The camcorder automatically sets the appropriate shutter speed Use low aperture values larger lens opening to softly blur the background in a portrait or high aperture values smaller lens opening to get a wider depth of field givin...

Page 51: ... speed slows down Special Scene Recording Programs to Match Special Conditions Recording in a very bright ski resort or capturing the full colors of a sunset or a fireworks display becomes as easy as selecting a Special Scene recording program When the mode switch is set to 0 the joystick guide will not appear Do not change the position of the mode switch while recording as the brightness of the i...

Page 52: ...K This function can also be activated with the CUSTOM key OJ 61 Manual Exposure Adjustment CD NOTES OJ 12 IBI NEXT v eJimNrsTOCHECK I _ H JU I _ _ _ c _ Mode switch P Automatic Backlight Correction 1 If the joystick guide does not appear on screen press 8 to display it 2 Push the joystick toward If does not appear on the joystick guide repeatedly push the joystick T toward NEXT to display the joys...

Page 53: ...own for more than 2 seconds 00 appears Pressing FOCUS Iagain will return the camcorder to autofocus Operating the zoom or the FOCUS dial will return the camcorder to manual focus adjustment MF FOCUS 11 Night scenes 1 Press IFOCUS MF appears 1 4 1cM II _ _ _ 0 _ 2 Adjust the focus as necessary with the FOCUS dial until the image appears focused You can also press IMAGNIFY OJ 53 or use the CUSTOM ke...

Page 54: ...appears in yellow This will not affect the recordings on the tape To RECORD THE MAGNIFIED IMAGE Use the custom white balance for special situations not covered by the other options The custom white balance will ensure that white subjects appear white under various lighting conditions White Balance The white balance function helps you accurately reproduce colors under different lighting conditions ...

Page 55: ...g instead of staying on Even in that case the white balance would be properly adjusted and the results should be better than with AWB AUTO Custom white balance may provide better results in the following cases Changing lighting conditions Close ups Subjects in a single color sky sea or forest Under mercury lamps and certain types of fluorescent lights Depending on the type of fluorescent light opt...

Page 56: ...roup compression As a general rule select a larger image size for higher quality CO 12 Options Approximate number of still images that can be recorded on different sizes of memory cards with the following quality settings is SUPER FINE FINE II NORMAL On a 128 MB memory card Image Size t9 II LW 1920x1 080 90 135 265 L2048x1536 60 85 180 M1440x1080 120 180 350 SW 848x480 455 650 1 300 S 640x480 600 ...

Page 57: ...the still image in record pause mode before you start recording Capturing a Still Image while Recording Movies You can record still images on the memory card even while the camcorder is set to CAMERA I221 mode You can also capture simultaneously as a still image on the memory card the same picture you are recording as video on the tape The size and quality of the still image can be selected I 1 0 ...

Page 58: ...ommend using the IC AHQlj mode which offers the best quality for still images FUNC J IDesired image quality To CAPTURE THE STILL IMAGE 1 Pause the playback when the scene you want to capture as a still image appears You can also use the frame by frame playback to find the exact picture you want to capture 2 Press PHOTO The data code of the still image will reflect the date and time of the original...

Page 59: ...t be turned off Mode switch at P You can turn off the focus priority and you can also select the AF autofocus mode to be used Options Default value Default value FUNC l Icon of the currently selected Light Metering Mode Appropriate for standard shooting conditions including backlit scenes The camcorder divides the picture into several areas and the light is measured in all of them to achieve the o...

Page 60: ... to activate the autofocus 2 Press PHOTOI fUlly and hold it pressed down A series of still images will be recorded as long as you hold the button pressed down AUTO EXPOSURE BRACKETING Press PHOTOI first halfway to activate the autofocus and then fully to record the still image Three still images in different exposures will be recorded on the memory card llJ 12 Captures a series of still images as ...

Page 61: ...ing the date and time and other camera data shutter speed aperture etc registered at the time of recording You can select the data to be displayed FUNC_ CO 25 QJ 12 Default value Other Functions Other Functions I Press CUSTOM to magnify the image at the center of the screen QJ 53 Repeatedly press CUSTOM to turn on off the assist functions QJ 45 which make sure you adjust the focus and exposure cor...

Page 62: ...he histogram display refer to the following section W FUNC FUNC I rl3 MENU When viewing still images you can displ ly the histogram and the icons of all the functions used at the time of recording Use the histogram as a reference to verify the correct exposure of the still image The area to the right of the histogram represents highlights and the left side represents shadows A still image whose hi...

Page 63: ... so the assist lamp does not light up The camcorder may not be able to focus even if the AF assist lamp is on C NO_T_ES __ 3 Press PHOTO first halfway to activate the autofocus and then fully to record the still image To USE THE OPTIONAL VFL 1 VIDEO FLASH LIGHT You can attach the optional VFL 1 Video Flash Light to the advanced accessory shoe if you want a more powerful flash than the built in fla...

Page 64: ...deo light off To USE THE OPTIONAL VL 3 VIDEO LIGHT You can attach the optional VL 3 Video Light to the advanced accessory shoe if you want a more powerful video light the built in mini video light For details about attaching and using the video light refer to the instruction manual of the VL 3 When a video accessory is attached to the advanced accessory shoe will appear on the screen J FUNC I r ME...

Page 65: ...cording level so that the audio level meter will go to the right of the 12 dB mark only occasionally When the 0 dB mark turns red the sound may be distorted 4 Press 8 to save the setting and hide the joystick guide To USE THE MICROPHONE AnENUATOR If the audio level is too high and the sound gets distorted activate the microphone attenuator by setting MIC ATT to rmJ ON CD 41 CD NOTES CD 12 fMIC dB4...

Page 66: ...hone it may appear on the screen FUNC I J I_O_N Using an External Microphone When recording in very quiet surroundings the built in microphone may pick up the sound of the camcorder s internal machinery In such case we recommend using an external microphone MICROPHONES COMPATIBLE WITH THE ADVANCED ACCESSORY SHOE You can attach to the advanced accessory shoe on the camcorder an optional OM 50 Direc...

Page 67: ...effect Applying FUNC J IDesired digital effect You can preview the effect on the screen before pressing FUNC I The icon of the selected effect appears FUNC II l 25 Setting Default value Select this effect to add flavor to your recordings C OTES J You can preview the digital effects on the screen while making the selection When you apply a fader not only the picture but also the sound will fade in ...

Page 68: ...the joystick toward IBI rCAMEU 8 while recording then press START STOPI to fade out and pause the recording lIUY Ei 2lJ during playback then press ill to fade out and pause the playback To ACTIVATE AN EFFECT Push the joystick toward IBI lCAMEM iEi 2lI while recording or in record pause mode LPlAY iEi 2l during playback IC_RAj I and then press B 2 QJ first halfway to activate the autofocus and then...

Page 69: ...FUNC II YES _ _ _ _ _ _ _ _ _ _ J ICARD OPERATIONS IERASE ALL IMAGES c c r gil l OJ 12 Q I t _J Initializing the memory card CO 70 will permanently erase all recorded still images even the protected ones Protecting Still Images You can protect still images from accidental erasure OJ 12 You can erase the last recorded still image while reviewing it within the time set for the REVIEW option or immed...

Page 70: ... to initialize a memory card to erase all the files in contains The regular initialization option INITIALIZE will clear the file allocation table but will not physically erase the stored data If you need to completely erase all the data select instead the complete initialization option COMPL INIT FUNG J IL Y_E_S_ _ Press e to cancel the complete initialization while it isin progress All the image ...

Page 71: ...erminal is for video only When you use connection type D do not forget the audio connections using the AV O terminal HDV DV Terminal E c Check the type and orientation of the terminal and make sure you connect the OV cable properly c HDMI OUT Terminal The HOMI OUT terminal offers a high quality digital connection that combines audio and video in a single convenient cable Use only HOMI cables marke...

Page 72: ...able Supplied IO White W L Red C R DV Cable Commercially available Output connection Signal Flow to an HOTV with a OV IEEE1394 terminal Input connection Signal Flow from a TV or other digital video source with a OV IEEE1394 output 001 C 3 e i 4 pin IIEff I agn mJ 6 pin Be careful to correctly insert the 6 pin plug into the DV terminal Inserting it in the wrong direction can result in damage to the...

Page 73: ...Signal Flow from a TV or other digital video source with a DV IEEE1394 output I C ItD III 4 pin 001 E ODI 09O j mJ 6 pin Be careful to correctly insert the 6 pin plug into the DV terminal Inserting it in the wrong direction can result in damage to the camcorder Output connection Signal Flow to a TV or VCR with AV Terminals Input connection Signal Flow from a TV VCR or other analog video source wit...

Page 74: ...connection connection type D you can enjoy the full resolution of high definition TV About the HDMITM connection The HDMI High Definition Multimedia Interface connection connection type 11 is a convenient all digital connection using a single cable for both video and audio When you connect the camcorder to an HDTV equipped with an HOMI terminal you can enjoy video and audio playback at the highest...

Page 75: ...Y OUT SETUP menu option list CD 42 PLAYBACK STD to select the output video standard DV OUTPUT to select the standard of the output video when using connection type fJ Note that the video standard of the recorded copy depends also on the standards supported by the external digital device Refer to the table below Set AV PHONES to I AV I AV when using connection type II Connecting Connect the camcord...

Page 76: ...MI connection connection type 6 Analog Line In Recording You can input video from an analog video source VCR TV etc and record the input video on the tape in the camcorder in DV standard Analog video cannot be converted to HDV standard CD 12 Connecting Connect the camcorder to the video input source using an analog connection connection type II OJ 71 shown in the previous section Connection Diagra...

Page 77: ...ious section Connection Diagrams Set PLAYBACK STD to m AUTO OJ 42 before making the connections OINTS TO CHECK Digital Video Dubbing You can input video from other digital video devices and record the input video on the tape in the camcorder Video input will be recorded on the tape in the same standard of the original HDV or DV We recommend powering the camcorder using the compact power adapter De...

Page 78: ...y devices to the camcorder s USB terminal while an external device is connected to the HDV DV terminal You can only record video signals in HDV standard 1 080i specifications or in DV standard Note that signals from identically shaped DV IEEE1394 terminals may be in different video standards 1 Set AV DV to mD ON OJ 42 2 Start the playback on the video source and the recording on the recording devi...

Page 79: ...o a computer as digital video The required equipment and operation is the same as described in Transferring Video Recordings aJ 81 except in this case you need to set AV DV to 3 ON before connecting the camcorder to the computer Note that the analog digital conversion may not work correctly depending on the software and the specifications settings of the computer m CD J S o o J J CD _ o J t ...

Page 80: ...ting Cable I Terminal on the Connected Device 1J Output connection Signal Flow to a PC or PictBridge compatible printer with a USB port iii un r s 1l1J ID USB Cable Supplied 1 1 Output connection Signal Flow to a computer with a DV IEEE1394 terminal or a DV capture board I C tD IJ DV Cable 4 pin Commercially available I 0 001J 6 pin Be careful to correctly insert the 6 pin plug into the DV termina...

Page 81: ...evious section PC Connection Diagrams When the connection is recognized I I HDV DV will be displayed 4 Start the video editing software Refer to the instruction manual of the editing software CD 12 II y I POINTS TO CHECK Change the following settings as necessary before making the connections Refer to the corresponding explanation of each setting in the fII PLAY OUT SETUP menu option list lJ 42 PL...

Page 82: ...n on PDF file The direct transfer menu appears on the camcorder screen and the I dJ tIV button lights up When the CARD access indicator is on or flashing do not perform the following actions Doing so may result in permanent data loss Do not open the memory card slot cover and do not remove the memory card Do not disconnect the USB cable Do not turn off the camcorder or the computer Do not change t...

Page 83: ...is transferred and displayed on the computer To continue transferring select another image WALLPAPER The selected image is transferred to the computer and displayed as the desktop s background The IN button will flash while the images are being transferred Press FUNC to return to the transfer menu AUTOMATIC TRANSFER OPTIONS When you select GALL IMAGES f NEW IMAGES or 00 TRANSFER ORDERS all the rel...

Page 84: ...6 seconds Connecting the Camcorder to the Printer Printing Still Images Direct Print The camcorder can be connected to any PictBridge compatible printer You can mark the still images you want to print and set the desired number of copies as a print order CD 87 Canon printers SELPHY printers of the CP DS and ES series and PIXMA printers marked with the PictBridge logo CO 12 FUNC FUNC ICARD OPERATIO...

Page 85: ...Print effect Date printing O PAPER SIZE Available paper sizes vary depending on the printer model PAPER TYPE Select PHOTO FAST PHOTO or DEFAULT l PAGE LAYOUT Select DEFAULT or one of the following available page layouts BORDERED Prints the whole image area almost exactly as the recorded still image BORDERLESS Enlarges the center portion of the still image to fit the width height ratio t f the sele...

Page 86: ...elected select STOP press 8 and retry printing Refer also to the printer s instruction manual for details If the error still persists and printing does not restart disconnect the USB cable and turn off the camcorder and the printer After a short while turn them on again set the camcorder to fYi _1Br gr J mode and restore the connection WHEN YOU HAVE FINISHED PRINTING Disconnect the cable from the ...

Page 87: ... 4 Y the trimming frame 4 After setting the trimming frame press IFUNC to return to the print menu CDNOTES About the color of the trimming frame White No trimming settings Green Recommended trimming size The size of the trimming frame may differ depending on the image size paper size or borders settings The trimming setting applies only to one image The trimming setting is canceled in the followin...

Page 88: ...hat PRINT is selected and press 0 Printing starts The print setting menu disappears when the printing is completed Depending on the connected printer you can change some print settings before step 4 OJ 85 Cancel Printing Printing Errors OJ 86 Restarting Printing Open the print settings menu as explained in steps 2 3 above In the print settings menu select RESUME and press 0 The remaining images wi...

Page 89: ...harging will start once the battery pack temperature is below 40 C 104 OF The battery pack is damaged Use a different battery pack Recording Playback Problem Solution OJ Buttons will not work Turn on the camcorder Load a cassette 22 Abnormal characters appear on Disconnect the power source and reconnect it after a short time the screen The camcorder If the problem still persists disconnect the pow...

Page 90: ... seem slightly warped Recording Problem Solution OJ Image will not appear on the Set the camcorder to f i l1 lI 28 screen SET THE TIME ZONE DATE Set the time zone date and time 26 AND TIME appears on the Recharge the built in lithium battery and set the time zone date 98 screen and time Pressing the START STOP Set the camcorder to ICAMBA l22ll 28 button will not start recording Load a cassette 22 ...

Page 91: ...he COMPOUT setting There is no sound from the TV When connecting the camcorder to an HDTV using the 71 CTC 100 S Component Cable make sure to connect also the audio connections using the white and red plugs of the STV 250N Stereo Video Cable Text displays do not appear on If you connected the camcorder to the TV using the video 44 the TV component connection set DV OUTPUT to HDV DV Tape is running...

Page 92: ...the camcorder Remove and 70 reinsert the memory card Initialize the memory card if flashing persists Printing Problem The printer is not operating even though the camcorder and printer are correctly connected Editing Solution Disconnect the USB cable and turn off the camcorder and the printe After a short while turn them on again set the camcorder to P I tAYicgj mode and restore the connection OJ ...

Page 93: ... tape or replace the cassette INCORRECT TAPE You attempted to play back a tape recorded in a different television SPECIFICATION system PAL or SECAM or in a recording standard not supported by this camcorder INPUT SIGNAL NOT The digital device connected with the DV cable is incompatible with SUPPORTED the camcorder PLAYBACK STD LOCKED Current camcorder settings do not match the HDV DV standard of 4...

Page 94: ... to dub a copyright protected tape May also appear 78 DUBBING RESTRICTED when an anomalous signal is received during analog line in recording Direct Print Related Messages CD NOTES J About Canon PIXMAISELPHY OS Printers If the printer s error indicator flashes or an error message appears on the printer s operation panel refer to the printer s instruction manual Message Explanation Solution PAPER E...

Page 95: ...y and turn it back on COMMUNICATION The printer is experiencing a data transfer error Cancel printing ERROR Disconnect the USB cable and turn off the camcorder and the printer After a short while turn them on again set the camcorder to PLAyA 9 1 mode and restore the connection When you are printing using the IV button check the print settings Or you attempted to print from a memory card that conta...

Page 96: ...e it to temperatures higher than 60 C 140 OF Do not leave it near a heater or inside a car in hot weather Do not try to disassemble or modify it Do not drop or knock it Do not get it wet Charged battery packs continue to discharge naturally Therefore charge them on the day of use or the day before to ensure a full charge Attach the terminal cover whenever a battery pack is not in use Contact with ...

Page 97: ... stored for a long time Do not leave the cassette in the camcorder after use Do not use spliced tapes or nonstandard cassettes as they may damage the camcorder Do not use tapes that have been jammed as video heads may become dirty Do not insert anything into the small holes of the cassette or cover them with cellophane tape Handle cassettes with care Do not drop or subject them to severe impact as...

Page 98: ...ce immediately The battery case may break and the battery fluids may cause internal injuries Keep the battery out of the reach of children Do not recharge short circuit or insert the battery in the wrong direction Dispose of the used battery according to applicable recycling regulations Do not pick up the battery using tweezers or other metal tools as this will cause a short circuit Wipe the batte...

Page 99: ...dry cloth to clean the camcorder body Never use chemically treated cloth or volatile solvents such as paint thinner Lens and Viewfinder If the lens surface is dirty the autofocus may not work properly Remove any dust or dirt particles using a non aerosol type blower brush Use a clean soft lens cleaning cloth to gently wipe the lens or viewfinder Never use tissue paper LCD Screen and I AF sensor Cl...

Page 100: ...ected RESUMING USE The precise time required for water droplets to evaporate will vary depending on the location and weather conditions After the condensation warning stops flashing wait for 1 more hour before resuming use Using the Camcorder Abroad Power Sources You can use the compact power adapter to operate the camcorder and to charge battery packs in any country with power supply between 100 ...

Page 101: ...ard DV Cable miniSD Card Adapter STV 250N Stereo Video Cable e _ J CTC 100 Component Cable _ i DTC 100 0 Terminal Cable mi C I _ _W _ u x r _ _ IFC 300PCU USB Cable The BP 2L13 Battery Pack supplied with the camcorder is black BP 2L13 Battery Packs sold separately are available in gray only MiniDVVideo cassette s OM 50 Directional Stereo Microphone Stereo Microphone 4 commercially available SS 600...

Page 102: ...non genuine Canon accessories although you may request such repairs on a chargeable basis Battery Packs When you need extra battery packs select one of the following models BP 2L13 BP 2L14 NB 2LH BP 2L24H CB 2LW Battery Charger Use the battery charger for charging the battery packs It plugs directly into a power outlet without a cable Battery Pack NB 2LH BP 2L13 BP 2L14 BP 2L24H Charging Time 90 m...

Page 103: ... s advanced accessory shoe for cable free operation Q Q 3 o 3 Q 0 o 3 DM 50 Directional Stereo Microphone This highly sensitive super directional microphone attaches to the camcorder s advanced accessory shoe It can be used as directional microphone monaural or stereo microphone Using the viewfinder to record video when the OM 50 is attached may prevent you from enjoying the full capabilities of t...

Page 104: ...th of the strap WS 20 Wrist Strap Use this for extra additional protection for active shooting SC 2000 Soft Carrying Case A handy camcorder bag with padded compartments and plenty of space for accessories This mark identifies genuine Canon video accessories When you use Canon video equipment we recommend Canon brand accessories or products bearing the same mark ...

Page 105: ...y Pack 9582A002AA BP 2L24H Battery Pack 2383B002AA CB 2LW Battery Charger 0763B001 AA TL H43 Tele converter 2071 B001 AA WD H43 Wide converter 2072B001 AA FS 43U nFilter Set 7150A004AA VFL 1 Video Flash Light 8834A001AA VL 3 Video Light 3175A002AA OM 50 Directional Stereo Microphone 3176A002AA CTC 100 Component Cable 1719BOO1AA WS 20 Wrist Strap 1729B001AA SC 2000 Soft Carrying Case 9389A001 AA DV...

Page 106: ...tive pixels Movies 16 9 approx 2 070 000 Movies 4 3 approx 1 550 000 Still images LW approx 2 070 OOO Still images L M S approx 2 760 000 2 7 in wide TFT color approx 211 000 dots 0 27 in wide TFT color approx 123 000 dots Stereo electret condenser microphone f 6 1 61 mm F 1 8 3 0 10xpowerzoom 35 mm equivalent Movies 16 9 Movies 4 3 Still images LW Still images L M S 11 elements in 9 groups 43mm A...

Page 107: ... DV Terminal COMPONENT OUT Terminal HOMI Terminal MIC Terminal Power Others Power supply rated Power consum ption HDV AF on Operating temperature Dimensions W x H x D Weight camcorder body only Power supply Power consumption Rated output Operating temperature Dimensions Weight 03 5 mm minijack dual purpose terminal also for headphones stereo output Video 1 Vp p 75 ohms unbalanced Audio output 10 d...

Page 108: ...ity Dimensions Weight Rechargeable Lithium Ion Battery 7 4 V DC 0 40 C 32 104 OF 1 200 mAh 33 3 x 25 8 x 45 2 mm 1 3 x 1 0 x 1 8 in 60 g 2 1 oz Weight and dimensions are approximate Errors and omissions excepted The information in this manual is verified as of February 2009 Subject to change without notice ...

Page 109: ...gram 48 49 Compact power adapter 20 COMPONENT OUT terminal 71 Component video 43 72 Condensation 99 Connection to a computer 80 Connection to a High Definition TV HDTV 72 Connection to a TVNCR 71 Continuous shooting 60 CUSTOM key 61 m Data code 61 Date and time 27 Date search 34 Daylight saving time 26 Digital effects 67 Digital video input DV dubbing 77 Digital zoom 39 Direct print 84 Direct tran...

Page 110: ... images 29 Recording data 62 Recording programs 48 Recording reminder 18 Remaining tape indicator 18 Remote sensor 23 RESET 89 Reviewing Movies Record review 28 Reviewing Still images 41 n Screen displays 17 Screen markers 45 Selecting the on screen displays 61 Self timer 64 Serial number 14 Setup menus 25 39 Shoulder strap 104 Shutterspeed 50 Simultaneous recording tape memory card 57 Slideshow 3...

Page 111: ... General Information II m White balance 54 Wide angle 30 Wide TV 16 9 43 Wind screen 41 Wireless controller 23 o Zero set memory 33 Zoom 30 Zoom speed 39 c C o s Q s o 3 Q o s ...

Page 112: ...se mishandling accident improper maintenance or failure to follow operating instructions B If the Equipment is defective as a result of leaking batteries sand dirt or water damage C If defects or damages are caused by the use of unauthorized parts or by service other than by Canon USA s factory service centers or authorized service facilities D If the Equipment is used for commercial or industrial...

Page 113: ...apply to Equipment purchased outside Canada If the Equipment contains a hard disk drive Canon Canada recommends that data stored on that drive be duplicated or backed up to prevent its loss in the event of a failure or other malfunction of such drive TO OBTAIN WARRANTY SERVICE Ship your Equipment in its original carton box or equivalent properly packed fully insured with shipping charges prepaid t...

Page 114: ......

Page 115: ... INC MONTREAL 8801 Route Transcanadienne Saint Laurent QC H4S 1Z6 If you have any questions call the Canon Canada Information Center toll free in Canada only at 1 800 0K CANON 1 800 652 2666 Si vous avez des questions veuillez tE lephoner1 800 0K CANON 1 800 652 2666 sans frais au Canada seulement CANON MEXICANA S DE RL DE CV Blvd Manuel Avila Camacho No 138 Piso 17 Col Lomas de Chapultepec C P 11...

Page 116: ...eck that the camcorder is not connected to the computer 2 Set the DIGITAL VIDEO Solution Disk in the computer s CD ROM drive 3 Select your country region and language 4 Click Easy Installation under Digital Video Software o To specify the installation folder click Custom Installation 1 Verifiez que Ie camescope n est pas connecte a I ordinateur 2 Mettez Ie disque DIGITAL VIDEO Solution Disk dans I...

Page 117: ...ck Install under Digital Video Software 1 Fermez tous les programmes en cours d execution et verifiez qu aucun camescope n est connecte a I ordinateur 2 Mettez Ie disque DIGITAL VIDEO Solution Disk dans Ie lecteur de CD ROM de I ordinateur 3 Double liquez sur I icone du CD ROM et sur I icone Canon Digital Video Installer 4 Selectionez votre pays ou votre region S Cliquez sur Installer du Logiciel ...

Page 118: ......

Page 119: ... pas lire les enregistrements realises au standard HDV ou que durant leur lecture vous pourriez noter de breves interruptions C est cause habituellement par des particules de poussieres accumulees et attachees aux t tes video Dans ce cas essayez une des actions suivantes Nettoyez les tetes video avec une cassette de nettoyage Assurez vous d utiliser des cassettes video recommandees pour I enregist...

Page 120: ...ette carte de garantie et attachez Ia avotre facture I MODEL I SERIAL NO Date of Purchase MODELE NQ DE SERlE Date d achat Purchaser s Name Nom d acheteur VIXIA HV40 A KIT Address Adresse Dealer s Name Nom de marchand Address Adresse Model DIGITAL VIDEO CAMCORDER Modele CAMESCOPE ET LECTEUR VIDEO DIGITAL warranty coverage is subject to the country where the unit La garantie en vigueur dans Ie pays ...

Page 121: ...E ADD ESS __ _ CITY STATE c _ _ _ ZIP CODE ...

Reviews: