User Manual of Network Video Recorder
144
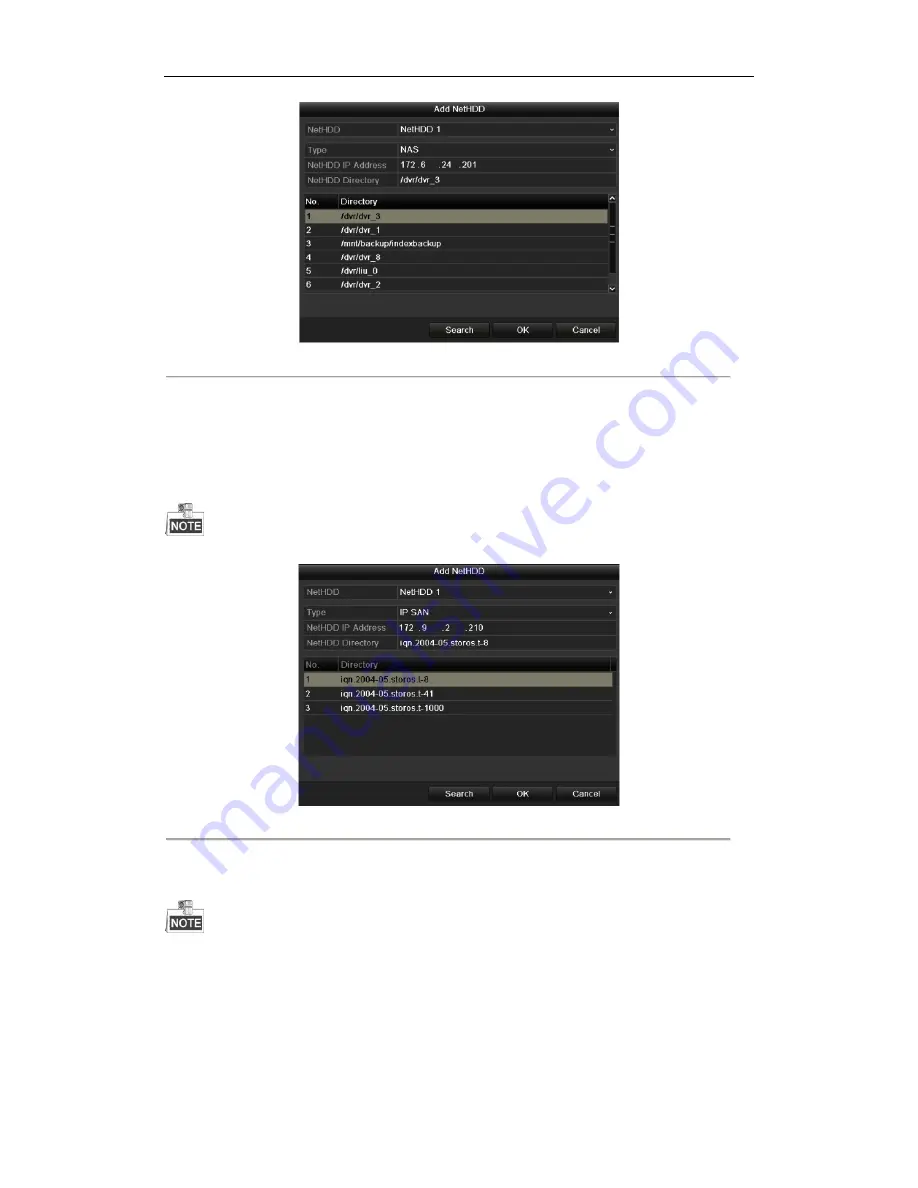
Figure 10. 8
Add NAS Disk
•
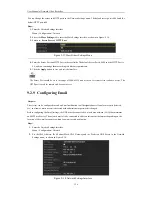
Add IP SAN:
1)
Enter the NetHDD IP address in the text field.
2)
Click the
Search
button to search the available IP SAN disks.
3)
Select the IP SAN disk from the list shown below.
4)
Click the
OK
button to add the selected IP SAN disk.
Up to 1 IP SAN disk can be added.
Figure 10. 9
Add IP SAN Disk
6.
After having successfully added the NAS or IP SAN disk, return to the HDD Information menu. The added
NetHDD will be displayed in the list.
If the added NetHDD is uninitialized, please select it and click the
Init
button for initialization.
Summary of Contents for NR310-16
Page 1: ...Network Video Recorder User Manual ...
Page 12: ...User Manual of Network Video Recorder 11 List of Compatible IP Cameras 186 ...
Page 13: ...User Manual of Network Video Recorder 12 Chapter 1 Introduction ...
Page 22: ...User Manual of Network Video Recorder 21 Chapter 2 Getting Started ...
Page 37: ...User Manual of Network Video Recorder 36 Chapter 3 Live View ...
Page 46: ...User Manual of Network Video Recorder 45 Chapter 4 PTZ Controls ...
Page 57: ...User Manual of Network Video Recorder 56 Chapter 5 Recording Settings ...
Page 76: ...User Manual of Network Video Recorder 75 Chapter 6 Playback ...
Page 93: ...User Manual of Network Video Recorder 92 Chapter 7 Backup ...
Page 106: ...User Manual of Network Video Recorder 105 Chapter 8 Alarm Settings ...
Page 122: ...User Manual of Network Video Recorder 121 Chapter 9 Network Settings ...
Page 141: ...User Manual of Network Video Recorder 140 Chapter 10 HDD Management ...
Page 146: ...User Manual of Network Video Recorder 145 Figure 10 10 Initialize Added NetHDD ...
Page 156: ...User Manual of Network Video Recorder 155 Chapter 11 Camera Settings ...
Page 160: ...User Manual of Network Video Recorder 159 Chapter 12 NVR Management and Maintenance ...
Page 171: ...User Manual of Network Video Recorder 170 Chapter 13 Others ...
Page 179: ...User Manual of Network Video Recorder 178 Appendix ...


