User Manual of Network Video Recorder
15
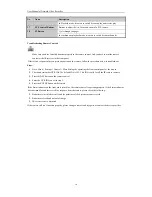
No.
Name
Description
On checkbox fields, pressing the button will
check
the checkbox.
In PTZ Control mode, the button adjusts the iris of the camera.
In Playback mode, it can be used to generate video clips for backup.
Enter/exit the folder of USB device.
5
A Button
Adjust focus in the PTZ Control menu.
It is also used to switch between input methods (upper and lowercase
alphabet, symbols and numeric input).
6
REC Button
Enter the Manual Record setting menu.
In PTZ control settings, press the button and then you can call a PTZ preset
by pressing Numeric button.
It is also used to turn audio on/off in the Playback mode.
7
PLAY Button
The button is used to enter the All-day Playback mode.
It is also used to
auto scan in the PTZ Control menu.
8
INFO Button
Reserved.
9
VOIP Button
Switch between main and spot output.
In PTZ Control mode, it can be used to zoom out the image.
10
MENU Button
Press the button will help you return to the Main menu (after successful
login).
Press and hold the button for 5 seconds will turn off audible key beep.
In PTZ Control mode, the MENU button will start wiper (if applicable).
In Playback mode, it is used to show/hide the control interface.
11
PREV Button
Switch between single screen and multi-screen mode.
In PTZ Control mode, it is used to adjust the focus in conjunction with the
A/FOCUS+ button.
12
DIRECTION Button
Navigate between different fields and items in menus.
In the Playback mode, the Up and Down button is used to speed up and slow
down recorded video. The Left and Right button will select the next and
previous record files.
In Live View mode, these buttons can be used to cycle through channels.
In PTZ control mode, it can control the movement of the PTZ camera.
ENTER Button
Confirm selection in any of the menu modes.
It can also be used to
tick
checkbox fields.
In Playback mode, it can be used to play or pause the video.
In single-frame Playback mode, pressing the button will advance the video by
a single frame.
13
PTZ Button
In Auto-switch mode, it can be used to stop /start auto switch.
14
ESC Button
Back to the previous menu.
Press for Arming/disarming the device in Live View mode.
15
RESERVED
Reserved for future usage.
16
F1 Button
Select all items on the list when used in a list field.
In PTZ Control mode, it will turn on/off PTZ light
(if applicable).
Summary of Contents for NR310-16
Page 1: ...Network Video Recorder User Manual ...
Page 12: ...User Manual of Network Video Recorder 11 List of Compatible IP Cameras 186 ...
Page 13: ...User Manual of Network Video Recorder 12 Chapter 1 Introduction ...
Page 22: ...User Manual of Network Video Recorder 21 Chapter 2 Getting Started ...
Page 37: ...User Manual of Network Video Recorder 36 Chapter 3 Live View ...
Page 46: ...User Manual of Network Video Recorder 45 Chapter 4 PTZ Controls ...
Page 57: ...User Manual of Network Video Recorder 56 Chapter 5 Recording Settings ...
Page 76: ...User Manual of Network Video Recorder 75 Chapter 6 Playback ...
Page 93: ...User Manual of Network Video Recorder 92 Chapter 7 Backup ...
Page 106: ...User Manual of Network Video Recorder 105 Chapter 8 Alarm Settings ...
Page 122: ...User Manual of Network Video Recorder 121 Chapter 9 Network Settings ...
Page 141: ...User Manual of Network Video Recorder 140 Chapter 10 HDD Management ...
Page 146: ...User Manual of Network Video Recorder 145 Figure 10 10 Initialize Added NetHDD ...
Page 156: ...User Manual of Network Video Recorder 155 Chapter 11 Camera Settings ...
Page 160: ...User Manual of Network Video Recorder 159 Chapter 12 NVR Management and Maintenance ...
Page 171: ...User Manual of Network Video Recorder 170 Chapter 13 Others ...
Page 179: ...User Manual of Network Video Recorder 178 Appendix ...


