7.
4
In
*
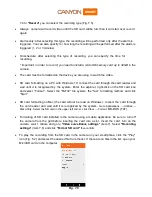
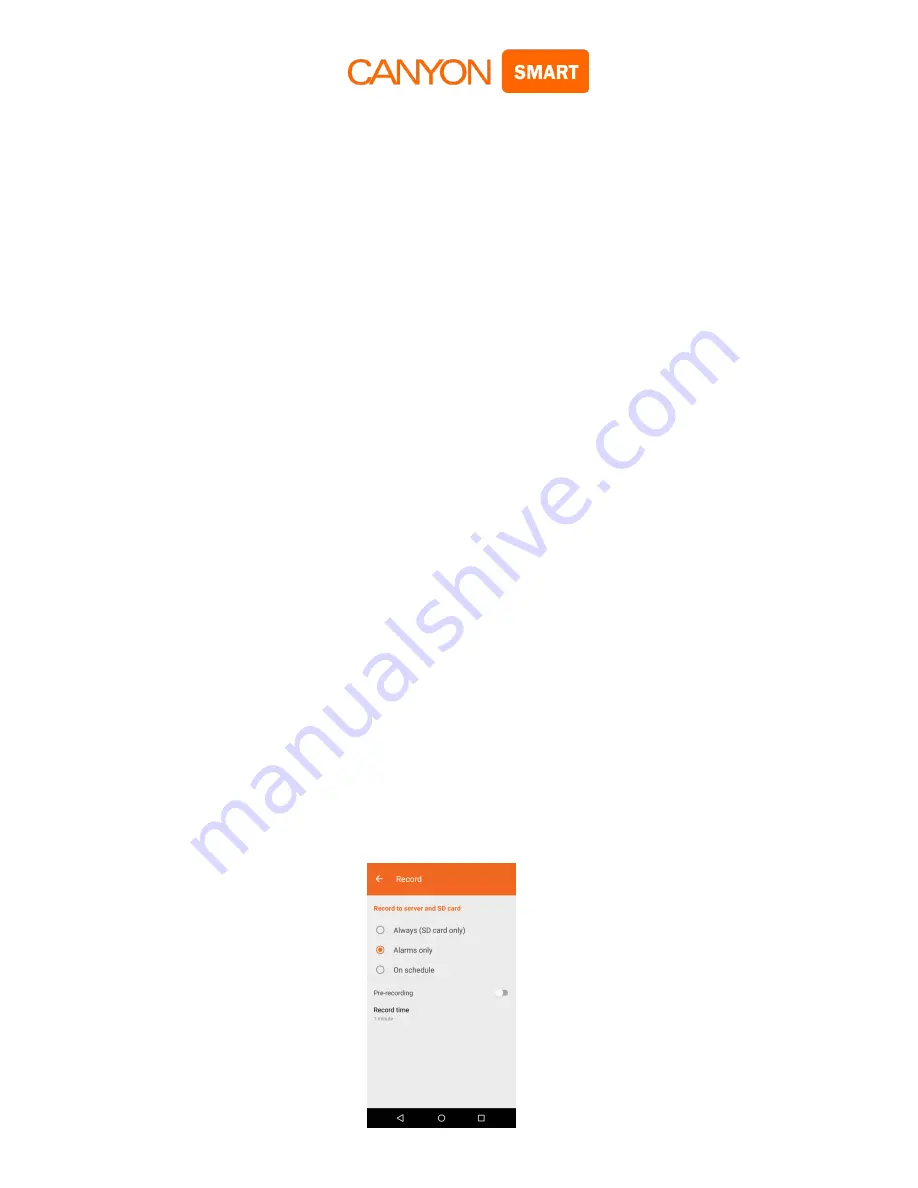
Record
*
you can select the recording type (Fig. 7.
5
).
Always
:
camera will record video until the SD card willbe full, then it will start over record
again
Alarm
s only
: after selecting this type, the recording will be performed only after the alarm is
triggered. You can also specify for how long the recording will be performed after the alarm is
triggered (1, 2 or 3 minutes).
On schedule
: after selecting this type of recording, you can specify the time for
recording.
* Important: in order to record, you need to install a microSD memory card up to 32GB in the
camera.
The card must be formatted on the device you are using to watch the video.
SD card formatting on a PC with Windows 10: connect the card through the card reader and
wait until it is recognized by the system. Enter the explorer, right-click on the SD card icon
and select
“Format”. Select the “FAT32” file system, the “fast” formatting method, and click
“Start”.
SD card formatting on Mac (the card will not be read on Windows): connect the card through
the card reader and wait until it is recognized by the system.
Go to Applications
→ Utilities →
Disk Utility.
Select the SD card in the upper left corner, click Clear
→ Format:
MS-DOS (FAT)
Formatting of SD card installed in the camera using a mobile application: be sure to turn off
the camera from the grid before inserting the card into a slot. Insert the card, turn on the
camera, wait 1 minute and go to
*Video surveillance settings*
(item 7). Select
*Recording
settings*
(item 7.6) and click
*Format SD card*
then confirm
.
To play the recording from the SD card in the camera on your smartphone, click the *Play*
icon (Fig. 5.2) and select the desired file from the list. If there are no files in the list, open your
MicroSD card on the computer.
Fig. 7.
5


