EN - 6
Getting Started
Connecting to Device
Please follow the steps below to connect the modem and PC(s) with CANYON
CNP-WFAP:
1.
Begin by searching for an appropriate location to setup device. Please keep
in mind to keep the device in the center of working area as the signal
strength and data transfer rate falls off with distance.
2.
It is also recommended to place device at a higher position to ensure
minimum obstacle interference.
3.
Make sure that all network devices are powered off, including the device
itself, PCs, switches, cable or DSL modem, and other peripherals.
4.
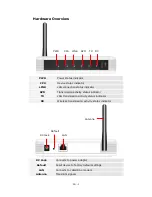
Connect the modem to WAN port of the device by one CAT 5 Ethernet
cable.
5.
Connect PC(s) with the LAN ports (PC1/PC2/PC3/PC4) of the device by CAT
5 Ethernet cables. One PC connects to only one port using one cable.
6.
Power on the cable or DSL modem.
7.
Plug in the power of the device. The Power status indicator at the front
panel of device will light up as soon as the power adapter is connected
properly.
8.
Power on PC(s).
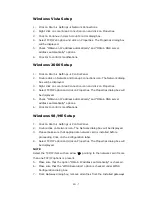
Windows XP Setup
1.
Click on Start
Æ
Settings
Æ
Control Panel.
2.
Click on Network and Internet Connections icon.
3.
Click on Network Connections
4.
Right click on Local Area Connection icon and click on Properties.
5.
Select TCP/IP option and click on Properties. The Properties dialog box will
be displayed.
6.
Check “Obtain an IP address automatically” and “Obtain DNS server
address automatically” options.
7.
Click Ok to confirm modifications.


