background image

- 9 - 

INSTALLATION INTO CABINET 

WARNING

The Warming Drawer is very heavy. Utilize sufficient manpower to lift the Warming Drawer into 
the required opening to prevent injury. A minimum of two persons is recommended. 

IMPORTANT

:  The door(s) must be removed prior to installation in the cabinet. This will prevent damage to the 

doors and reduce the weight of the Warming Drawer for installation. 

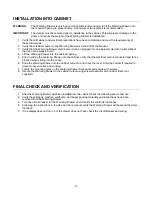
1.  Verify that all cabinet and electrical preparations have been completed and meet the requirements of 

these instructions. 

2.  Verify that electrical power to the Warming Drawer is turned off at the breaker. 
3.  Verify that the Warming Drawer electrical cord can be plugged into an approved electrical outlet without 

the use of an extension cord. 

4.  Lift the Warming Drawer into the cabinet opening. 
5.  Prior to sliding the Warming Drawer into the cabinet, verify that the electrical cord is connected and is not 

pinched when sliding into the cavity. 

6.  Slide the Warming Drawer into the cabinet cutout so and check the level. Shim the bottom if required to 

prevent uneven cakes and cooking. 

7.  Locate the mounting holes on the Warming Drawer front panel and secure with screws. 
8.  Secure the Warming Drawer to the cabinet cutout using screws that will match cabinet finish (not 

supplied). 


FINAL CHECK AND VERIFICATION 

1.  After the Warming Drawer has been installed into the cabinet check the following prior to first use: 
2.  Verify that all tapes, plastics, cardboard, and paper packing materials and instructions have been 

removed from the Warming Drawer. 

3.  Turn the circuit breaker for the Warming Drawer on and verify the control is functional. 
4.  Following the instructions in the Use and Care manual verify the Warming Drawer will heat and the timer 

functions. 

5.  If the display does not turn on or the drawer does not heat, check the circuit breaker and wiring.  

Summary of Contents for MAESTRO MWD30EST

Page 1: ...CAPITAL COOKING EQUIPMENT MAESTRO WARMING DRAWER INSTALLATION INSTRUCTIONS MODEL MWD30EST...

Page 2: ...valuable guide to help you better understand your Capital Cooking appliance Since your satisfaction is our topmost priority please feel free to contact our service experts You may reach us toll free a...

Page 3: ...5 PLANNING THE INSTALLATION 6 Cabinet Cutout Diagrams 6 Dimension Summary Table 7 UNPACKING AND HANDLING 8 ELECTRICAL WIRING INSTALLATION 8 Electrical Requirement Summary Table 8 INSTALLATION INTO CA...

Page 4: ...ce or installation 8 This product is to be used only for tasks expected of a home appliance This product is not intended for commercial use 9 Do not climb or sit on any part of the appliance 10 Do not...

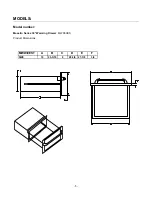
Page 5: ...5 MODELS Model number Maestro Series 30 Warming Drawer MWD30ES Product Dimensions MWD30EST A B C D E F SIZE 10 23 3 16 9 29 3 4 27 3 8 3 4...

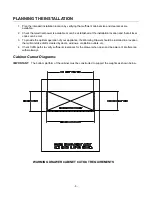
Page 6: ...3 To provide the optimal operation of your appliance the Warming Drawer should be installed in a location that will minimize drafts created by doors windows ventilation outlets etc 4 Check traffic pat...

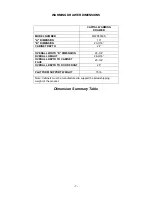
Page 7: ...SION 23 3 16 CABINET DEPTH 24 OVERALL WIDTH D DIMENSION 29 3 4 OVERALL HEIGHT 28 9 16 OVERALL DEPTH TO CABINET FACE 23 3 4 OVERALL DEPTH TO DOOR FRONT 25 PLATFORM SUPPORT WEIGHT 75 lb Note Cabinets mu...

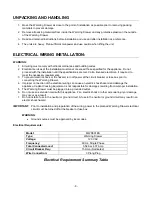
Page 8: ...power at the circuit breaker or fuse box prior to connecting the Warming Drawer 4 Improper connection of the electrical wiring can cause an electric shock hazard and damage the appliance Capital Cook...

Page 9: ...er into the cabinet verify that the electrical cord is connected and is not pinched when sliding into the cavity 6 Slide the Warming Drawer into the cabinet cutout so and check the level Shim the bott...

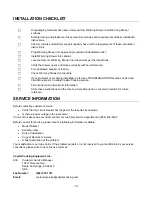
Page 10: ...alling Capital Cooking service F Fill out and return all warranty information F Store these instructions and the Use and Care Manual in a convenient location for future reference SERVICE INFORMATION B...

Page 11: ...plied warranty shall not extend beyond the duration of this written warranty This warranty is in lieu of all warranties expressed or implied and all other obligations or liability in connection with t...

Page 12: ...12 NOTES...

Page 13: ...DATE INFORMATION CONTACT CAPITAL COOKING EQUIPMENT INC INDICATING THE MODEL NUMBER WE RESERVE THE RIGHT TO CHANGE THESE SPECIFICATIONS OR DESIGN WITHOUT NOTICE THE POWER OF PERFORMANCE TM Capital Coo...

Reviews: