3
step 1: unpacking, moving and placing the range
CAUTION!
Proper equipment and adequate manpower
must be used in moving the range to avoid
damage to the unit or the floor. The unit is
heavy and rests on stainless steel legs.
WARNING!
DO NOT lift the range by the oven door handles!
DO NOT remove the griddle and grill sections!
1) Remove the outer carton and packing
materials from the shipping base. The all gas
ranges are held to the skid by four (4) bolts.
After removing the bolts the range must be
lifted and removed from the skid.
2) It is strongly recommended that after removing
the packing material, remove the door(s), top
grates, oven racks, front kick plate and drip
pan(s) to facilitate lifting and easier handling.
3) To remove door, open the door completely,
close the hinge latches and release the door.
Remove door by lifting and pulling.
4) Support the range uniformly across the bottom
5) Lift the range from the skid with a soft
wheel dolly.
6) Remove the angle mounting brackets from
range. This requires the installer to remove two
screws holding each bracket, then remove
bracket and reinstall screws.
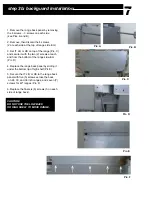
7) Make sure gas and electric connections
are made, anti-tip device is installed, and the
back guard installed prior to placing the
range in position.
8) Measure the height of the counter top and
adjust the range height to match countertop
height by adjusting front and rear leveling feet.
9) Slide the range in place and ensure that the
range is level.
10) Reinstall the kick plate, top grates, oven
door(s), drip pan tray(s), and make sure burner
caps are seated firmly and locked into position.
WEIGHT:
24” Range = 295 lbs
30” Range = 350 lbs
36” Range = 450 lbs
48” Range = 595 lbs
We're here for you
If you have any questions about this section,
please call us at 1-866-402-4600, and a
Performance Series™ Customer Service
Specialist will be glad to help answer any
questions you may have.


