ASSEMBLY
STANDARD LEGS:
Attach the legs if required. We suggest that the two legs
with fixing holes be fitted to the back of the stove, for neater appearance. If the
hearth is uneven, fit one or more washers between any leg and the stove body
to lengthen it. Fix the stove down to the hearth, through the legs, using the
screws and plugs provided.
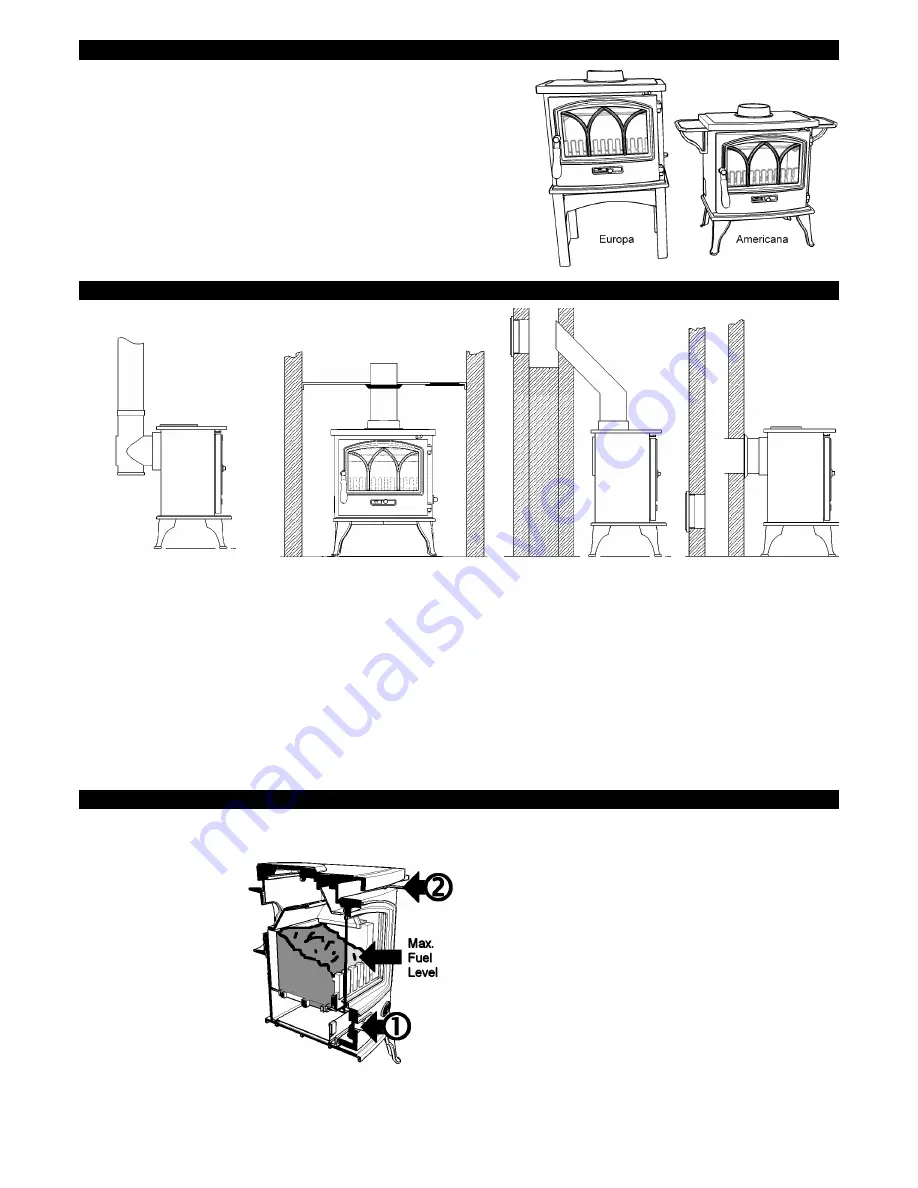
'AMERICANA' COOKTOP KIT OPTION
(supplied separately)
:
Remove the two
bolts located to the left and right inside the underneath of the standard top.
Remove and discard the standard top, taking care not to damage the fibre seal.
Fit the 'wings' to the cooktop and bolt the whole assembly back onto the stove
body. Do not over tighten.
'EUROPA' HI-LEG KIT OPTION
(supplied separately)
:
Assemble the left, and
right hi-legs
loosely
to the central bridging member. Attach to the underside of
the stove using the bolts supplied before fully tightening. Note the 'Installation
Clearances' on page 1. When used as a log store, logs must not be placed
higher than the central 'bridging' member.
FITTING
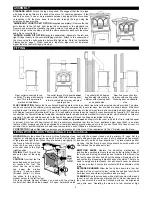
Rear outlet connected to top
outlet by 'T' piece with cleaning
door. This is the preferred
method of installation.
Top outlet through fully-sealed
steel
closure plate (fitted with cleaning door)
into old, oversized, chimney with steel
sealing collar.
Top outlet with 45 degree
bend sealed into masonry
chimney with cleaning door
on opposite side.
Rear flue connection into
chimney with sealing collar.
Cleaning door on opposite
side.
FLUE CONNECTION:
Fasten the flue outlet and blanking plate to the top or back flue outlet with screws and nuts provided. The stove
can be connected to the chimney (using approved flue pipe components) in several ways, four of which are shown above. Whichever
method is used it is imperative that: (1) The route for gases from the stove to the chimney terminal is completely air-tight; seal all joins
with fireproof cement and/or heatproof rope. (2) It is possible to sweep the entire length- access doors may be required. (3) The entire
construction is of durable fireproof materials- composite board is
not
a suitable material for closure plates, which should be of steel or
concrete. The stove should be secured to the hearth by screwing through the fixing holes drilled in the legs.
AIR SUPPLY
The stove needs air to breathe - there
must
be a
permanent
air supply into the room in which the fire is installed equal
to at least 5.5cm² per kW heat output. While it is commonly accepted that this air for an appliance below about 5kW in an older
(before c1980) property can often be supplied by air naturally leaking around windows etc, in any case of doubt fit a fixed air vent. An
extractor fan, or another fireplace or heater can remove this air, even if fitted in a different room.
CO DETECTOR
Carbon Monoxide is a poisonous gas, produced by this stove. It is a requirement to fit a CO alarm near the stove.
LIVING WITH A SIRIUS TRADITIONAL Clean Burn Stove
LIGHTING
Empty the ashes. Place two or three firelighters close
together, or screwed-up paper covered with dry sticks, at the back
of the grate and light them. When they are burning well gently fill
the fire
very full
with dry fuel,
close the door and set the
air control slide to the 'high'
(right) position.
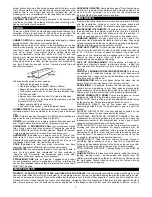
FILLING:
Don't fill with fuel
above the level of the lining
bricks.
CONTROL
How fast the fire
burns depends on how much
air reaches the fuel. The
stove has two air controls,
one below the window
('primary'
) and one above
('airwash control'
). Move
the slides to the right for
highest output, to the left for 'low'.
Our tests indicate highest efficiency on wood with the primary
control all but closed and the airwash 2/3 open. Anthracite works
best with the airwash closed and the primary 1/3 open. But the
best settings will depend on your fuel, air supply and flue draught
and can only be found from experience. To prevent castings from
cracking, the first fire lit in your stove should be small- made with
little fuel and the air slide set to 'low'.
EMPTYING ASHES
Operate the de-ashing mechanism by
locating the operating tool onto the boss on the right-hand side of
the stove and moving it backwards and forwards a few times. Use
the tool to open the door and lift out the ashpan. Remember to let
ash cool before disposing in plastic sacks or dustbins. There is no
need to empty every last speck, but ash should never be allowed
to build up so that it comes into contact with the underside of the
grate.
EXTENDED BURNING
Allow the fire to burn down to a low, hot
firebed. Set the air control to 'low', empty the ash and fully fill with
hard fuel such as anthracite (smaller sizes are best).
CLEANING
Wipe the stove body with a slightly damp cloth when it
is cool, don't use abrasives, metal polish or 'cream' cleansers as
they can scratch the surface. Polished parts can be brightened
using wire wool. Operating the stove for a few minutes at high
2


