background image

Instruction manual C3371

Instruction manual C3371

18

19

Please keep this instruction manual for future reference 

Please keep this instruction manual for future reference 

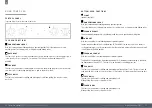
C O O K I N G   G U I D E L I N E S


-

Set the function for the type of cooking required.


-

 Preheat the oven, setting the thermostat to the required temperature. Once the oven has heated 
to the selected temperature, the orange warning light will go out.


-

 This same light will appear again automatically during operation of the oven to indicate that the 
heating elements are on.


-

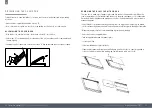
 Remove the drip tray when using the oven for conventional cooking, roasting etc. The tray should 
be left in place only when using the grill, as its purpose is to catch falling droplets of fat. Food 
should be placed in oven dishes with raised edges and positioned centrally under the grill. 


-

 If the fan heat operation is selected, different foods can be cooked simultaneously (e.g. meat and 
fish), although in this case the respective cooking time must be observed.

C O O K I N G 
F U N C T I O N

F O O D   T Y P E

S H E L F 
P O S I T I O N

T E M P E R AT U R E 
( ˚ C )

T I M E
( M I N S ) 

Conventional 

cooking

Yorkshire Pudding
Sponge Cake Small Cakes
Fruit Tart
Scones 
Fruit Cake

1
1
2
1
2
1

200
180
190
200
220
140

30-40
25-30
15-20
40-45
10-15
120-180

Grilling
(Top oven)

Pork chops (4 pcs)
Sausages (6 pcs)
Toast (6 pcs)

3
3
3

225
225
225

Side 1

Side 2

12
6
1

10
5
1

Grilling
(Main oven)

Pork chops (4 pcs)
Steak (4 pcs)
Sausages (6 pcs)
Toast (6 pcs)

5
5
5
5

250
250
250
250

Side 1

Side 2

15
10
9
1

12
8
6
1

T E M P E R AT U R E S  A N D  T I M E S   F O R   M A I N   OV E N   C O O K I N G

D I S H E S

T E M P E R AT U R E   ( ˚ C )

T I M E
( M I N S ) 

SWEET
Short pastry flan
Fruit pie/tart
Shortcake biscuits
Savoury biscuits

200
200
200
200

190
190
190
190

8-10
25-35
10-15
15-20

MEAT
Slow roast
Quick roast
Meat loaf

175
200
200

170
190
190

12-15
12-15
30-40

POULTRY
Duck 1.5-2kg
Goose 3 kg
Roast chicken
Turkey 5kg

200
200
200
175

170
180
190
150

120-180
150-210
60-90
240

GAME
Hare 
Haunch of venison

200
175

180
175

60-90
90-180


-

 Frozen meat should be thoroughly thawed before cooking. For large joints it is advisable to  
thaw overnight.


-

 Frozen poultry should be thoroughly thawed before cooking, the time required depends on the 
size of the bird e.g. a large turkey may take up to 48 hours to thaw.


-

Adjust the shelf position so the meat or poultry will be in the centre of the oven.


-

 The times given in the roasting guide are only approximate because the size and age of the bird 
will influence cooking times as will the shape of a joint and the proportion of bone.

Summary of Contents for C3371

Page 1: ...Sense Built In Electric Double Oven Instruction Manual C3371 Contact Caple on 0117 938 7420 for spare parts or www caple co uk ...

Page 2: ...from 8 years and above Persons with reduced physical sensory or mental capabilities or lack of experience and knowledge must be supervised and given appropriate instruction concerning the use of the appliance in a safe way and understand the hazards involved Children shall not play with the appliance Cleaning and user maintenance should not be carried out by children without supervision The applia...

Page 3: ...r to installation ensure that the local distribution conditions electricity voltage and frequency and the requirements of the appliance are compatible The requirements for this appliance are stated on the rating label This appliance is designed only for cooking food and is intended for indoor use This product is not designed for commercial use it is a household appliance only It is not intended to...

Page 4: ...p back to avoid the hot steam coming out of the oven as there may be a risk of burns Do not put flammable or combustible materials in or near the appliance when it is operating Always use oven gloves to remove and replace food in the oven Pay close attention to the oven while cooking with solid or liquid oils as they could potentially catch fire when oven is hot Never pour water on flames that are...

Page 5: ...ment WEEE By ensuring this product is disposed of correctly you will help prevent potential negative consequences for the environment and human health which could otherwise be caused by inappropriate waste handling of this product The symbol on the product indicates that this product may not be treated as household waste Instead it shall be handed over to the applicable collection point for the re...

Page 6: ...ant Particularly when the adjoining furniture is made of veneered wood the adhesives should be able to withstand a temperature of 120 C Plastic materials or adhesive which cannot withstand this temperature will become deformed or unstuck To comply with safety regulations once the appliance has been fitted it should not be possible to make contact with the electrical parts All parts which offer pro...

Page 7: ...t be connected to terminal has to be approximately 10mm longer than the other wires the blue neutral wire has to be connected to the terminal marked with letter N Black brown red live wires have to be connected to terminal L Mains connection can also be made by fitting double pole switch with a minimum gap between the contacts of 3mm proportionate to the load and complying with the regulations in ...

Page 8: ...lectrical supply If the electrical supply is different from the value given above call Caple Service immediately Wiring of the appliance must be performed by a qualified installer electrician The earth cable must be connected via the terminal screw with the earthing mark Supply cable connection must be as shown in the diagram If there is no earthed outlet conforming to regulations in the installat...

Page 9: ...eating elements operate together This is the traditional cooking method perfect for roasting joints cooking pastry and baking cakes TURBO DEFROST The air at ambient temperature is distributed inside the oven to speed up defrosting time FAN HEAT Both the fan and the circular heating element operate together The fan evenly distributes the hot air between 50 C and MAX inside the oven This is ideal fo...

Page 10: ...cones Fruit Cake 1 1 2 1 2 1 200 180 190 200 220 140 30 40 25 30 15 20 40 45 10 15 120 180 Grilling Top oven Pork chops 4 pcs Sausages 6 pcs Toast 6 pcs 3 3 3 225 225 225 Side 1 Side 2 12 6 1 10 5 1 Grilling Main oven Pork chops 4 pcs Steak 4 pcs Sausages 6 pcs Toast 6 pcs 5 5 5 5 250 250 250 250 Side 1 Side 2 15 10 9 1 12 8 6 1 TEMPERATURES AND TIMES FOR MAIN OVEN COOKING DISHES TEMPERATURE C TIM...

Page 11: ...ts cooked in foil and for lidded casseroles add 5 minutes per 450g 1lb to the calculated cooking time Smaller joints weighing less than 1 25 kg 2lb may require 5 minutes per 450g 1lb extra cooking time TOUCH CON T ROL E LE C T RON I C T I ME R SETTING AND CHANGING THE CURRENT TIME NOTE The oven only operates when the time has been set When the appliance has been connected to the electrical supply ...

Page 12: ...ook time indicator flashes Using the or button set the required cooking time After approx 5 seconds the display returns to the current time The cook time indicator will light up When the time has elapsed the cook time indicator will flash an acoustic signal will sound for 2 minutes and the oven will switch itself off Press any button to switch the signal and the programme off END TIME Press select...

Page 13: ...your hands WARNING Ensure the appliance is disconnected from the mains before replacing the light to avoid the possibility of an electric shock REPLACING THE OVEN LIGHT Switch off your oven at the mains Remove the glass cover by unscrewing this from the light socket Remove the light bulb by pulling it from the light socket and replace it with a similar bulb Remount the glass cover and reconnect th...

Page 14: ...ain REMOVING THE GLASS FROM THE DOOR The oven door is made up of 3 panes of glass and has vents at the top and bottom When the oven is operating air is circulated through the door to keep the outer pane cool If condensation has worked its way in between the glass panes the door can be dismantled in order to clean in between the panes Remove the door as per above instruction and place it on a prote...

Page 15: ...OV EN S HELVES Ensure shelf orientation is correct see image to the right Slide into the oven at an angle until raised back of shelf is past the safety stop on the side runners Lower the front of shelf and push in until stop is reached To remove oven shelves withdraw to the stop and raise the front of shelf to clear the stop Fig 1 Fig 2 F2 F1 To install align the 2 top holes in the catalytic liner...

Page 16: ...ight 888mm Width 595mm Depth 546mm Usable volume 40ltr and 61ltr Rated Voltage 220 240V TOP OVEN NOMINAL ELECTRICAL INPUT IN W TOLL 5 10 Top outside heating element 750W Top inside heating element 1000W Bottom heating element 1050W Light 15 25W Maximum electrical input 1820W 230V MAIN OVEN NOMINAL ELECTRICAL INPUT IN W TOLL 5 10 Top outside heating element 1000W Top inside heating element 1900W Ci...

Page 17: ...Caple Service Fourth Way Avonmouth Bristol BS11 8DW T 0117 938 1900 E service caple co uk www caple co uk ...

Reviews: