background image

SAFETY 

Precautions before using 

  Unpack the hob and all associated components, taking care not to 

lose or mishandle any parts. 

  The appliance must be installed by a suitably qualified professional 

and  connected  to  the  electricity  supply  by  a  qualified  electrician 
who will comply with the local regulations. The manufacturer cannot 
be  held  responsible  for  damage  caused  by  wrong  installation  or 
connection. 

  The appliance must be installed in a purpose-designed kitchen unit 

and worktop cut out as specified below. 

  This  hob  has  been  designed  for  use  only  as  a  domestic  cooking 

appliance. Any other use is potentially dangerous and will invalidate 
the guarantee. 

  Remove all labels and other packaging materials from the ceramic 

surface prior to use. 

  Do not modify the appliance in any  way as this will invalidate the 

guarantee and is potentially dangerous. 

  The  hob  must  not  be  used  as  a  freestanding  appliance  or  as  a 

worktop.  

  This  appliance  must  be  connected  to  the  electricity  supply 

according to the local regulations. It must be suitably earthed. 

  Do not use any extension cable to connect the hob. 

  This appliance must not be installed above a dishwasher or tumble 

dryer as steam may damage the electronic components. 

  This  appliance  must  not  be  controlled  by  external  tools  like 

separate timer or separate remote control system. 

Summary of Contents for C876I

Page 1: ...Instruction manual for induction hob Model code C876I Contact Caple on 0117 938 7420 or for spare parts www caple co uk ...

Page 2: ...Dear customers Congratulations on your purchase of a Caple induction hob In order to make the best use of your appliance please carefully read the following use and care manual and keep it for reference ...

Page 3: ... AND APPLIANCE MANAGEMENT 11 BEFORE USING YOUR NEW INDUCTION HOB 11 HOW INDUCTION WORKS 11 TOUCH CONTROL 11 POWER SELECTION ZONE SLIDER AND TIMER SETTING ZONE 11 RESIDUAL HEAT INDICATION 11 PAN DETECTION 12 STARTING UP 12 BOOSTER FUNCTION 12 TIMER 13 AUTOMATIC COOKING 14 PAUSE FUNCTION 14 RECALL FUNCTION 14 BRIDGE FUNCTION 15 KEEP WARM FUNCTION 15 CONTROL PANEL LOCKING 15 COOKING ADVICE 16 CHOOSIN...

Page 4: ...mestic cooking appliance Any other use is potentially dangerous and will invalidate the guarantee Remove all labels and other packaging materials from the ceramic surface prior to use Do not modify the appliance in any way as this will invalidate the guarantee and is potentially dangerous The hob must not be used as a freestanding appliance or as a worktop This appliance must be connected to the e...

Page 5: ...st not be placed on the hob as they may become hot Don t place any other metallic object than suitable pans on the hob In case of untimely activation or residual heat metallic object may become hot melt or even burn Never cover the hob with any cloth or other cover This may become hot and create a fire hazard This appliance can be used by children aged from 8 years and above and persons with reduc...

Page 6: ...he hob turn it off immediately and carefully remove them Take care not to burn yourself WARNING Unattended cooking on a hob with fat or oil can be dangerous and may result in fire CAUTION The cooking process has to be supervised A short term cooking process has to be supervised continuously WARNING Danger of fire do not store items on the cooking surface Never place any hot items on the control pa...

Page 7: ...s Ensure that each pan is well centred on its cooking zone The pan base must cover as much of the cooking zone as possible For those with heart pacemakers or active implants the magnetic field could influence its operating You should obtain information from the retailer or your attending physician Do not use aluminium or plastic containers they could melt onto hot cooking zones NEVER try to exting...

Page 8: ...tal regulations for waste disposal For more detailed information about treatment recovery and recycling of this product please contact your local council your household waste disposal service or the retailer where you purchased the product CE DECLARATIONS OF CONFORMITY This appliance has been manufactured to the strictest standards and complies with all applicable legislation Low Voltage Directive...

Page 9: ...er 1400 W Booster power Standardised cookware category B Energy consumption ECcw 177 3 Wh kg Rear right heating zone Ø 220 mm Minimum detection Ø 100 mm Nominal power 2300 W Booster power 3000 W Standardised cookware category C Energy consumption ECcw 171 1 Wh kg Front right heating zone Ø 175 mm Minimum detection Ø 90 mm Nominal power 1400 W Booster power Standardised cookware category A Energy c...

Page 10: ...II Pause The hob is in pause Bridge 2 cooking zones are combined Ventilation The cooling system is fully automatic The cooling fan starts with a low speed when the calories brought out by the electronic system reach a certain level The ventilation will run at high speed when the hob is intensively used The cooling fan reduces speed and stops automatically when the electronic circuit is cooled enou...

Page 11: ...oo small and therefore fails to adapt to the induction hob the display will show U Touch Control Your induction hob is equipped with electronic controls with touch control keys When your finger presses the key the corresponding command is activated This activation is validated by a control light a letter or a number in the display and or a beep sound For general use ensure only one button is press...

Page 12: ...t the power to the right or to the left To stop Slide to 0 on SLIDER 0 or H or press on 0 0 or H If no action is made within 20 seconds the electronics returns in waiting position Booster function The booster function P grants a boost of power to the selected heating zone If this function is activated the heating zones work for 10 minutes with an ultra high power The booster is used for example to...

Page 13: ...its Slide on the SLIDER to 0 1 fixed 0 blinking Valid the units Press display 10 1 blinking 0 fixed Deactivate the tens Slide on the SLIDER to 0 0 blinking 0 fixed Valid the tens Press display 00 00 Egg timer function Egg timer is an independent function It stops as soon as a heating zone starts up If the egg timer is on and the hob is switched off the timer continues until time runs out Example f...

Page 14: ...ection Press 7 from the zone 7 blinking with A Power level selection Slide on the SLIDER 1 to 9 Pause function This function brakes all the hob s cooking activity temporarily and allows you to restart with the same settings Startup stop the pause function Action Control panel Display Engage pause Press during 2s Displays II in the heating zone displays Stop the pause Press during 2s Pause control ...

Page 15: ...to 9 or H To engage Press between 0 and 1 on the U SLIDER To stop Press between 0 and 1 selected U Slide on the SLIDER 0 to 9 or H This function can be started independently on all the heating zones When the pan leaves the cooking zone of the Keep warm function remains active during approximately 10 minutes The maximum duration of keep warm is 2 hours Control panel locking To avoid modifying a set...

Page 16: ...e pan If it is attracted and sticks to the pan the pan is suitable Certain pans can make noise when they are placed on an induction cooking zone This noise is normal and does not affect the cooking operation nor does it mean a failure in the appliance Do not use cookware with jagged edges or a curved base To avoid scratching the glass always lift pans off the hob do not slide Pan dimension The coo...

Page 17: ...little water Then rinse with cold water and dry the surface thoroughly Highly corrosive or abrasive detergents and cleaning equipment likely to cause scratches must be absolutely avoided Do not use any steam cleaner or pressure washer Do not use any object that may scratch the ceramic glass Ensure that the pan is dry and clean Ensure that there are no grains of dirt on your ceramic hob or on the p...

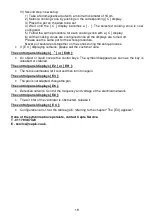
Page 18: ... reconfigured Please implement the following steps I Important before you start make sure there is no more pot on the hob II Disconnect the appliance from the grid by removing the fuse or turning the circuit breaker off III Reconnect the table to the grid IV Procedure take a pot with a ferromagnetic bottom and a minimum diameter of 16 cm start the procedure within 2 minutes after reconnecting the ...

Page 19: ...ng remains please call the customer care The control panel displays or Er03 An object or liquid covers the control keys The symbol disappears as soon as the key is released or cleaned The control panel displays E2 or E H The hob is overheated let it cool and then turn it on again The control panel displays E3 The pan is not adapted change the pan The control panel displays E6 Defective network Con...

Page 20: ...of furniture or the support in which the hob is to be fitted as well as the edges of furniture the laminate coatings and the glue used to fix them must be able to resist temperatures of up to 100 C The mural rods of edge must be heat resisting Not to install the hob to the top of a not ventilated oven or a dishwasher There must be a space of 20mm beneath the bottom of the hob casing to ensure a go...

Page 21: ...use accidents Ventilation requirements To ensure adequate ventilation of your induction hob please ensure the installation requirements shown in this diagram are followed A 5mm gap at the front of the unit must be left and a minimum 10mm gap must be cut out at the back of the cabinet to allow air to circulate A minimum distance of 20mm must be left between the underside of the hob and the applianc...

Page 22: ... To open the cover use a medium screwdriver calculated with the simultaneous factor following the standard EN 60 335 2 6 Connection of the hob Setting up the configurations For the various kinds of connection use the brass bridges which are in the box next the terminal Monophase 230V 1P N Put the bridge between terminal 1 and 2 Attach the earth to the terminal earth the neutral N to terminal 4 the...

Page 23: ...Notes ...

Page 24: ...Caple Service Fourth Way Avonmouth Bristol BS11 8DW t 0117 938 7420 e service caple co uk www caple co uk Please keep this instruction manual for future reference 24661 2 ...

Reviews: