background image

Demo mode : 

This mode will be use for only sales points by salesman to show functions & modes to customer 
without operating components as a compressor, fan, motor..Etc  

Entering Demo mode: 

•Firstly the power is on , with in 1 minute user will push ‘’SET’’ button for 10 seconds  , Then appliance
will go on “demo function” and Super LED symbol will blink during the mode. 
•All functions can be adjusted to show how they are adjusted to the customer.

Canceling Demo mode: 

•For cancelling; Same operation will be used. If user will push SET button for 10 seconds, demo
function will be cancelled. 
•When appliance is Demo mode; if plug is removed or there is an electricty breakdown; demo mode
will continue with current settings after user plug into or electricity breakdown finish. 

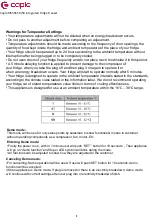
Warnings for Temperature Settings 

• Your temperature adjustments will not be deleted when an energy breakdown occurs.
• Do not pass to another adjustment before completing an adjustment.
• Temperature adjustments should be made according to the frequency of door openings, the
quantity of food kept inside the fridge and ambient temperature of the place of your fridge. 
• Your fridge should be operated up to 24 hours according to the ambient temperature without
interruption after being plugged in to be completely cooled. 
• Do not open doors of your fridge frequently and do not place much food inside it in this period.
• A 5 minute delaying function is applied to prevent damage to the compressor of
your fridge, when you take the plug off and then plug it on again to operate it or 
when an energy breakdown occurs. Your fridge will start to operate normally after 5 minutes. 
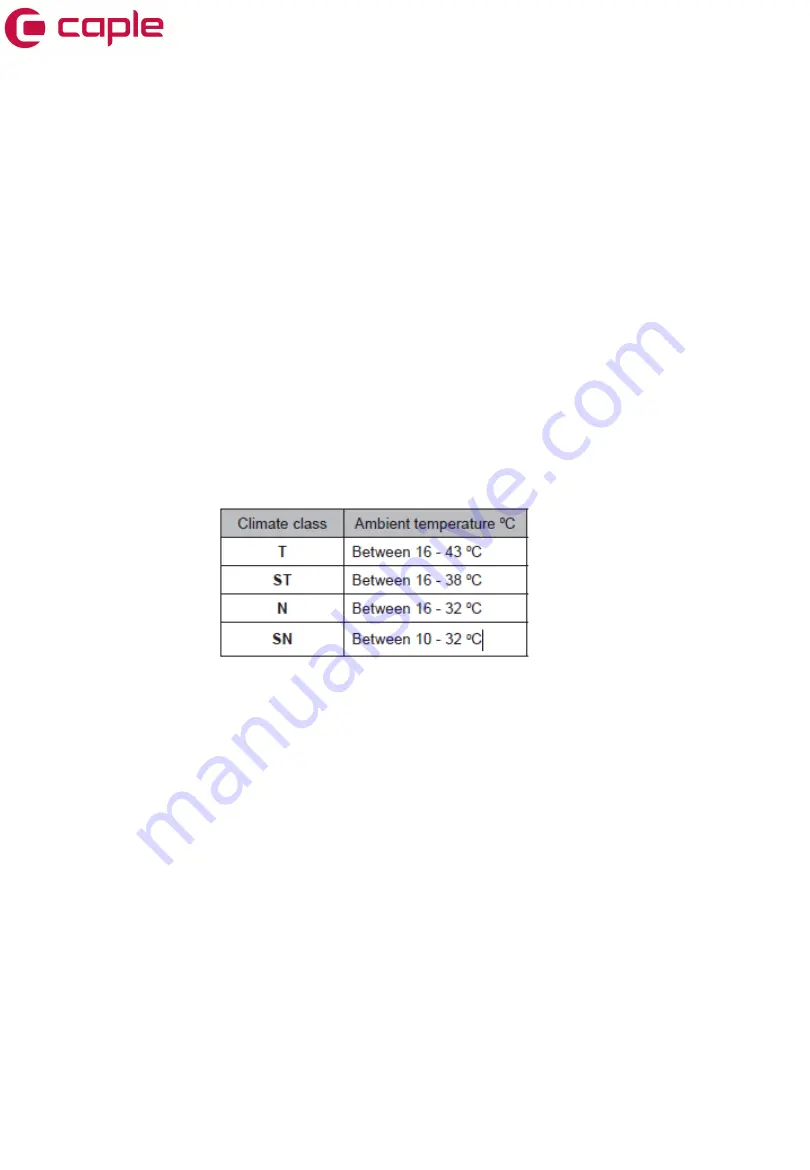
• Your fridge is designed to operate in the ambient temperature intervals stated in the standards,
according to the climate class stated in the information label. We do not recommend operating 
your fridge out of stated temperatures value limits in terms of cooling effectiveness. 
• This appliance is designed for use at an ambient temperature within the 16°C - 38°C range.

Caple RI5505 50/50 Integrated Fridge Freezer

Summary of Contents for RI5505

Page 1: ...RI5505 Caple 50 50 Integrated Fridge Freezer Service Manual ...
Page 2: ...ge place the food that needs to be kept frozen in a separately cooled container and remove the ice gathered in the freezer compartment The situation is completely different in no frost refrigerators Dry and cold air is blown into the fridge and freezer compartments homogeneously and evenly from several points via a blower fan Cold air dispersed homogeneously and evenly between the shelves cools al...

Page 3: ...set button the mode will be cancelled and the setting will be restored from MAX Note Super cooling mode will be automatically cancelled after 5 hours Temperature Settings The initial temperature of the Setting Display is middle temperature indicator Press temperature set button once Every time you press the button the setting temperature will decrease If you press temperature set button until supe...

Page 4: ...mpleting an adjustment Temperature adjustments should be made according to the frequency of door openings the quantity of food kept inside the fridge and ambient temperature of the place of your fridge Your fridge should be operated up to 24 hours according to the ambient temperature without interruption after being plugged in to be completely cooled Do not open doors of your fridge frequently and...

Page 5: ...and remove the refrigerator door Pic 2 Picture 1 Picture 2 Picture 4 2 Unscrew the two screws fixing the middle hinge side bracked and remove it Pic 3 Picture 3 3 Uncrew the two screws fixing the middle hinge Pic 4 and remove the freezer door Pic 5 Picture 5 Caple RI5505 50 50 Integrated Fridge Freezer ...
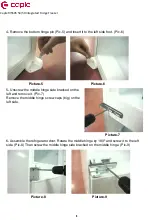
Page 6: ...move the bottom hinge pin Pic 5 and insert it to the left side foot Pic 6 Picture 5 Picture 6 Picture 7 6 Assemble the refrigerator door Rotate the middle hinge by 1800 and screw it to the left side Pic 8 Than screw the middle hinge side bracked on the middle hinge Pic 9 Picture 8 Picture 9 Caple RI5505 50 50 Integrated Fridge Freezer ...

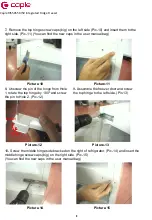
Page 7: ...e to the left side Pic 13 Picture 13 10 Screw the middle hinge side bracked on the right of refrigorator Pic 14 and insert the middle hinge screw caps big on the right side Pic 15 You can find the new caps in the user manual bag Picture 14 Picture 15 8 Unscrew the pin of the hinge from Hole 1 rotate the top hinge by 1800 and screw the pin to Hole 2 Pic 12 Picture 12 Hole 1 Hole 2 Caple RI5505 50 5...

Page 8: ... Motor Picture 1 Picture 2 1 Remove the fan motor cover Pic 1 Unscrew the two screws and remove the fan motor body Pic 2 Take out the sockets and replace the fan motor Pic 3 Picture 3 Caple RI5505 50 50 Integrated Fridge Freezer ...
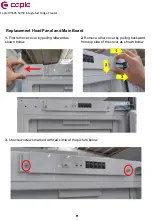
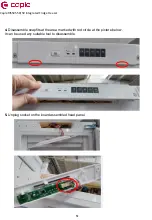
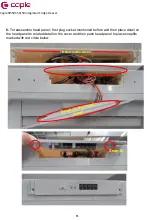
Page 9: ... First remove cover by pulling leftward as shown below 2 Remove other cover by pulling backward from top side of the cover as shown below 1 3 3 Unscrew screws marked with red circle at the picture below Caple RI5505 50 50 Integrated Fridge Freezer ...

Page 10: ...emble snapfits at the area marked with red circle at the picture below It can be used any suitable tool to disassemble 5 Unplug socket on the board assembled head panel Caple RI5505 50 50 Integrated Fridge Freezer ...

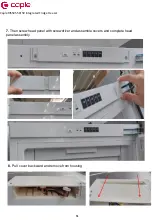
Page 11: ... socket mentioned before and then place detail on the head panel to related detail on the cover and then push head panel to place snapfits marked with red circle below Detail on the cover Snap fit Caple RI5505 50 50 Integrated Fridge Freezer ...
Page 12: ...14 7 Then screw head panel with screwdriver and assemble covers and complete head panel assembly 8 Pull cover backward and remove from housing Caple RI5505 50 50 Integrated Fridge Freezer ...

Page 13: ...15 9 Then unplug all sockets 10 To reassemble cover first plug all sockets related place on the board Caple RI5505 50 50 Integrated Fridge Freezer ...

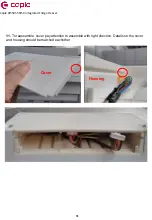
Page 14: ...16 11 To reassemble cover pay attention to assemble with right direction Details on the cover and housing should be matched eachother Housing Cover Caple RI5505 50 50 Integrated Fridge Freezer ...

Page 15: ...2 Picture 1 Picture 2 2 Displace the fin evaporator balanced by holding on both sides Pic 2 1 Remove the fin evaporator resistance connectors from the sockets Pic 1 blue connector Picture 1 Picture 2 CAUTION The fin evaporator should not be pulled upward downward Otherwise the fin evaporator fixing plastics might be broken Fin Evap Res Connector Replacement of Freezer Evap Gr Caple RI5505 50 50 In...

Page 16: ...tails These details hold on to the pipe It could be removed easily Pic 2 Termal Fuse Connector Replacement of Freezer Fan Motor 1 Remove the fan motor connector Pic 1 2 Unscrew the fan motor fixing screws and displace the fan motor Pic 2 3 Remove the propeller Pic 3 Picture 1 Picture 2 Picture 3 Caple RI5505 50 50 Integrated Fridge Freezer ...

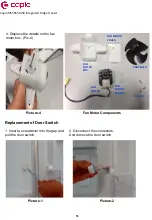
Page 17: ...PELLER FAN MOTOR BOX SCREWS FAN MOTOR RUBBER Fan Motor Components Picture 4 Replacement of Door Switch 1 Insert a screwdriver into the gap and pull the door switch 2 Disconnect the connectors And remove the door switch Picture 1 Picture 2 Caple RI5505 50 50 Integrated Fridge Freezer ...

Reviews: