
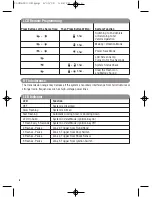


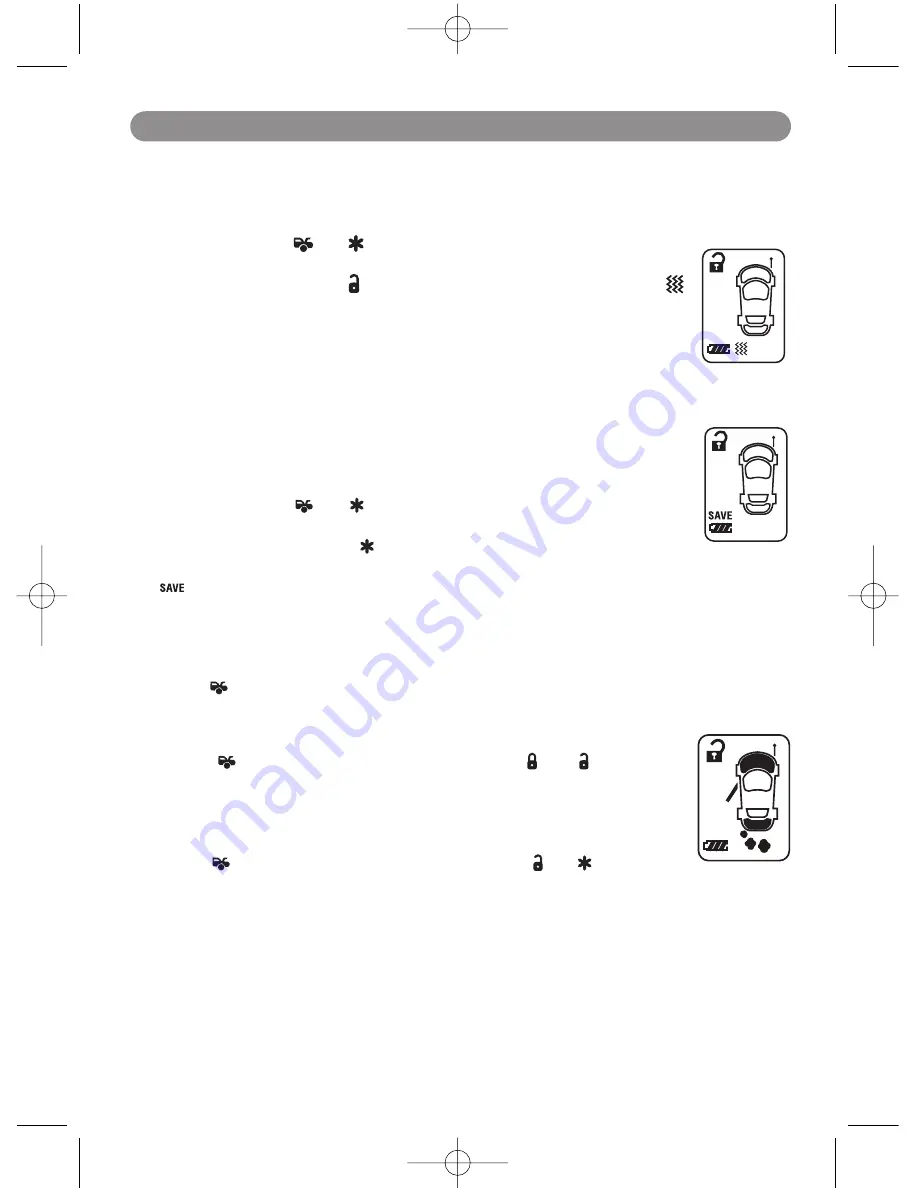
Vibration/Melody Mode
This mode is useful when you are in a noisy place and it is difficult to hear the beep from the
transmitter. While in the Vibration/Melody Mode, the transmitter will vibrate if your security
system has been activated.
1. Press and hold the and buttons at the same time until one long beep is
heard. Programming has now been entered.
2. Within 5 seconds, press the button to toggle between “ON” or “OFF”. The
icon will be displayed in the LCD display when the Melody Mode is On.
3. To exit the Programming Mode, take no action for five seconds. The remote
control will generate two long beeps to indicate Programming Mode has been
exited.
Power Save Mode
While in the Power Save Mode, the LCD remote transmitter will “Sleep” until a
button is pushed, extending the life of battery. When Power Save Mode is “OFF”,
the remote control will wake up periodically to check for messages from the
security system.
1. Press and hold the and buttons at the same time until one long beep is
heard. Programming has now been entered.
2. Within 5 seconds, press the button to toggle between “ON” or “OFF”. The
remote will beep once for “ON”, and twice for “OFF”. When Power Save Mode is “ON”, the
icon on the LCD screen indicates entry into Power Save Mode.
3. To exit Programming Mode, take no action for five seconds. The remote control will generate
two long beeps indicating Programming Mode has been exited.
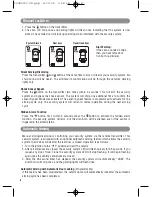
Screen Lamp On
Press the button once, and the LCD screen lamp will turn on for 5 seconds.
System Status Check
To check the system’s present status through the LCD screen, press the
transmitter button first, then within 3 seconds press and buttons at the
same time. The response will be one melody sound, and the LCD screen will be
illuminated. Note: If no response is received, then you are out of range.
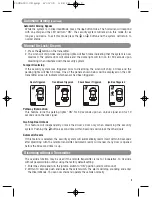
Clear the Flash Icon and Melody Sound
Press the button first, then within 3 seconds press the and buttons at the
same time. These steps will clear the flash icon and melody sound on the LCD
transmitter.
Stop the Trigger Melody Sound
While triggering the alarm, the LCD screen will alert the user through a melody sound and a
flashing trigger icon. Press any button on the LCD transmitter to stop melody sound only, and the
remote control will not send a command to the system.
5
LCD Remote Programming
PLUS6900-UM.qxp 4/30/09 3:48 PM Page 5


