background image

23

STORAGE AND TRANSPORT

4.1 

General Instructions


WARNING


+

The storage location should be chosen so that improper use by third parties or children can 

be prevented. 


+

If your equipment does not have transportation wheels, the equipment must be 

disassembled before transportation.


ATTENTION


+

Make sure that the equipment is protected from moisture, dust and dirt in the selected 

storage location. The storage location should be dry and well ventilated and have a constant 

ambient temperature between 10°C and 35°C. 
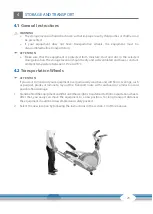
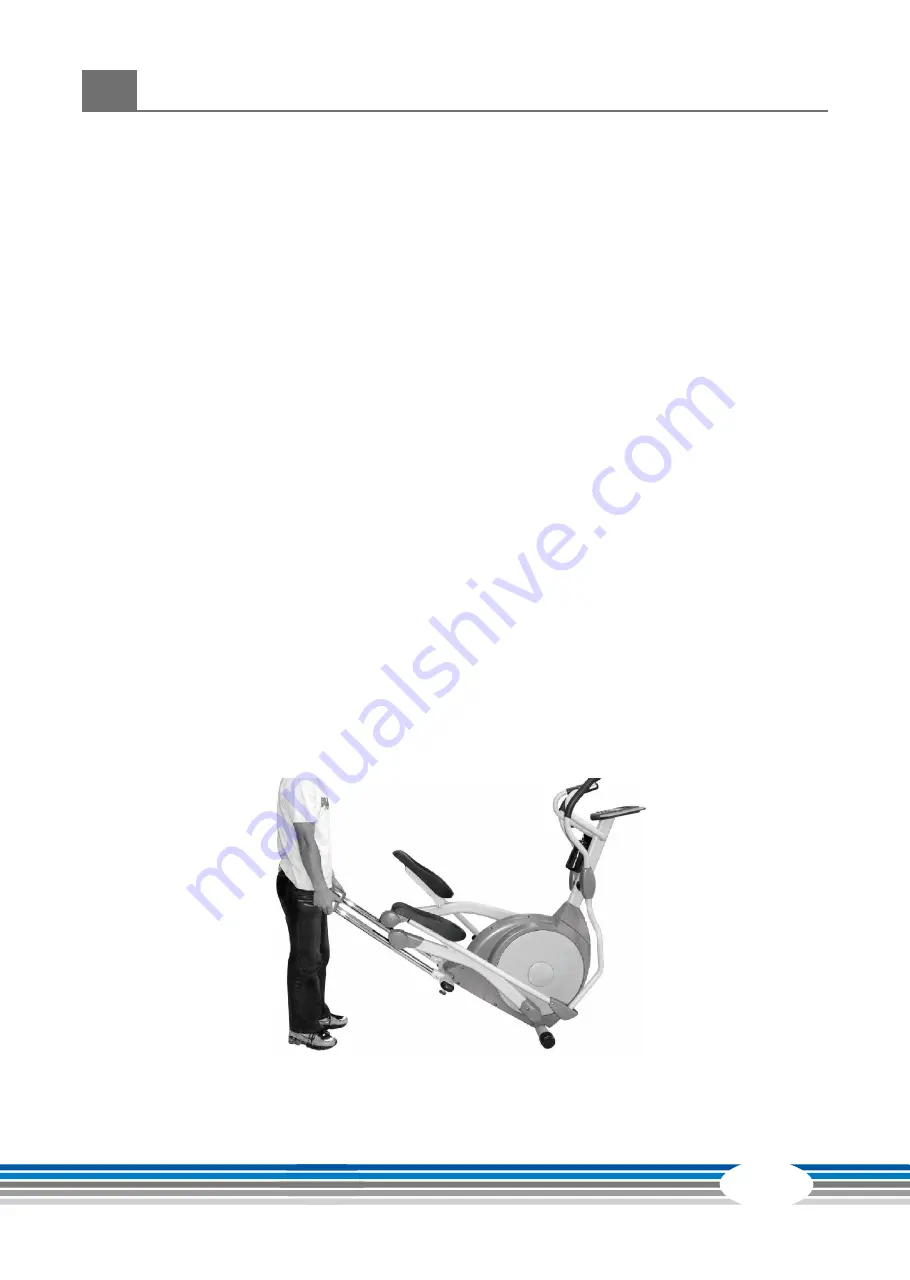
4.2 

Transportation Wheels


ATTENTION

If you want to transport your equipment over particularly sensitive and soft floor coverings, such 

as parquet, planks or laminate, lay out the transport route with cardboard or similar to avoid 

possible floor damage. 

1.  Stand behind the equipment and lift it until the weight is transferred to the transportation wheels. 

After that, you easily can move the equipment to a new position. For long transport distances 

the equipment should be disassembled and safely packed.

2.  Select the new location by following the instructions in the section 1.4 of this manual.

Summary of Contents for CST-FX30-2

Page 1: ...TF CSTFX30 02 01 max 120 kg L 145 B 52 H 160 90 Min C M 47 kg Assembly and Operating Instructions Art No CST FX30 2 Elliptical Trainer FX30...

Page 2: ...2 FX30...

Page 3: ...Programme MANUAL 18 3 4 2 Pre Set Programmes BEGINNER ADVANCE SPORTY 19 3 4 3 Heart Rate Controlled Programmes CARDIO 20 3 4 4 Watt controlled Programme WATT 21 3 5 Recovery Heart Rate Test 21 3 6 Bod...

Page 4: ...4 FX30 8 ORDERING SPARE PARTS 28 8 1 Serial Number and Model Name 28 8 2 Parts List 29 8 3 Exploded Drawing 31 9 WARRANTY 32 10 CONTACT 34...

Page 5: ...onal Headquarters Flensburger Stra e 55 24837 Schleswig Germany Management Christian Grau Sebastian Campmann Dr Bernhard Schenkel No HRB 1000 SL Local Court Flensburg European VAT Number DE813211547 D...

Page 6: ...rect any mistakes Please pay close attention to the safety and maintenance instructions given here The contract partner cannot be held liable for damage to health accidents or damage to the equipment...

Page 7: ...9 cm Stride height 18 cm Stride width 10 cm Programmes in total 18 Manual programmes 1 Pre set programmes 12 Heart rate controlled programmes 4 Watt controlled programmes 1 Recovery Heart Rate Test 1...

Page 8: ...ess to the equipment Persons with disabilities must have a medical license and must be under strict observation when using the equipment The equipment is strictly for use by one person at a time If yo...

Page 9: ...le or the mains plug Keep the mains cable away from water heat oil and sharp edges Do not route the mains cable underneath the equipment or under a carpet or rug and do not place any objects on top of...

Page 10: ...e the risk of injuries CAUTION Ensure to have sufficient room for movement in each direction during assembly The assembly of the equipment must be carried out by at least two adults If in doubt seek t...

Page 11: ...ed directly CAUTION If parts of the scope of delivery are missing or damaged the assembly must not be carried out Step 1 104 1 8 7x20x1 5T Flat Washer 2x 112 3 8 x23x1 5T Curved Washer 2x 96 3 8 Cap N...

Page 12: ...20x1 5T Flat Washer 2x Step 4 113 5 16 x23x1 5T Curved Washer 4x 91 5 16 x7T Nyloc Nut 6x 76 5 16 x1 3 4 Hex Head Bolt 6x 87 3 5x12mm Sheet Metal Screw 8x Tools 116 12mm Wrenchl 1x 118 5mm Allen Wrenc...

Page 13: ...Connecting Arms 1 Mount the Front Stabilizer 14 to the plate that is located on the lower end of the frame with two Carriage Bolts 77 two Curved Washers 112 and two Cap Nuts 96 The transportation whe...

Page 14: ...Computer Cable 36 and the two Handpulse Cables 40 into the Console 35 4 Mount the Console 35 to the bracket plate with four Phillips Head Screws 84 Make sure to not pinch the cables Step 3 Assembly of...

Page 15: ...eet If the floor is uneven you can stabilize the equipment by turning the two setting screws under the main frame 1 Lift the equipment on the desired side and rotate the setting screws under the main...

Page 16: ...roper use of this product explained to you by a specialist 3 1 Console Display Display Description Time Display of the training time Display range 00 00 99 59 Setting range 00 00 99 00 1 Minute Steps...

Page 17: ...l Steps Programmes Manual programme MANUAL 12 Pre set programmes BEGINNER 1 4 ADVANCE 1 4 SPORTY 1 4 4 Heart rate controlled programmes CARDIO Watt controlled programms WATT 3 2 Button Functions Butto...

Page 18: ...elect the manual programme MANUAL in the main menu with the UP DOWN buttons and confirm the selection with the MODE button Fig 2 2 To set the values for TIME DISTANCE CALORIES and PULSE use the UP DOW...

Page 19: ...on Fig 11 13 3 Set the TIME with the UP DOWN buttons and confirm the entry with the MODE button 4 To start the programme press the START STOP button L NOTICE During the training you can adjust the res...

Page 20: ...u and confirm the selection with the MODE button Fig 14 2 Set your AGE with the UP DOWN buttons and confirm the entry with the MODE button Fig 15 3 Select with the UP DOWN buttons 55 Fig 16 75 90 or s...

Page 21: ...g the training you can adjust the watt value with the UP DOWN buttons 5 To pause the programme press the START STOP button again 6 To end the programme press the RESET button while the programme is pa...

Page 22: ...ill display a loading screen during the measurement Fig 22 Once the measurement is complete the display shows the body fat percentage FAT and BMI for 30 seconds Fig 23 and 24 L NOTICE During or after...

Page 23: ...ated and have a constant ambient temperature between 10 C and 35 C 4 2 Transportation Wheels ATTENTION If you want to transport your equipment over particularly sensitive and soft floor coverings such...

Page 24: ...uction Nevertheless faults or malfunctions may occur Frequently individual parts are responsible for these disturbances an exchange is usually sufficient Please refer to the following overview for the...

Page 25: ...by hand pulse possible 5 3 Error Codes and Troubleshooting The electronics of the equipment continuously carries out tests In case of deviations an error code appears on the display and normal operati...

Page 26: ...ts I Plastic covers C I Screws and cable connections I Legend C clean I inspect 6 DISPOSAL At the end of its operational life this equipment cannot be disposed of in normal household waste Instead it...

Page 27: ...y recommend that you use a compatible chest strap as this ensures optimum transmission of the heart rate You may want to buy additional grips or weights for multi gyms Our range of accessories offers...

Page 28: ...eady The corresponding contact options can be found in chapter 10 of this operating manual L NOTICE The serial number of your equipment is unique It s located on a white sticker The exact position of...

Page 29: ...pulse W Cable Assembly 2 41 Power Adaptor 1 42 Console Mast Cover L 1 43 Console Mast Cover R 1 44 Transportation Wheel 2 46 Round End Cap 2 47 Slide Wheel Urethane 2 48 Adjustment Foot Pad 2 49 WFM 1...

Page 30: ...Nut 1 94 1 4 UNC20 8T_ Nyloc Nut 4 96 3 8 UNC16 12 5T_Cap Nut 2 97 3 8 UNF26 4T_Nut 2 98 3 8 UNF26 11T_Nut 2 99 3 8 UNC16 7T_Nut 2 102 8 7 20 1 5T_Flat Washer 2 103 8 35 1 5T_Flat Washer 2 104 8 5 26...

Page 31: ...31 8 3 Exploded Drawing...

Page 32: ...web shop begin on delivery of the fitness equipment The respective warranty periods for your equipment can be found on its product website Repair Costs According to our choice there will either be a r...

Page 33: ...control you will need to give the serial number of your equipment when contacting the service team Where possible please have your serial number and your customer number ready when you call our servic...

Page 34: ...hop fr Mo Fr 08 00 18 00 Sa 09 00 18 00 PL BE TECHNICAL SUPPORT SERVICE TECHNICAL SUPPORT SERVICE 22 307 43 21 49 4621 42 10 948 info fitshop pl Mo Fr 08 00 18 00 Sa 09 00 18 00 02 732 46 77 49 4621 4...

Page 35: ...mpanies and physio practices with professional equipment for endurance and strength training Sport Tiedje offers a wide range of fitness equipment from renowned manufacturers high quality in house dev...

Page 36: ...Elliptical Trainer FX30...

Reviews: