
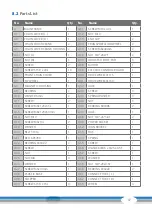
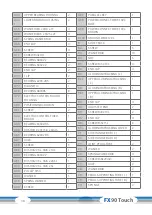

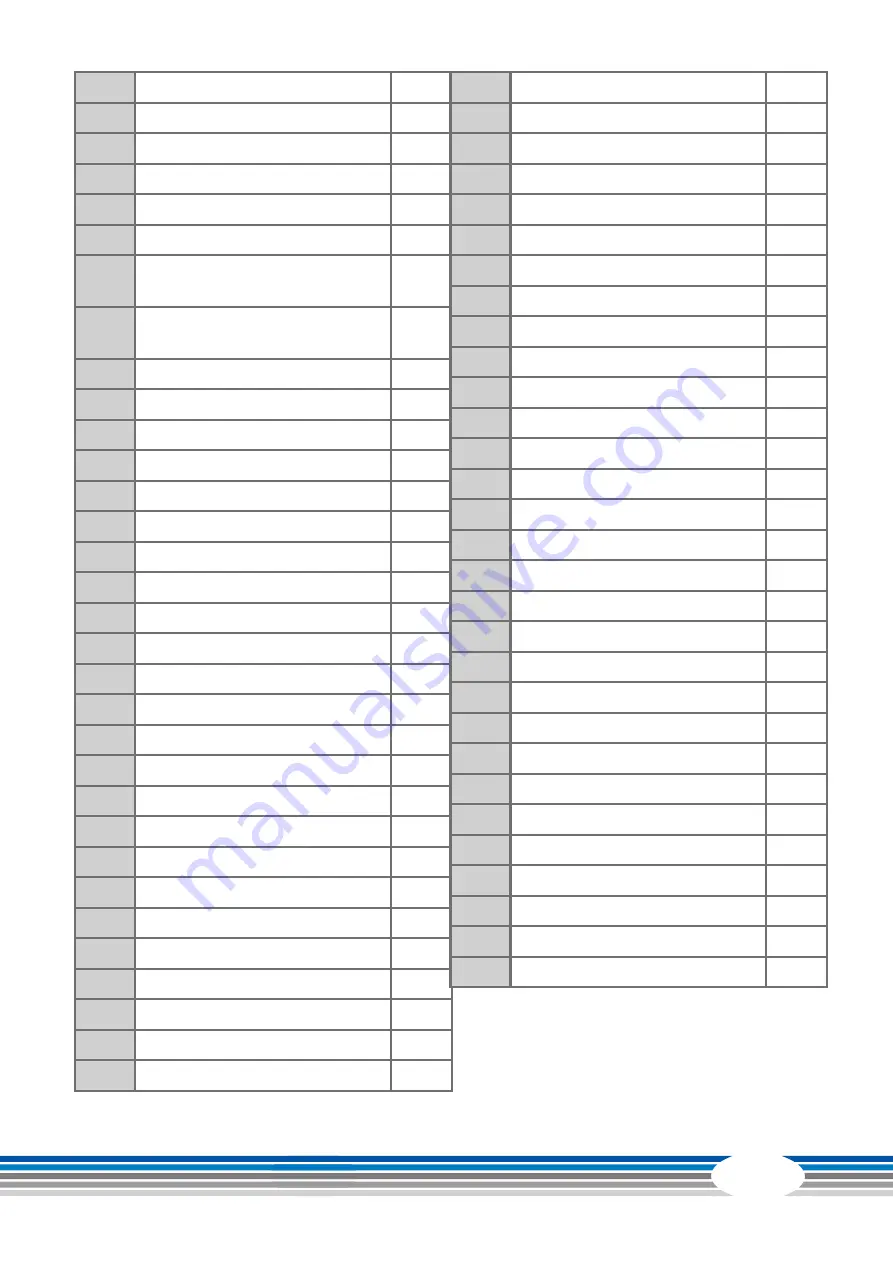
D
CONSOLE SUPPORTING TUBE
1
D1
SENSOR WIRE
1
D2
SENSOR WIRE
1
D3
SENSOR WIRE
1
D4
SENSOR WIRE
1
D5
SENSOR WIRE
2
D6
UPPER HANDLE PULSE
HOUSING
2
D7
LOWER HANDLE PULSE
HOUSING
2
D9
TOGGLE LOAD -
1
D10
TOGGLE LOAD +
1
D11
SPONGE
2
D12
HANDLE PULSE RING
2
D13
SCREW M8 x 20mm
3
D14
SCREW M3 x 10mm
4
D15
SPRING WASHER M8
3
D16
WASHER M8
3
D17
SCREW M3x10mm
4
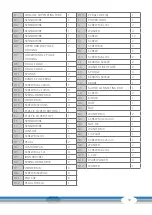
E1
PLASTIC COVER ( BOTTOM )
1
E2
PLASTIC COVER ( TOP )
1
F1
SENSOR WIRE
1
F2
SENSOR WIRE
1
G
CONSOLE
1
G1
SCREW M5x10L
4
H1
PEDAL
2
H2
CUSHION PAD
2
H3
SCREW M6 x 12L
8
H5
IRON BRACKET
2
H6
SPRING WASHER M8
2
H7
WASHER M8
6
H8
SCREW M8x20mm
6
H11
END CAP
8
H12
PEDAL TUBE (L)
1
H13
PEDAL TUBE (R)
1
I
POWER CORD
1
J1
SCREW M8 x 30L
4
J2
WASHER
4
J3
SCREW
12
J4
SCREW
2
J5
SCREW M8
6
J6
SCREW
6
J14
SCREW M8 x 10L
2
L1
BEARING 6202ZZ
2
L2
WASHER FIXED PLATE
2
L3
SPONGE
4
L4
BEARING 6003ZZ
2
L5
BRAKE
1
L7
MOTOR CONNECTING ROD
1
L8
SCREW
2
M1
MOTOR
1
M2
BOLT
1
N1
NUT
1
N2
WASHER M4
2
N3
SCREW M4 x 16mm
1
N4
NUT M3
1
N5
WASHER M3
4
N6
FIX PLATE
1
N7
SCREW M5 x 25mm
1
N8
WASHER
2
N9
SCREW M6 x 10L
2
N10
C CLIP
2
N11
WAVE WASHER
4
N12
WASHER
1
39
Summary of Contents for CST-FX90-T
Page 2: ...2 FX90 Touch...
Page 45: ...45 Notes...
Page 46: ...46 FX90 Touch Notes...
Page 47: ...47...
Page 48: ...Crosstrainer FX90 Touch...


