background image

7

English

SCALA RIDER

® 

FM™  | 

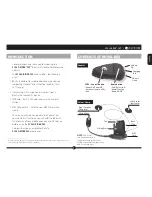
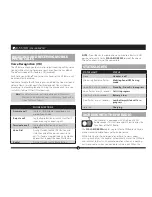
Using two speakers inside the 
helmet may be prohibited in 
certain jurisdictions. If this is the 
case, you should tuck away the 

long corded speaker underneath 
the helmet padding as follows: 
Lead the speaker cord [B] 

alongside the rim of the padding 
to the right side and then back 
to the left side, near speaker 
[A]. Then place the speaker [B] 
underneath the padding. 

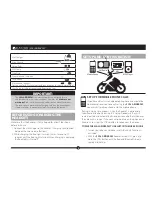
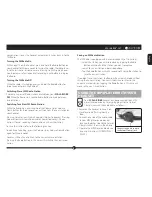
ATTACHING AND REMOVING THE 

HEADSET FROM THE HELMET CLAMP

ATTACHING:

Slide the headset downwards along 

the sliding panel until a clicking sound 

indicates that the headset is locked in 

place.

REMOVING:

Your headset can be removed for charging 

and storage by pressing your finger 

gently against the tab and sliding 

the headset up with the other hand.
We recommend that you remove the 

headset from the helmet when not in 

use.

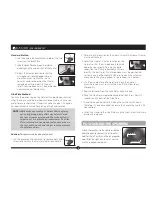
AUDIO SOURCES AND PRIORITIES

The different Audio Sources that are connected to the SCALA RIDER 

FM are prioritized as follows:

Highest:

 1. Mobile phone audio (Incoming/outgoing calls) / GPS 


  device (GPS audio and navigation instructions)


2. FM Radio

Lowest 

  3. MP3 Connectivity

A high priority Audio Source will always interrupt any lower priority 

Audio Source. i.e. Mobile phone call overrides FM radio

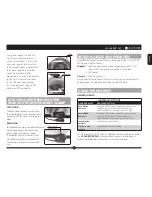
USING THE HEADSET

GENERAL USAGE

GENERAL FUNCTIONS

DESIRED RESULT:

REQUIRED ACTION:

Turn on the 

headset

Press the CTRL Button steadily for at least three 

seconds. Led indication: three blue flashes. 

Audio feedback: Ascending tone (low-high).

Turn off the 

headset

Press the CTRL Button steadily for at least three 

seconds. Led indication: three red flashes. 

Audio feedback: Descending tone (high-low).

Increase the 

volume

Tap the Volume Up Button

Decrease the 

volume

Tap the Volume Down Button

AGC (Automatic Gain Control): In addition to manual Volume Control, 

the 

SCALA RIDER FM 

will automatically increase and reduce its 

volume according to ambient noise and driving speed.

Speaker A

Speaker B

Press here 

to remove

Speaker B

Cable

Summary of Contents for SCALA RIDER FM -

Page 1: ...UserGuideGebrauchsanleitung Guide d Utilisation Guida di Avvio Guia de Usario...

Page 2: ...2 SCALA RIDER FM...

Page 3: ...et but you should first familiarize yourself with the Bluetooth functionality of your mobile phone and or GPS device before using the SCALA RIDER FM Cardo wishes you an enjoyable and safe SCALA RIDER...

Page 4: ...o Volume Buttons 2 While charging the Red Light turns on it may take up to 15 seconds until the Red Light turns on When charging is complete the Red Light will turn off SET UP AND CONFIGURATION SET UP...

Page 5: ...Pair your headset to the GPS device as described below NOTE Not all Bluetooth enabled GPS devices allow connections to Bluetooth headsets like the SCALA RIDER FM Please consult your GPS device s User...

Page 6: ...ly once 1 Use the enclosed Allen Wrench to remove both Allen screws and release the Helmet Clamp s back plate 2 Determine the location on the helmet where the Helmet Clamp must be attached 3 Adjust th...

Page 7: ...s that are connected to the SCALA RIDER FM are prioritized as follows Highest 1 Mobile phone audio Incoming outgoing calls GPS device GPS audio and navigation instructions 2 FM Radio Lowest 3 MP3 Conn...

Page 8: ...utton and state the name of the person you wish to call This feature is supported only by mobile phones that support the Voice Dial feature Redial During Standby tap the Radio Button NOTE If your Blue...

Page 9: ...inue searching press the Volume Up or Volume Down Button again for three seconds You may still continue to listen to the current unsaved station Pressing the Radio Button in this case will switch to t...

Page 10: ...e the separation between the equipment and receiver Connect the equipment into an outlet on a circuit different from that to which the receiver is connected Consult the dealer or an experienced radio...

Page 11: ...filiates Parent Company Representatives Agents Contractors Sponsors Employees Sup pliers and Resellers jointly referred to as the Company or Cardo strongly advises you to take all necessary precaution...

Page 12: ...rstand its terms and that you have given up substantial rights by not returning the Device for a full refund see refund option below Disclaimer of Warranty CARDO DISCLAIMS ALL EXPRESS AND IMPLIED WARR...

Reviews: