background image

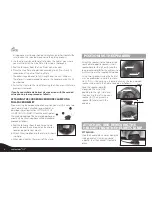
1. Place the 

scala rider Q2

 into Intercom Pairing mode following the 

instructions in the 

PRIMARY BUDDY PAIRING

 section above.

2. Once the Red Light begins flashing rapidly, press and hold Volume 

up for three seconds.

3. The Red and Blue Lights will flash five times, confirming that the 

Reset Pairing was successful.

STEP 3

SET UP FOR MOBILE PHONE CALLS: PAIRING 

If you have a 

Bluetooth

 enabled mobile phone and would like to 

make and receive phone calls using the 

scala rider Q2

, you must first 

pair your headset to the mobile phone.

NOTE:

 If you have a compatible 

Bluetooth

 GPS device you wish to 

use with the 

scala rider Q2

, please skip this step, and continue 

ahead to 

STEP 4: SET UP FOR 

BLUETOOTH

 GPS DEVICE.

Pairing is a one time process. Once the headset is paired to a 

specific mobile phone during this Setup Procedure, they will 

remain paired and automatically recognize each other whenever 

they are within range. If the connection between the phone and 

headset is lost, tap the CTRL button to reconnect the devices.

TO PAIR THE SCALA RIDER Q2 TO A 

BLUETOOTH


MOBILE PHONE

1. Turn on your phone and make sure its 

Bluetooth

 function is 

activated.

2. With the 

scala rider Q2

 headset turned ON, press and hold 

the CTRL Button for at least six seconds until the Red and Blue 

Lights begin rapidly alternating.

3. Search for 

Bluetooth

 devices on your phone by following the 

phone’s instructions. Please consult your phone’s User Manual 

for more information.

4. After a few seconds the phone will list the 

scala-rider Q2


as a discovered device. Select it and follow your phone’s 

instructions to accept the pairing.

5. When prompted enter 0000 (four zeros) as your PIN or passkey.
6. Your phone will confirm that pairing has succeeded and the 

headset will begin flashing slowly in Blue.

NOTE: 

If the Pairing process is not completed within two minutes the 

headset will return to Standby mode.

With some mobile phones, you may need to tap the CTRL button 

to connect the headset to the phone after pairing is complete. 

The 

scala rider Q2

 headset will automatically connect to the last 

phone connected to the headset.

STEP 4

SET UP FOR 

BLUETOOTH

 GPS DEVICE: PAIRING 

If you have a 

Bluetooth

 enabled GPS device and would like to transmit 

navigation instructions and sounds from the GPS device through the 

headset’s speakers, you must first pair your headset to the GPS device. 

NOTE: 

Not all 

Bluetooth

 enabled GPS devices allow connections to 

Bluetooth

 headsets like the 

scala rider Q2

. Please consult your GPS 

device’s User Manual for more information.

TO PAIR THE SCALA RIDER Q2 TO A 

BLUETOOTH

 GPS 

DEVICE:

1. Turn on your GPS device.

2. With the 

scala rider Q2

 headset turned ON, press and hold 

the CTRL Button for at least six seconds until the Red and Blue 

Lights begin rapidly alternating.

6

scala rider

® 

Q2

Summary of Contents for Scala Rider Q2

Page 1: ...Q2 Gebrauchsanleitung Guide d Utilisation Guida di Avvio Guia de Usario User Guide communication in motion...

Page 2: ...The Bluetooth word mark and logos are owned by the Bluetooth SIG Inc and any use of such marks by Cardo Systems Inc is under license Other trademarks and trade names are those of their respective owne...

Page 3: ...mpatible Bluetooth devices 4 FM Radio built in FM radio receiver with six preset stations 5 MP3 Connectivity Listen to your MP3 player while riding The scala rider Q2 can establish an audio connection...

Page 4: ...urs before initial use 1 Connect the wall charger to the headset s Charging Jack located between the two Volume Buttons 2 While charging the Red Light turns on it may take up to 15 seconds until the R...

Page 5: ...dset will return to Standby mode STEP 2 Optional SET UP FOR RIDER TO PASSENGER INTERCOM PAIRING There are two ways that the scala rider Q2 can be used for Driver to Passenger communication A Both Ride...

Page 6: ...alternating 3 Search for Bluetooth devices on your phone by following the phone s instructions Please consult your phone s User Manual for more information 4 After a few seconds the phone will list th...

Page 7: ...k Plate 2 Slide the Back Plate between the internal padding and the external shell of the helmet 3 Adjust the clamp s location so that the microphone is located opposite your mouth and then tighten th...

Page 8: ...the exact spot on the internal padding of the helmet opposite your mouth where the microphone will be placed and proceed as follows a Peel the foil cover from the adhesive Velcro pad and place the Ve...

Page 9: ...nnectivity A high priority Audio Source will always interrupt any lower priority Audio Source i e Mobile phone call interrupts Intercom call Intercom call interrupts FM Radio USINGTHEINTERCOM Making I...

Page 10: ...m NOTE The Primary Buddy has priority by default To toggle the Voice Connect Intercom between Primary and Secondary Buddy Press and hold the Volume Up Button for three seconds and you will hear a beep...

Page 11: ...n the radio The radio tunes in to the last radio station you were listening to With some phones you should wait a few seconds after ending a call before turning on the Radio Turning the FM Radio Off W...

Page 12: ...t Clamp s jack inserting the cable through the MP3 cable holder Make sure that the cable plug clicks into place 7 Tuck the MP3 cable into the hook of the MP3 cable holder 8 In order to use your MP3 pl...

Page 13: ...nnected Consult the dealer or an experienced radio TV technician for help Operation is subject to the following two conditions 1 this device may not cause interference and 2 this device must accept an...

Page 14: ...nsume these substances before or during the use of the Device 4 You fully acknowledge our warnings and understand that a risks and dangers exist in using the Device while in traffic including but not...

Reviews: