6
| SCALA RIDER
®
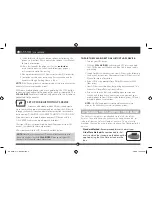
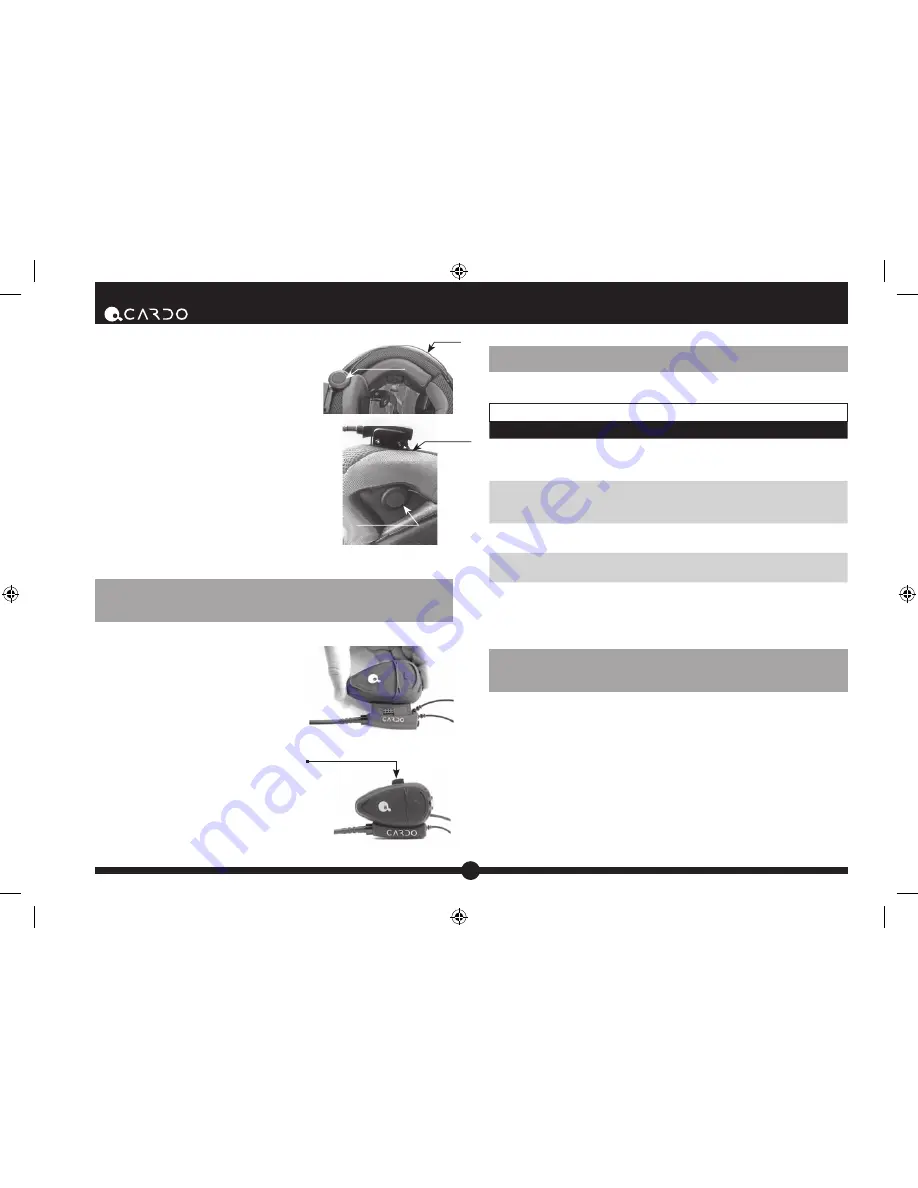
You may want to use the supplied Velcro
pad.
Using two speakers inside the helmet may
be prohibited in certain jurisdictions. If this
is the case, you should tuck away the long
corded speaker underneath the helmet
padding as follows: Lead the speaker [B]
alongside the rim of the padding to the
right side and then back to the left side,
near speaker [A]. Then place the speaker [B]
underneath the padding.
ATTACHING AND REMOVING THE
HEADSET FROM THE HELMET CLAMP
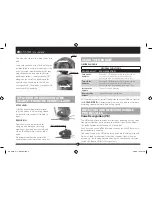
ATTACHING:
Slide the headset downwards along
the sliding panel until a clicking sound
indicates that the headset is locked in
place.
REMOVING:
Your headset can be removed for
charging and storage by pressing
your finger gently against the tab and
sliding the headset up with the other
hand.
We recommend that you remove the
headset from the helmet when not in use.
USING THE HEADSET
GENERAL USAGE
GENERAL FUNCTIONS
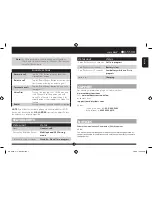
DESIRED RESULT:
REQUIRED ACTION:
Turn on the
headset
Press the CTRL Button steadily for at least three
seconds. Led indication: three blue flashes.
Audio feedback: Ascending tone (low-high).
Turn off the
headset
Press the CTRL Button steadily for at least three
seconds. Led indication: three red flashes.
Audio feedback: Descending tone (high-low).
Increase the
volume
Tap the Volume Up Button
Decrease the
volume
Tap the Volume Down Button
AGC (Automatic Gain Control): In addition to manual Volume Control,
the
SCALA RIDER
will automatically increase and reduce its volume
according to ambient noise and driving speed.
INITIATING AND RECEIVING MOBILE
PHONE CALLS
Voice Recognition (VR)
The VR feature allows you to answer or reject incoming calls by voice
Control without having to remove your hands from the handlebars.
The default mode of this feature is ON (enabled).
Each time you switch off and turn on the headset, the VR feature will
be automatically enabled.
To disable / enable the VR feature press and hold the Volume Up and
Volume Down simultaneously for three seconds. You will hear an
ascending / descending tone confirming the change each time you
switch this feature ON or OFF respectively.
Speaker A
Speaker B
Press here to remove
Speaker B
Cable
QG SOLO 014 - QG0143.indd 6
9/4/08 1:02:51 PM


