background image

7. FM RADIO

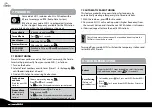
Your cardo SHO-1 includes a built-in FM radio with a 

6 Preset memory and RDS (Radio Data System).

RDS allows your cardo SHO-1 to automatically retune 

to the strongest frequency available for the FM station 

you are listening to when the signal becomes too weak.

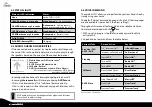
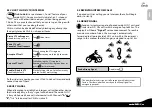
Turn on Radio

In standby, double-tap 


Turn off Radio 

Press 

 for 2 seconds

Next Station

With radio ON, tap 


Previous Station

With radio ON, double-tap 


RDS ON/OFF

(Default: Off)

With Radio ON, press   and   simultaneously for 

2 seconds

7.1 RADIO TUNING

Preset stations can be saved via the 

Cardo Community,

 the Cardo 

Smartset App or directly from your cardo SHO-1, as follows:

1. Turn on the Radio.

2.  Select a Preset number you wish to set (Preset 1 – 6) by tapping 


until the desired preset is heard.

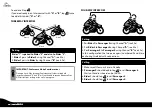
3.  Find an FM station to save using Seek or Scan.

Seek up/down 

and Save

(Find the next FM 

station)

Choose a preset by tapping


Press   or   for 2 seconds 

Tap


 within 20 seconds to save to current preset

Scan and Save: 

(Automatically 

scans up for a 

station)

With Radio ON, press   for 5 seconds 

To stop search, tap    
Tap 


within 20 seconds to save to current preset 

To continue scan, wait for the next station to be found.

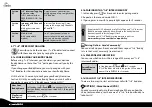
7.2 AUTOMATIC RADIO TUNING

This feature makes finding new stations fast and easy by 

automatically creating a temporary list of 6 radio stations.

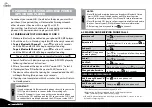
1. With the radio on, press   for 5 seconds.

2.  Your cardo SHO-1 will search upwards (higher frequency) from 

the current station and store the next 6 FM stations it discovers.

3.  If desired, repeat to store the next 6 FM stations.
 

These 6 temporary stations cannot be saved and do not replace the 

FM Presets you may have saved.

Turning off your cardo SHO-1 will clear the temporary stations and 

restore the FM Presets.

8. TROUBLESHOOTING 

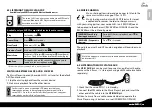
Reboot

If your cardo SHO-1 stops responding, reset it by turning 

it off and then on again (press 

 for 2 seconds)

Reset Pairing

(Deletes all  

paired devices)

1.  In Standby, press   for 5 secs until LED flashes RED/

BLUE.

2.   Press 

 for 2 seconds until LED flashes 5 times in 

PURPLE.

14 

cardo SHO-1

Summary of Contents for SHO-01

Page 1: ...User Guide ver 2 1...

Page 2: ...H CHANNELS 1 AND 2 12 6 2 MAKING AND RECEIVING PHONE CALLS 12 6 3 LISTENING TO MUSIC VIA A2DP 13 6 4 MUSIC SHARING 13 6 5 LISTENING TO MUSIC VIA THE AUX 13 7 FM RADIO 14 7 1 RADIO TUNING 14 7 2 AUTOMA...

Page 3: ...nd VOX technology Make Receive mobile calls by voice command Make intercom calls by voice command AGC technology Automatic Gain Control allowing the automatic volume adjustment according to ambient no...

Page 4: ...e unit 3 CUSTOMIZATION AND SETTINGS Get the most out of your cardo SHO 1 by changing the settings and customizing your unit according to your own personal preferences There are three ways to change th...

Page 5: ...seconds 4 GETTING STARTED 4 1 GENERAL FUNCTIONS Power ON OFF Press for 2 seconds ON 3 BLUE flashes ascending tone OFF 3 RED flashes descending tone Volume Tap or to adjust and set volume of current a...

Page 6: ...com calls will interrupt ongoing A2DP music Click to Link Intercom and 1 8 calls have the same priority Click to Link requests will not interrupt any type of Intercom call in progress and vice versa A...

Page 7: ...ettings Enable Disable VOX For Intercom Voice Command only In Standby press and simultaneously for 2 seconds Enable Blue flash for 2 seconds Disable Red flash for 2 seconds 5 INTERCOM The cardo SHO 1...

Page 8: ...n Standby tap and simultaneously You will hear the Buddy name of your cardo SHO 1 through the speakers Play Paired Buddy List In Standby press for 2 seconds 5 1b PAIRINGWITHA 1 8 INTERCOMBUDDY 1 In St...

Page 9: ...make Intercom calls proceed as follows 1 Check that all units are in Standby 2 Press for 5 seconds until the LED begins flashing rapidly indicating it is in Intercom Pairing mode see table below for...

Page 10: ...th intercom channels A and B will not be able to receive phone calls or GPS instructions as long as the call is in progress FOUR WAY INTERCOM Pairing 1 PairRider1toPassenger2using Channel A see 5 2a 2...

Page 11: ...r riders are nearby your next Click to Link call may randomly connect to any of them 5 4 BUSY SIGNAL When attempting to establish an Intercom call with another device that is already busy a busy signa...

Page 12: ...HO 1 you will need to set one as default for making calls If your GPS supports it you can pair the second mobile phone directly to the GPS and then pair the GPS to your cardo SHO 1 and so connect both...

Page 13: ...on the left side of your helmet carry your smartphone on the left side of your body 6 4 MUSIC SHARING Music sharing allows rider and passenger to listen to the same music within a range of 10m 33 ft...

Page 14: ...hin 20 seconds to save to current preset Scan and Save Automatically scans up for a station With Radio ON press for 5 seconds To stop search tap Tap within 20 seconds to save to current preset To cont...

Page 15: ...interference and 2 this device must accept any interference including interference that may cause undesired operation of the device FCC RF Radiation Exposure Statement This equipment complies with FCC...

Page 16: ...dsandmedical devicesonlyafterconsultingaphysicianorspecialist MakesuretoinstallandmounttheProductinastablemanner HEALTH WARNINGS Hearing Loss Audio devices can cause hearing loss Employ care and avoid...

Page 17: ...consent and without which the product would not be provided to you absent such limitations Some states do not allow certain exclusions of incidental or consequential damages so the above limitations...

Page 18: ...o injury or illness strains fractures partial and or total paralysis death or other ailments that could cause serious disability b these risks may be caused by the negligence of the manufacturers or i...

Reviews: