background image

TRITON SYSTEMS, INC.

SECTION 5 - MANAGEMENT FUNCTIONS

O

PERATION

 M

ANUAL

 - M

ODEL

 97XX-Series

5-26

9700-S

ERIES

9705-S

ERIES

9710-S

ERIES

9750-S

ERIES

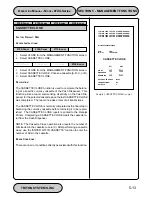
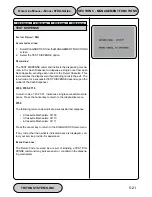
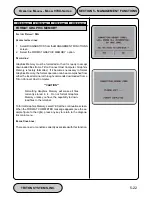
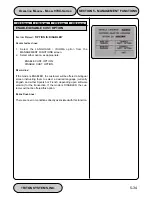
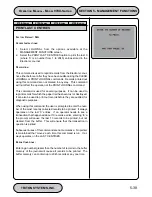
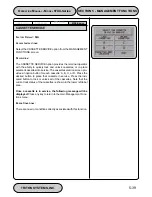
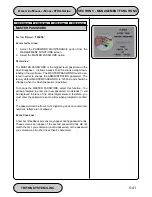
INJECT NEW CASSETTE ID

F

ACTORY

 D

EFAULT

: N/A

A

CCESS

 I

NSTRUCTIONS

:

1.

Select DIAGNOSTICS from the MANAGEMENT FUNCTIONS
screen.

2.

Select the MORE DIAGNOSTICS option.

3.

Select the INJECT NEW CASSETTE ID option.

D

ESCRIPTION

:

Each Note Cassette contains onboard memory that enables it to
store it’s own identification code. This option allows you to inject a
new ID into a Note Cassette. This option will prompt you to insert
the cassette you want to use into the top feed channel, and will
then provide options for injecting a designation of ‘A’, ‘B’, ‘C’, or ‘D’
into the cassette in this position. When the ID has successfully
been injected, the word DONE will appear. If the operation fails, an
error message will be displayed.

The CASSETTE ID has no direct correlation to the physical posi-
tion of the cassette within the unit, although in most instances the
cassette identified as ‘A’ will be placed in the top position, ‘B’ in the
second, ‘C’ in the third, and ‘D’ in the fourth position. This is not a
requirement, however, since the ID code allows the dispensing
mechanism (and the Cash Dispenser control system) to locate the
cassette no matter which slot it is in.

This function will automatically perform an UNLOCK operation so
that the cassettes can be  rearranged as needed to facilitate the
operation. At the conclusion of the procedure, after each cassette
has been placed in its appropriate location, use the LOCK/UN-
LOCK function to LOCK the cassettes into place.

E

RROR

 C

ONDITIONS

:

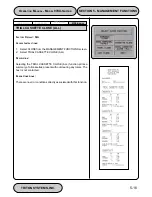
If the operation fails, an error message will be displayed.

Summary of Contents for Triton 9700

Page 1: ...Owner s manual Triton Owner s Manual 9700...

Page 2: ...Dispenser causes harm to the telephone network the telephone company will notify the customer that a temporary discontinuous of service may be required If advanced notice is not possible the telephone...

Page 3: ...o be connected to the facilities of the local telecommunications company The equipment must also be installed using an acceptable method of connection The customer should be aware that compliance with...

Page 4: ...ent Pour sa propre protection l utilisateur doit s assurer que tous les fils de mise la terre de la source d nergie lectrique des lignes t l phoniques et des canalisations d eau m talliques s fl y en...

Page 5: ...se harmful interference in which case the user will be required to correct the interference at his own expence Changes or modifications to this unit not expressly approved by the party responsible for...

Page 6: ...y 1 5 Alarm Thresholds 1 5 Transaction and Account Type Configuration 1 6 Electronic Journal 1 6 Distributor EPROM Access With Challenge 1 7 Status Monitoring 1 7 Language Option 1 7 International Mon...

Page 7: ...4 12 MODEL 9750 SERIES 4 15 Removing Note Cassettes 4 15 Opening Note Cassettes 4 15 Loading Note Cassettes 4 16 Installing Note Cassettes 4 17 Removing the Reject Vault 4 17 Opening the Reject Vault...

Page 8: ...WORD 5 42 TERMINAL CONFIGURATION 5 43 PRINTER SETTINGS 5 44 SET PRINT LENGTH 5 45 LOW RECEIPT PAPER 5 46 PRINTER GRAPHICS 5 47 RANDOM LEVEL PRIZE COUPONS 5 48 PRINTED COUPONS 5 49 ENTER LEVEL PRIZE MS...

Page 9: ...2 CURRENCY DATA 5 93 CASSETTE 5 95 DESCRIPTION 5 96 PRIMARY DESCRIPTION 5 97 SECONDARY DESCRIPTION 5 98 FAST CASH AMOUNT 5 99 KEY MANAGEMENT 5 100 ENTER MAC MASTER KEY 5 101 ENTER PIN MASTER KEY 5 103...

Page 10: ...HICS 5 146 VIEW MODIFY OPTIONS 5 147 ACTIVATE 5 148 DEACTIVATE 5 149 SELECT FEATURE NUMBER 5 150 DATE TIME FUNCTIONS 5 151 SET DATE FORMAT 5 152 SET DATE TIME 5 153 SET DATE 5 154 SET TIME 5 155 TRANS...

Page 11: ...xi APPENDIX A MECHANICAL LOCK A 1 About the Dial A 2 To Lock A 2 Changing the Combination A 2 APPENDIX B ELECTRONIC LOCK B 1 Entering the Combination B 2 Changing the Combination B 2 Lockout Feature B...

Page 12: ...SECTION 1 INTRODUCTION...

Page 13: ...cs that differentiate the various models in a series are 1 Class of Service and 2 Security Vault Access Type Class of Service Business vs Level 1 The basic Model 97XX is U L certified for Business Hou...

Page 14: ...advertising panels Supports an optional integrated full motion video display 320 by 240 256 color LCD display supports attention getting graphics and user selectable background screens Monochrome disp...

Page 15: ...opportunities or other purposes Voice Enabled Transactions The terminal provides voice feedback via an integrated headphone jack enabling sight impaired users to plug in a set of headphones and recei...

Page 16: ...ired this feature can be turned off Exit Message This feature allows a message to be displayed to the customer at the conclusion of a transaction The content of the message is determined by the operat...

Page 17: ...eceipt printer but with the optional Triton Connect software package the information can be sent to a remote PC Personal Computer for storage and subsequent analysis The information in the electronic...

Page 18: ...al to be provided to the processor The feature is acti vated using the terminal s Management Functions Language Option The Cash Dispenser has a screen language option This option allows the terminal u...

Page 19: ...ists of up to eight lines of text and each ad can be displayed for an operator specified duration The messages are created and downloaded to the terminal using Triton Connect Software Release release...

Page 20: ...tates remote data retrieval and moni toring of your Triton Systems Cash Dispenser The advantages of this feature are reduced service calls and simplified terminal con figuration changes which in turn...

Page 21: ...ry of the full range of monetary values available in the local currency type The Extended Amounts feature allows the selection of 12 character currency amount entry fields for those applications that...

Page 22: ...SECTION 2 BASIC OPERATION...

Page 23: ...When a screen timeout occurs a screen is presented which asks the user if more time is needed If the user chooses NO the Cus tomer Welcome screen will be presented If YES is chosen the user is returne...

Page 24: ...ed To enter a letter or punctuation mark you will first press the CTRL key the blank key in the lower right hand corner of the keypad and then you will press the number that has the letter or other ch...

Page 25: ...ort the current transaction The keys located beside the display are called the Screen Keys They are used in the selection of menu functions A Screen Key is only active when a function or menu option n...

Page 26: ...US TOMER TRANSACTIONS or MANAGEMENT FUNCTIONS Se lecting CUSTOMER TRANSACTIONS changes the display to the Customer Welcome screen so the terminal is ready to perform customer transactions Selecting MA...

Page 27: ...MODEL 97XX Series 2 6 The two options presented in such instances will be RESET ER ROR and MANAGEMENT FUNCTIONS Press RESET ERROR to attempt to clear the error or enter the MANAGEMENT FUNC TIONS area...

Page 28: ...SECTION 3 INITIAL SETUP...

Page 29: ...grouped into the following major categories Communications Security Surcharging Currency Settings Cassette Setup Transactions Receipts Coupons Languages Messages Ad Screens Date Time Settings Status M...

Page 30: ...nt These parameters are used to manage transaction activity record keeping enable remote monitoring of Cash Dispenser operation and to ensure receipts and other records are accurately annotated with t...

Page 31: ...s of each parameter listed In most cases the factory default value for each parameter is also provided IMPORTANT Although many of the Cash Dispenser s parameters have been set at the factory it is imp...

Page 32: ...O I T A C I N U M M O C E D O C S S E C C A K A P A T A D 4 1 1 5 8 X X X X S N O I T A C I N U M M O C D I E V R E S U P M O C 6 1 1 5 9 X X X X S N O I T A C I N U M M O C E D O M L A I D F M T D 8...

Page 33: ...N E R R U C E T T E S S A C N I Y T Q R E T N E 0 4 1 5 0 1 X E T T E S S A C S S E N K C I H T L L I B N R A E L E R 1 8 5 1 1 X X X E T T E S S A C Y C N E R R U C W O L D E L B A N E 2 8 5 2 1 X X...

Page 34: ...S I D E L B A N E D E L B A N E 2 3 1 5 0 1 X X X X G N I R O T I N O M S U T A T S N O T I R T E L B A S I D E L B A N E T C E N N O C D E L B A S I D 3 3 1 5 1 1 X X X X G N I R O T I N O M S U T A...

Page 35: ...O P U O C T N U O M A E Z I R P L E V E L T E S 0 0 0 3 5 5 2 1 X X X X S N O P U O C G N I N N I W M O D N A R T E S 0 4 5 5 3 1 X S N O P U O C S S A C N O P U O C L E V E L T C E L E S E N O N 6 5...

Page 36: ...SECTION 4 CURRENCY HANDLING...

Page 37: ...in the next section Media Condition S E I L I M A F L E D O M X X 7 9 Y L I M A F L E D O M E T T E S S A C Y T I C A P A C Y C N E R R U C E T A M I X O R P P A s e i r e S 0 0 7 9 e t t e s s a C e...

Page 38: ...ing and storing New or uncirculated currency must be burst and fully separated prior to loading into cassettes Preparing Notes Use the following procedures to prepare notes before inserting them into...

Page 39: ...ith the cassette key before it can be inserted onto the loading tray Insert the key and turn clockwise to show the green indicator in the window on the side of the cassette CAUTION If RED is indicated...

Page 40: ...tes in neat bundles of no more than to inches in thickness 100 200 notes Turn every other bundle around to minimize slanting of the pile bundle should have the same height on both sides if possible Cu...

Page 41: ...the reject tray and the lid The cassette can now be removed from the loading tray by sliding it away from the probes 10 Verify that the cassette is primed Be certain the green indicator is showing in...

Page 42: ...omer transactions performing close operations etc can cause the terminal to enter an Out of Service condition 2 Open the outer fascia panel to gain access to the security container door using the key...

Page 43: ...ervicing Removing note cassette Note cassette removed from dispenser Loading the Currency Cassette 1 Unlock the cassette and open the cassette lid using the supplied key Move the pusher plate to the r...

Page 44: ...ame height on both sides if possible Cupped bundle To avoid dispensing problems caused by cupped bundles turn all the bundles with the cupped side towards the dispense opening of the note cassette opp...

Page 45: ...5 Close and lock the cassette Remove the key Slide the cassette back into its compartment in the dispensing mechanism Make sure the cassette is fully inserted You will feel the cassette latch securel...

Page 46: ...against the cassette day close records Reinstalling the Dispenser Mechanism 1 After reinstalling the currency and reject cassettes pull down on the swivel platform locking pin to allow the swivel pla...

Page 47: ...mmon notes Removing the Note Tray 1 Ensure the terminal is not in use before removing the note tray Removing the note tray while the machine is in operation processing customer transactions performing...

Page 48: ...upped sides toward dispense opening Mixed Slanting and Cupped bundles Separate the mixed currency into neat bundles of 100 200 notes of each type Place the cupped bundles nearest the dispense opening...

Page 49: ...the notes When loading the note tray to full capacity make sure that the pusher plate has a leeway of approximately 1 4 inch 5 mm between the wall plate and the pusher plate 5 Using the handle slide t...

Page 50: ...Functions 2 Open the outer fascia panel of the security con tainer using the key lock on the front of the panel Open the combination lock on the security con tainer door and open the door to gain acc...

Page 51: ...m from forming neat even piles If not corrected such conditions may cause notes to be rejected by the dispensing mechanism To compensate for the most common conditions of slanting or cupped note piles...

Page 52: ...ameter matches the denomination of currency in each Note Cassette See the proce dure for using the VALUE function to set this pa rameter in Section 5 Management Functions Removing the Reject Vault The...

Page 53: ...andle with one hand while holding the mechanism in place with the other hand Pull the Vault out slightly Place one hand underneath to support the Vault as you slide it completely out of the unit Place...

Page 54: ...in Management Functions 3 Perform a TRIAL CASSETTE CLOSE on each cassette Check the Management Report to ensure the quantity value matches what you entered in the previous step 4 Check the VALUE para...

Page 55: ......

Page 56: ...SECTION 5 MANAGEMENT FUNCTIONS...

Page 57: ...entered the Management Functions menu see the figure on the next page will be displayed Once you have entered the Management Functions Menu you may per form any of the functions allowed by the type o...

Page 58: ...n such cases this is because the function is not available in the version of terminal operating software currently loaded in the unit You may also notice that the factory default values for some func...

Page 59: ...The MANAGEMENT FUNCTIONS menu offers the following op tions 1 CLOSE 2 DIAGNOSTICS 3 LANGUAGE IDIOMA 4 JOURNAL 5 PASSWORD MAINTENANCE 6 TERMINAL CONFIGURATION 1 CLOSE 2 DIAGNOSTICS 3 LANGUAGE IDIOMA 4...

Page 60: ...FUNCTION menu offers the following op tions 1 SCHEDULE CLOSE 2 TRIAL CASSETTE BALANCE 3 TRIAL CLOSE 4 DAY CLOSE 5 SEND TERMINAL TOTALS 6 ENTER QTY IN CASSETTE 7 CASSETTE CLOSE 1 SCHEDULE CLOSE 2 SEND...

Page 61: ...SE process will be automatically initiated if the SCHEDULE CLOSE feature is turned ON When the feature is turned OFF the close procedure must be initiated manually The current state of the SCHEDULE CL...

Page 62: ...h the processor and perform a close operation The time is entered in the form HH MM SS hours minutes seconds Do not enter the char acters separating the fields just the fields themselves Press CLEAR t...

Page 63: ...will send accumulated totals information to the processor during the close operation Terminal totals include the total value of all with drawal inquiry and transfer transactions that have occurred si...

Page 64: ...umber of customer transactions With drawals Inquiries and Transfers recorded by the host processor and the terminal since the last Day Close was performed The two column format allows the host and ter...

Page 65: ...day The DAY CLOSE is normally completed as the final step in the daily balancing process The DAY CLOSE report is printed to the receipt printer The TRIAL CLOSE function does the same thing as the DAY...

Page 66: ...close operations When the CASSETTE CLOSE option is se lected a cassette selection screen see the description of the SE LECT CASSETTE function for more information is presented which allows the operat...

Page 67: ...Shows the number of notes that have been dispensed and the value of this quantity of notes 3 REMAINING Shows the number of notes remaining in the cassette and the total value of these notes 4 VALUE OF...

Page 68: ...alancing the currency cassette before removing it to be replen ished The CASSETTE CLOSE report is printed to the Receipt Printer Completing a CASSETTE CLOSE clears the cassette to tal from the Cash Di...

Page 69: ...cassette A B C or D 3 Select ENTER QTY IN CASSETTE DESCRIPTION The ENTER QTY IN CASSETTE function allows entry of the num ber of documents in the cassette This number is used as a start ing point for...

Page 70: ...Choose a cassette A B C or D 3 Choose the SELECT CASSETTE option DESCRIPTION This option provides a convenient way to switch between cassettes when performing cassette specific close operations Simpl...

Page 71: ...TORY DEFAULT N A ACCESS INSTRUCTIONS 1 Select CLOSE from the MANAGEMENT FUNCTIONS screen 2 Select TRIAL CASSETTE CLOSE ALL DESCRIPTION Selecting the TRIAL CASSETTE CLOSE ALL function prints a summary...

Page 72: ...EST DISPENSE to perform a dispense from each Feed Channel of the mechanism Select FORMAT GRAPHIC MEMORY to erase the memory used to store Ad graphics Select the TEST RECEIPT PRINTER option to test the...

Page 73: ...perating normally 1 40 40 50 40 36 2 50 40 50 40 36 3 44 40 50 40 36 4 54 40 50 40 36 Note that the value of the second number in a set of return codes may be either 40 or 50 40 50 The cancel button m...

Page 74: ...EMENT FUNCTIONS The Return Code received as a result of initiating status testing may provide indications of error conditions in the specified chan nel ERROR CONDITIONS If any code other than what is...

Page 75: ...of the dispensing mechanism The return code for a successful PURGE depends upon the model of the Cash Dispenser 9700 9705 9710 The Return Code for a successful purge is 20 20 20 If any code other tha...

Page 76: ...g notes to the exit The return code for a successful TEST DISPENSE depends upon the model of the Cash Dispenser 9700 9705 9710 A return code of 20 20 21 indicates a single successful test dis pense Pr...

Page 77: ...formatted If it becomes necessary to format Graphics Memory the format operation can be accomplished from either the local terminal or through commands downloaded from a Triton Connect Host Computer C...

Page 78: ...01 10 05 51 AM Mode Demo Term 000000000000000 Terminal Owner Eprom Version SD02 02B60 05 24 99 Program Version SA DEMO 14 10 19 99 Table Version ST 9700 14 10 12 99 SPED version SP 01 00 MACing is Dis...

Page 79: ...Select DIAGNOSTICS from the MANAGEMENT FUNCTIONS screen 2 Select the VERSION S option DESCRIPTION This function displays the version information for the terminal soft ware that is running in the Cash...

Page 80: ...to test a customer s ATM or credit card for proper operation in the terminal card reader For 9750 series Cash Dispensers the the SELECT CLOSE FUNC TION menu provides the following options 1 INJECT NEW...

Page 81: ...ID has successfully been injected the word DONE will appear If the operation fails an error message will be displayed The CASSETTE ID has no direct correlation to the physical posi tion of the cassett...

Page 82: ...EST MODEM option DESCRIPTION This test confirms that the CPU Module can communicate with the modem and that the modem can be configured This test does not test the ability of the modem to communicate...

Page 83: ...nsed and raises as a security precaution when the cassette is removed from the dispensing mechanism During a normal unlocking operation see the description of the CASSETTE PARAMETERS function when the...

Page 84: ...y remove any notes that are sticking out of the cas sette Re insert the cassette into the dispensing mechanism and perform a normal LOCK operation followed by a normal UNLOCK operation You may now rem...

Page 85: ...he customer complains of card read errors first make sure that he or she is inserting the card correctly Then try to read the card with SCAN CARD If the card can be read properly the information from...

Page 86: ...des access to the options that control the lan guage that is displayed on the Cash Dispenser LCD Display Cur rent language options include English or Spanish certain interna tional versions of termina...

Page 87: ...d will set the LCD screen to display only English text during a transaction Choosing this function when the ENABLE CUST OPTION is se lected will present customer transaction text in English initially...

Page 88: ...anguage option with French Choosing this option when the DISABLE CUST OPTION is se lected will display only Spanish text during a transaction Choosing this option when the ENABLE CUST OPTION is se lec...

Page 89: ...UNCTIONS screen 2 Select either option as appropriate ENABLE CUST OPTION DISABLE CUST OPTION DESCRIPTION If the mode is ENABLED the customer will be offered a bilingual screen instructing them to sele...

Page 90: ...FACTORY DEFAULT N A ACCESS INSTRUCTIONS Select JOURNAL from the options available at the MANAGEMENT FUNCTIONS screen DESCRIPTION Select the JOURNAL function from the MANAGEMENT FUNCTIONS screen to 1 P...

Page 91: ...rds will be printed whether there are 1 or 2045 records This command should be used regularly to print the audit trail of the terminal This information should be maintained in case of an inquiry by a...

Page 92: ...records in the journal as audited This means that they will not be printed out the next time a PRINT JOURNAL command is per formed Audited records are not erased They are marked as if they had been pr...

Page 93: ...al purposes It can be used to reprint records for which the paper trail has been lost or destroyed It can also be used to print out records before they are audited for diagnostic purposes When using t...

Page 94: ...ock cassettes or to place selected cassettes into service The cassette selection screen pro vides an option button for each cassette A B C or D Press the desired button to place that cassette in servi...

Page 95: ...LT N A ACCESS INSTRUCTIONS Select the PASSWORD MAINTENANCE option from the MANAGE MENT FUNCTIONS screen DESCRIPTION The PASSWORD MAINTENANCE Function of MANAGEMENT FUNCTIONS menu allows access to menu...

Page 96: ...DMINISTRATION password The factory default MASTER PASSWORD is 123456 and should be changed when the Cash Dispenser is installed To change the MASTER PASSWORD select this function You will be prompted...

Page 97: ...ER PASS WORD is used to enter the Management FUNCTIONS area Use the options provided to VIEW or CHANGE the password as shown in the figures below When the VIEW option is selected the cur rent password...

Page 98: ...GURATION option from the MAN AGEMENT FUNCTIONS screen DESCRIPTION The TERMINAL CONFIGURATION option provides access to func tions that allow the following parameters to be viewed and changed 1 PRINTER...

Page 99: ...RY DEFAULT N A ACCESS INSTRUCTIONS 1 Select the TERMINAL CONFIGURATION option from the MANAGEMENT FUNCTIONS screen 2 Select the PRINTER SETTINGS option DESCRIPTION This menu provides access to the fol...

Page 100: ...RATION option from the MANAGEMENT FUNCTIONS screen 2 Select the PRINTER SETTINGS option 3 Select SET PRINT LENGTH DESCRIPTION This function sets the minimum length of the receipt provided to the custo...

Page 101: ...to the appropriate text and pressing the EXIT key Selecting the IN SERVICE options will allow the terminal to con tinue to operate after it senses a Receipt Printer Paper Low condi tion Error Code 18...

Page 102: ...nect Software Release 1 8 or above allows bit mapped graphics in bmp format to be downloaded to the terminal This graphic will be printed on the receipt when the PRINTER GRAPHICS op tion has been ENA...

Page 103: ...s the functions specific to managing either printed or dispensed prize coupons The following options are available 1 ENTER LEVEL PRIZE MESSAGE 2 ENTER RANDOM PRIZE MESSAGE 3 ENABLE DISABLE COUPON AWAR...

Page 104: ...u 2 Select RANDOM LEVEL PRIZE COUPONS from the TERMINAL CONFIGURATION menu 3 Select PRINTED COUPONS DESCRIPTION This function provides access to the following options which will set up terminal operat...

Page 105: ...The keys on the right side of the display are F6 through F8 The F1 key centers the text on the line where the cursor appears The F2 key erases all text in the current mes sage F3 clears the text on th...

Page 106: ...F4 The keys on the right side of the display are F6 through F8 The F1 key centers the text on the line where the cursor appears The F2 key erases all text in the current mes sage F3 clears the text on...

Page 107: ...TERMINALCONFIGURATION from the MANAGEMENT FUNCTIONS menu 2 Select RANDOM LEVEL PRIZE COUPONS from the TERMINAL CONFIGURATION menu 3 Select PRINTED COUPONS 4 Select the ENABLE DISABLE COUPON AWARDS op...

Page 108: ...PRIZE COUPONS from the TERMINAL CONFIGURATION menu 3 Select PRINTED COUPONS 4 Select the SET LEVEL PRIZE AMOUNT option DESCRIPTION This function sets the threshold level at which the level prize cou p...

Page 109: ...he TERMINAL CONFIGURATION menu 3 Select PRINTED COUPONS 4 Select the SET RANDOM WINNING option DESCRIPTION This function sets the frequency at which the random prize cou pons will be printed The rando...

Page 110: ...Select RANDOM LEVEL PRIZE COUPONS from the TERMINAL CONFIGURATION menu 3 Select DISPENSED COUPONS DESCRIPTION This function provides access to the following options which will set up terminal operati...

Page 111: ...lect TERMINALCONFIGURATION from the MANAGEMENT FUNCTIONS menu 2 Select RANDOM LEVEL PRIZE COUPONS from the TERMINAL CONFIGURATION menu 3 Select DISPENSED COUPONS 4 Choose SELECT LEVEL COUPON CASS DESC...

Page 112: ...1 Select TERMINALCONFIGURATION from the MANAGEMENT FUNCTIONS menu 2 Select RANDOM LEVEL PRIZE COUPONS from the TERMINAL CONFIGURATION menu 3 Select DISPENSED COUPONS 4 Choose SELECT RANDOM COUPON CAS...

Page 113: ...IONS menu 2 Select RANDOM LEVEL PRIZE COUPONS from the TERMINAL CONFIGURATION menu 3 Select DISPENSED COUPONS 4 Select the ENABLE DISABLE COUPON AWARDS option DESCRIPTION This function provides access...

Page 114: ...menu 3 Select DISPENSED COUPONS 4 Select the SET LEVEL PRIZE AMOUNT option DESCRIPTION This function sets the threshold level at which the level prize cou pon will be dispensed Withdrawing an amount e...

Page 115: ...SED COUPONS 3 Select the SET RANDOM WINNING option DESCRIPTION This function sets the frequency at which the random prize cou pons will be dispensed The random coupon is won by a random number of tran...

Page 116: ...EMENT FUNCTIONS menu 2 Select CHANGE MESSAGES DESCRIPTION The CHANGE MESSAGES option of the TERMINAL CONFIGU RATION menu allows information for the following screens to be changed by the terminal oper...

Page 117: ...ight side of the display are F6 through F8 The F1 key centers the text on the line where the cursor appears The F2 key erases all text in the current mes sage F3 clears the text on the current line Th...

Page 118: ...MESSAGES 3 Select SURCHARGE MESSAGES DESCRIPTION This function is used to select the surcharge message that will be displayed to the customer Press the button next to the desired message to select it...

Page 119: ...TRITON SYSTEMS INC SECTION 5 MANAGEMENT FUNCTIONS OPERATION MANUAL MODEL 97XX Series 5 64 CUSTOM F CUSTOM G CUSTOM H CUSTOM C CUSTOM D CUSTOM E...

Page 120: ...key centers the text on the line where the cursor appears The F2 key erases all text in the current mes sage F3 clears the text on the current line The F4 Key is used similarly to a CAPS LOCK key on a...

Page 121: ...the SURCHARGE OWNER is entered directly into the terminal To enter a digit 0 9 simply press the key that has that digit To enter a letter first press the CTRL key then press the key that has the lett...

Page 122: ...The F1 key centers the text on the line where the cursor appears The F2 key erases all text in the current mes sage F3 clears the text on the current line The F4 Key is used similarly to a CAPS LOCK...

Page 123: ...here the cursor appears The F2 key erases all text in the current mes sage F3 clears the text on the current line The F4 Key is used similarly to a CAPS LOCK key on a com puter keyboard Pressing the F...

Page 124: ...essage The name is entered directly into the terminal To enter a digit 0 9 simply press the key that has that digit To enter a letter first press the CTRL key then press the key that has the letter yo...

Page 125: ...RATION from the MANAGEMENT FUNCTIONS menu 2 Select SET TERMINAL PARAMETERS DESCRIPTION Selecting SET TERMINAL PARAMETERS from the TERMINAL CONFIGURATION menu allows the following Cash Dispenser op era...

Page 126: ...an go on line AND before the communications key can be downloaded When this function is selected the current TERMINAL is dis played If it is to be changed select CHANGE To enter a digit 0 9 press the...

Page 127: ...ERMINAL PARAMETERS 3 Choose the RESET SEQ option DESCRIPTION Select the RESET SEQ option from the TERMINAL PARAM ETER menu to reset the sequence number that is printed on the journal printout and rece...

Page 128: ...IONS menu 2 Select SET TERMINAL PARAMETERS 3 Choose the SURCHARGE MODE option DESCRIPTION Selecting the SURCHARGE MODE option from the SET TERMI NAL PARAMETERS menu allows the terminal operator or ser...

Page 129: ...ress the CHANGE PERCENT AMOUNT key the ENTER NEWAMOUNTAND PRESS OK prompt replaces the CURRENT PERCENT IS field Enter the applicable percentage value from 1 and 99 percent and press OK If the processo...

Page 130: ...wal transactions If surcharges are in use on your net work you are required to notify the customer of an additional fee before the transaction is processed He or she must be given a chance to cancel t...

Page 131: ...the terminal user is given the option of accepting the surcharge and continuing the transaction or canceling the transaction without incurring any charges The surcharge amount identified in the notif...

Page 132: ...mber limit must be downloaded to the terminal using Triton Connect man agement software From 1 to 9 digits may be used The terminal will compare the card number to all current ISO numbers to the lengt...

Page 133: ...ng 1 Press the Screen Key next to the block where the new ISO will be entered or an ISO changed 2 Enter the ISO number up to six digits in length 3 Press the OK key If more than one ISO must be entere...

Page 134: ..._ _ _ field that will appear on the SURCHARGE MODE screen The value will be stored in the ter minal and displayed to the customer in the surcharge notification message See Error Conditions for additio...

Page 135: ...llows the terminal operator to view and change the follow ing parameters 1 LOW CURRENCY 2 INTERNATIONAL CURRENCY 3 MAXIMUM AMOUNT 4 MULTIPLE AMOUNT 5 EXTENDED AMOUNT 6 FAST CASH AMOUNT 1 RELEARN BILL...

Page 136: ...During this process the unit will dispense and reject as many as 7 15 notes For multiple cassettes the number of test rejects could almost fill the single note compartment of the Reject Cas sette In...

Page 137: ...withdrawal due to a partial dispense occurring In the event of a partial dispense or no dispense the terminal will automatically inform the Processor and the customers account will be correctly credi...

Page 138: ...e default symbol can be viewed and changed through the termi nals Management Functions Monetary symbols for use with following currencies are supported by the Cash Dispenser 1 C The symbol for the Col...

Page 139: ...ion It can be set from 1 to 999999 in increments of 1 and it must be an even multiple of the denomination that is in the cassette Factory default is set to 500 00 The value is dollar amount only no ce...

Page 140: ...nstalled in the currency cassette It can be set to any value as long as this value is no less than 1 50th of the MAXIMUM AMOUNT Typical values might be 10 20 50 or 100 Whenever a withdrawal transactio...

Page 141: ...aximum non cash purchase limit must be set in the Cash Dispenser before any purchases of non cash items can be com pleted This number is the largest dollar amount allowed for the purchase of a non cas...

Page 142: ...AMOUNT option DESCRIPTION The standard length of a currency amount entry field is 8 digits In some applications this length is insufficient to allow the entry of the full range of customer transactio...

Page 143: ...setup operations When the CAS SETTE PARAMETERS option is selected a cassette selection screen see the description of the CASSETTE option for more in formation is presented which allows the operator t...

Page 144: ...UP 4 Choose the CASSETTE PARAMETERS option 5 Select a cassette A B C or D 6 Choose SET BILL DIMENSION DESCRIPTION This function enables you to enter the WIDTH and LENGTH measurements of the item in th...

Page 145: ...function allows the operator to set the value of a cash or non cash item in a particular cassette For cash VALUE must be the denomination of the currency currently inside that particular cassette and...

Page 146: ...ETERS 3 Select CASSETTE SETUP 4 Choose the CASSETTE PARAMETERS option 5 Choose a cassette A B C or D 6 Select the TYPE option DESCRIPTION This function allows the user to set what type of item is curr...

Page 147: ...n DESCRIPTION This function allows the user to set the desired cassette to either IN SERVICE or OUT OF SERVICE Placing a cassette IN SER VICE will allow the dispenser to access the item inside the cas...

Page 148: ...nd the country of interest in the left hand col umn then move to the right to find the description of the currency type in the second column Move to the third column to find the specific three charact...

Page 149: ...new currency type value or denomination is used in a cas sette E D O C Y R T N U O C E P Y T Y C N E R R U C Y C N E R R U C E D O C E D O C Y R T N U O C E P Y T Y C N E R R U C Y C N E R R U C E D O...

Page 150: ...enu of con figuration functions applicable to the selected cassette will be pre sented This option is also used to LOCK or UNLOCK the cassettes in the dispensing mechanism chassis Note that this funct...

Page 151: ...t the terminal owner enter a brief description of NON CASH only items in a cassette There are two menus for entering descriptive infor mation The PRIMARY DESCRIPTION is used to provide a brief descrip...

Page 152: ...escrip tion of the items in the NON CASH cassettes Examples of de scriptions are PHONE CARDS COUPONS STAMPS etc To enter a number press the key that has that number To enter a letter first press the C...

Page 153: ...on DESCRIPTION The SECONDARY DESCRIPTION provides a location for other information of general interest or information required by law To enter a number press the key that has that number To enter a le...

Page 154: ...T function Up to six digits more with software versions that support extended field lengths can be entered into any data field accepting a monetary value Selecting this function displays the FAST CASH...

Page 155: ...DESCRIPTION The KEY MANAGEMENT function provides access to Cash Dis penser functions that control the method of entry for the Master Key and the Comms Communications Key The functions ac cessed throug...

Page 156: ...r security reasons when entering this key a is displayed in place of the actual character Since it is not possible to view the key while it is entered the key must entered in twice to make sure it was...

Page 157: ...e organization for assis tance ERROR CONDITIONS If the MAC MASTER KEY is not entered correctly no message traffic can take place so be sure to enter the key accurately If your second entry of the key...

Page 158: ...ply press the key that has that digit and a will appear To enter the letters A F first press the CTRL key then press the key that has the letter you want on it The first press of the key will display...

Page 159: ...e to enter the key accurately If your second entry of the key does not match the first entry you will be warned and allowed to start over with the first entry To enter a digit 0 9 simply press the key...

Page 160: ...RS 3 Select KEY MANAGEMENT 4 Choose the INJECT MASTER KEYS option DESCRIPTION The INJECT MASTER KEYS function is used in conjunction with a PC Personnel Computer and a special floppy disk to inject th...

Page 161: ...lay the first character above the number Sub sequent presses will display the characters in sequence When the character you want is displayed press the RIGHT ARROW key to lock in the letter If your ne...

Page 162: ...enu and comparing the MAC WORKING KEY CHECK DIGIT on the printout to the original receipt printout from the initial terminal setup If the CHECK DIGIT is different from the original and the terminal is...

Page 163: ...enter the letters A F first press the CTRL key then press the key that has the letter you want on it The first press of the key will display the first character above the number Sub sequent presses w...

Page 164: ...into a memory device such as an EPROM is correct The CHECK DIGIT can be verified by doing a RECEIPT PRINTER TEST from the DIAGNOSTICS Menu and comparing the PIN WORKING KEY CHECK DIGIT on the printou...

Page 165: ...NG KEYS or they may be downloaded from the processor host computer These keys must be loaded before the Cash Dispenser can oper ate in a live mode When the DOWNLOAD WORKING KEYS function is run a call...

Page 166: ...METERS 3 Select TELEPHONE DESCRIPTION The TELEPHONE function is used to set up parameters that con trol telephone communications between the Cash Dispenser and the Processor The following parameters a...

Page 167: ...rs on the screen no number is set Se lect CHANGE to blank the current entry and then enter the de sired phone number The phone number may be up to 15 digits long It can also contain a dialing prefix s...

Page 168: ...his function is selected the current phone number is dis played if nothing appears on the screen no number is set Se lect CHANGE to blank the current entry and then enter the de sired phone number The...

Page 169: ...n number which enables the DataPak pro cessing organization to correctly identify and route data traffic be tween the terminal and the transaction processor The current state of the DATAPAKACCESS CODE...

Page 170: ...ish a connection as soon as the customer s ATM or credit card has been scanned by the card reader The pur pose of this mode of operation is to provide quicker processing of customer transactions When...

Page 171: ...nction allows the terminal operator or a service technician to view and change the COMPUSERVE ROUTING ID number When this function is selected the current Compuserve ID is dis played if nothing appear...

Page 172: ...ON from the MANAGEMENT FUNCTIONS menu 2 Select SET TERMINAL PARAMETERS 3 Select TELEPHONE 4 Select the MODEM SETUP option DESCRIPTION Selecting the MODEM SETUP OPTION from the TELEPHONE screen allows...

Page 173: ...in either the touch tone mode DTMF or in the rotary PULSE mode Consult with the local phone company to determine which option is supported After se lecting the dial mode be certain to execute the RES...

Page 174: ...he MODEM SETUP option 5 Select DIAL RATE DESCRIPTION The internal modem can be configured to send dial tones at one of three speeds The possible values are FAST 70 milliseconds MED 150 ms and SLOW 255...

Page 175: ...Select TELEPHONE 4 Select the MODEM SETUP option 5 Select BAUD RATE DESCRIPTION The bit rate of the modem can be controlled with this function The rate can be set to 2400 or 1200 bits per second bps T...

Page 176: ...up string can be sent to the modem when it is initialized A custom modem initialization string can be entered for the following options 1 INITIALIZE STRING 2 PRE HOST STRING 3 POST HOST STRING 4 TRITO...

Page 177: ...ST MODEM DESCRIPTION This function is used to reset and test the internal modem It should be run after setting any of the modem configuration parameters to make sure an error was not made It MUST be r...

Page 178: ...MANAGEMENT FUNCTIONS menu 2 Select SET TERMINAL PARAMETERS 3 Choose MORE DESCRIPTION Selecting the MORE TERMINAL PARAMETERS option from the TERMINAL PARAMETERS allows the terminal operator or a ser vi...

Page 179: ...NALCONFIGURATION from the MANAGEMENT FUNCTIONS menu 2 Select SET TERMINAL PARAMETERS 3 Select MORE 4 Choose ADJUST CONTRAST DESCRIPTION This feature allows the terminal operator to adjust the contrast...

Page 180: ...at the completion of a transaction When RECEIPT OPTION is ENABLED the customer is presented with a message at the conclusion of the transaction asking whether they want a receipt or not If they respon...

Page 181: ...ARM NUMBERS 4 CALL BACK ENABLE DISABLE 5 TRITON CONNECT ENABLE DISABLE NOTE Triton Connect is an option and may not be installed on your terminal ERROR CONDITIONS There are no error conditions directl...

Page 182: ...current phone number is dis played if nothing appears on the screen no number is set Se lect CHANGE to blank the current entry and then enter the de sired phone number The phone number may be up to 1...

Page 183: ...the current phone number is dis played if nothing appears on the screen no number is set Se lect CHANGE to blank the current entry and then enter the de sired phone number The phone number may be up t...

Page 184: ...ations the terminal monitoring organization may re quire different telephone numbers for alarm reporting purposes This could enable a third party service organization for example to be notified of ala...

Page 185: ...on is selected the current phone number is dis played if nothing appears on the screen no number is set Se lect CHANGE to blank the current entry and then enter the de sired phone number The phone num...

Page 186: ...ction is selected the current phone number is dis played if nothing appears on the screen no number is set Se lect CHANGE to blank the current entry and then enter the de sired phone number The phone...

Page 187: ...nal it will hang up and wait for the terminal to CALL BACK This is done for security reasons The CALL BACK option allows the terminal operator to enable and disable this feature Once you ve reached th...

Page 188: ...eature has been ACTIVATED using the AC TIVATE function this function can be used to ENABLE or DIS ABLE Triton Connect access to the terminal Once you ve reached the TRITON CONNECT screen the TRI TON C...

Page 189: ...ect MORE 4 Select ATM monitoring DESCRIPTION The ATM Monitoring screen provides access to the following func tions 1 STATUS MONITORING When this feature is enabled the terminal will send operational s...

Page 190: ...or software When enabled the terminal will send operational status information to the processor during certain transactions with the processor The status information is sent in a data field that is pa...

Page 191: ...em will fail and inhibit any calls from being made The host has no way of determining which sce nario is occurring in any kind of real time mode The Heartbeat Message overcomes this limitation When th...

Page 192: ...ost know everything is all right a Heartbeat Message call that DOES NOT succeed for any reason is not retried If the call does fail the interval timer will be reset and the terminal will re main in se...

Page 193: ...iders Terminal Was Reset or Power Cycled Since the interval timer is reset when the terminal is reset a sched uled call may not occur at the expected time To realize the benefits of the Heartbeat Mess...

Page 194: ...eated in a special graphics editor that runs from the Triton Connect Terminal Managers program The graphics editor lets the user import 16 color bit mapped graphic files in the bmp format with a maxim...

Page 195: ...N HEADER data field consists of alphanumeric characters To enter a digit 0 9 press the key that has that digit To enter a letter first press the CTRL key then press the key that has the letter you wan...

Page 196: ...DIFY OPTIONS The ALARM THRESHOLDS function is used to monitor the status of various parameters such as number of journal entries or the level of cash remaining in the cassette and determines at what p...

Page 197: ...ed OFF no notification message will be sent 2 JOURNAL THRESHOLD When this feature is turned ON the terminal will send a notification message to a remote Triton Connect computer if the number of entrie...

Page 198: ...SHOLDS 6 Select SET LOW CASH THRESHOLD DESCRIPTION This function allows you to enter the number of bills that will act as a low cash threshold When the number of bills in the cassette drops below the...

Page 199: ...NAL PARAMETERS 3 Select MORE 4 Select MORE 5 Select ALARM THRESHOLDS 6 Select SET JOURNAL THRESHOLD DESCRIPTION This function allows you to enter the number of journal entries that will act as a thres...

Page 200: ...RATION from the MANAGEMENT FUNCTIONS menu 2 Select SET TERMINAL PARAMETERS 3 Select MORE 4 Select MORE 5 Select ALARM THRESHOLDS 6 Select SET SCHEDULED JOURNAL DESCRIPTION This function allows you to...

Page 201: ...used to turn ON or OFF the display of background graphics and to select the cur rently displayed background graphic image The current state of the BACKGROUND GRAPHICS function is shown as either ON o...

Page 202: ...FIGURATION from the MANAGEMENT FUNCTIONS menu 2 Select SET TERMINAL PARAMETERS 3 Select MORE 4 Select MORE 5 Select VIEW MODIFY OPTIONS DESCRIPTION The VIEW MODIFY OPTIONS FUNCTION provides access to...

Page 203: ...that is displayed on the FEATURE 00 SERIAL NUMBER screen Once the activation code is obtained select the ACTIVATE option from the FEATURE 00 Menu to display the FEATURES 00 SE RIAL NUMBER screen Enter...

Page 204: ...VIEW MODIFY OPTIONS 6 Choose DEACTIVATE DESCRIPTION To DEACTIVATE a Feature select the DEACTIVATE option from the FEATURE menu When DEACTIVATE is selected a confirma tion screen ARE YOU SURE is displ...

Page 205: ...PARAMETERS 3 Select MORE 4 Select MORE 5 Select VIEW MODIFY OPTIONS 6 Choose SELECT FEATURE NUMBER DESCRIPTION Selects the feature number to examine or to activate deactivate For example entering the...

Page 206: ...ON This screen provides a menu of functions related to configuration of date and time parameters for the Cash Dispenser 1 SET DATE FORMAT This option allows you to choose between a DD MM YY and a MM D...

Page 207: ...ect TERMINALCONFIGURATION from the MANAGEMENT FUNCTIONS menu 2 Choose DATE TIME FUNCTIONS 3 Choose SET DATE FORMAT DESCRIPTION This function provides a way to change the date format the termi nal uses...

Page 208: ...IGURATION from the MANAGEMENT FUNCTIONS menu 2 Choose DATE TIME FUNCTIONS 3 Choose SET DATE TIME DESCRIPTION The Cash Dispenser contains an internal clock that maintains the date and time even when po...

Page 209: ...cess The date is en tered in the form MM DD YY month day year Do not enter the characters separating the fields just the fields themselves Press CLEAR to erase everything and start over Press the BACK...

Page 210: ...n the form HH MM SS hours minutes sec onds Do not enter the characters separating the fields just the fields themselves Press CLEAR to erase everything and start over Press the BACKSPACE key to back u...

Page 211: ...ability of the two transaction types TRANSFERS and BALANCE INQUIRIES When a transaction type is turned ON the terminal will provide that op tion to the customer When a transaction type is turned OFF t...

Page 212: ...off the availability of two account types SAVINGS and CREDIT CARD When an account type is turned ON the terminal will provide that option to the cus tomer When an account type is turned OFF the select...

Page 213: ......

Page 214: ...SECTION 6 MAINTENANCE...

Page 215: ...he AC Power ap plied to the Cash Dispenser 1 This operation can be completed with the power on Open the top of the cash dispenser by unlocking the control panel and pulling the hinged door forward IMP...

Page 216: ...he top of the roll when it is installed on the paper bracket 6 Place the paper roll and paper spool back on the paper bracket by sliding the small slotted end of the spool into the large hole in the b...

Page 217: ...play The Liquid Crystal Display LCD on the front of the cash dispenser has a plastic protective window that should be cleaned only with a SOFT cloth dampened with a weak solution of a mild detergent a...

Page 218: ...with the next step 6 Open the ATM control panel Remove and reconnect the data cable ribbon style cable on the card reader Close the ATM control panel 7 Reset the ATM Try to read a card If the problem...

Page 219: ...ATM control panel Plug the base unit of a telephone NOT the handset into the phone jack on the third card from the top in the card cage 3 Listen for a dial tone If there is a dial tone unplug the tel...

Page 220: ...SECTION 7 JOURNAL ENTRIES...

Page 221: ...cribed in Section 8 Error Recovery in the operations manual 09 l9 94 5 32 29 PM OK 9999 TERM 000000 1234567890123456 0004 1 50 00 Dispensed 50 00 Code 32 D 5 R O 7 13 12 1 2 3 4 5 6 8 9 11 10 S E I R...

Page 222: ...o r f r e f s n a r T 5 g n i k c e h C o t g n i v a S m o r f r e f s n a r T 6 g n i k c e h C o t d r a C t i d e r C m o r f r e f s n a r T 7 s g n i v a S o t d r a C t i d e r C m o r f r e f...

Page 223: ......

Page 224: ...SECTION 8 ERROR RECOVERY...

Page 225: ...Cash Dispenser to normal operation But there are some actions that the end user can perform to confirm the existence of a problem or correct simple problems Table 8 1 Error Codes Recovery Procedures...

Page 226: ...to confirm that the dispenser is working normally and that is to per form a TEST DISPENSE The success of this operation is usually a good indication that the overall dispenser control system and disp...

Page 227: ...e k n i L 1 5 9 X d e l l a t s n i e p y t e m a s f o s e t t e s s a c e l p i t l u M 1 1 1 0 1 X k c i P r o f g n i t i a w t u o e m i T c e s 2 r o r r E 2 2 0 1 X t n e r r u c r e v o r o t...

Page 228: ...r p r o f g n i t i a w t u o e m i T 4 1 4 1 X X X X m a j r e p a p d e t r o p e r s u t a t S 4 2 4 1 X X X X r o r r e d n a m m o c d a b d e n r u t e r r e s n e p s i D 1 3 4 1 X X X X r o r...

Page 229: ...l l i b e s n e p s i d o t t p m e t t a n A 4 1 5 9 1 X X X X r e p a P f o t u O r e t n i r P t p i e c e R 0 1 6 9 1 X X X X r o r r E r e d a e R d r a C 1 3 0 2 X X X X d r a o b n i a m o t g...

Page 230: ...h C t n u o C e s n e p s i D 1 5 2 3 X y t l u a F r e i f i l a u Q e t o N 1 6 2 3 X e r u l i a f r o s n e s t i x e e t t e s s a C 1 7 2 3 X e r u l i a F r e t t u h S 1 9 2 3 X t a o r h T y...

Page 231: ...If the test dispense does not work or the error occurs again contact your service provider 1 This Procedure applies to the following error codes 52 53 54 55 56 128 129 130 131 132 133 136 142 143 144...

Page 232: ...ould prevent proper dispensing Also make sure the currency is fit for dispensing If there is no currency in the cassette s or the currency level is too low fill the cassette s and reinstall 4 Close an...

Page 233: ...OVERY OPERATION MANUAL MODEL 97XX Series 8 10 ERROR RECOVERY PROCEDURE 3 Refer to your ATM Operations Manual for procedures on checking and setting this parameter This Procedure applies to the followi...

Page 234: ...dvert ently sometimes when printer is opened 5 Turn power ON With printer still open touch manual feed button and watch roller turn Inspect for any paper shreds in roller 6 Close printer and tighten t...

Page 235: ...works place the unit back in service 6 If the test dispense does not work or the error occurs again contact your service provider IMPORTANT NOTE If the terminal dispenses all of its cash and a casset...

Page 236: ...ure all cassettes are LOCKED into position in the mecha nism using the cassette LOCK UNLOCK function 3 Close and lock the security container Reset the Cash Dis penser 4 If the error clears perform a T...

Page 237: ...e Reinstall the Reject Cassette 2 Close and lock the security container Reset the Cash Dis penser 3 If the error clears perform a Test Dispense 4 If the dispense works place the unit back in service 5...

Page 238: ...re all cassettes are present Remove and reinstall the cassettes 3 Close and lock the security container Reset the Cash Dis penser 4 If the error clears perform a Test Dispense 5 If the dispense works...

Page 239: ...ed path for jammed cur rency and currency sticking together Clear the feed path as needed 3 Close and lock the security container Reset the Cash Dis penser 4 If the error clears perform a Test Dispens...

Page 240: ...2 Check the receipt paper spool If the paper spool is low or out of paper replace the paper roll See the applicable Operations Manual for paper roll replacement procedure 3 Reset the terminal If the...

Page 241: ...led replace it with the correct non duplicate cassette If necessary use the INJECT NEW CASSETTE ID procedure to ensure each cassette has a unique ID A B C or D 3 Make sure all cassettes are IN SERVICE...

Page 242: ...2 1 Archive or Print the journal 2 Reset the Cash Dispenser 3 If the error clears perform a Test Dispense 4 If the dispense works place the unit back in service 5 If the test dispense does not work or...

Page 243: ...be yellow in color 3 Close and lock the security container 4 If the EJ Module is the correct color reset the Cash Dispenser 5 If the error clears perform a Test Dispense 6 If the dispense works place...

Page 244: ...k Unlock function to ensure the cassettes are locked 2 Reset the Cash Dispenser 3 If the error clears perform a Test Dispense 4 If the dispense works place the unit back in service 5 If the dispense d...

Page 245: ...f r e d i v o r p e c i v r e s r u o y t c a t n o C 0 1 N O G O L _ D G B e c n a t s i s s a r o f r e d i v o r p e c i v r e s r u o y t c a t n o C 1 1 t c e n n o c o N e c n a t s i s s a r o...

Page 246: ...SECTION 9 CUSTOMER TRANSACTIONS...

Page 247: ...being inserted correctly Most problems are the result of inserting the card incor rectly Once the card has been read in successfully a surcharge screen if applicable may be displayed the surcharge sc...

Page 248: ...TRITON SYSTEMS INC 9 3 SECTION 9 Customer Transactions OPERATION MANUAL MODEL 97XX Series 1 2 3 4 6 8a 7a 5 8b 9 7b 10a 10b Figure 10 1 Transaction Flow 8c 8d...

Page 249: ...p m o r p s i r e m o t s u c e h t d e t c e l e s s i n o i t c a s n a r t l a w a r d h t i W a f I s n o i t c n u F t n e m e g a n a M n i s g n i t t e s s e p y T t n u o c c A e h t n o p u...

Page 250: ...shows the location of the headhone jack on the Cash Dispenser A raised symbol helps a user locate the headphone jack The Cash Dispenser will automatically detect when a headphone has been plugged int...

Page 251: ......

Page 252: ...APPENDIX A MECHANICAL LOCK...

Page 253: ...cking 3 Number Combinations For Example 50 25 50 1 Turn the dial to the LEFT stopping when 50 is aligned with the opening index the FOURTH time 2 Turn the dial to the RIGHT stopping when 25 is aligned...

Page 254: ...ter turn to the LEFT see Figure 1 With the change key in this position set the new combination as follows turn the dial to the LEFT stopping when the first number of the new combination aligns with th...

Page 255: ......

Page 256: ...APPENDIX B ELECTRONIC LOCK...

Page 257: ...fter the lock is opened the door latch may be turned and the safe opened Changing the Combination To change the combination of the lock simply follow these direc tions Enter six zeros Enter the curren...

Page 258: ...l of the battery facing up Con tinue to hold the battery against the terminals as you enter the combination and open the lock Follow these steps to replace a battery 1 Open the ATM vault door If the b...

Page 259: ......

Page 260: ...APPENDIX C WARRANTY POLICY...

Page 261: ...and is believed to be accurate However Triton Systems Inc assumes no responsibility for any inaccuracies errors or omissions that may be contained in this document In no event will Triton Systems Inc...

Page 262: ...used by a disaster such as fire flood wind earthquake lightning or other acts of God caused by failure to provide a suitable installation environment for the equipment including but not limited to fau...

Page 263: ...claims prior to selecting them as your preferred carrier If the equipment receives structural damage and is in an un installable condition Triton will work with you to arrange for a replacement unit...

Page 264: ...order in which they were received By providing the information requested in the voice mail the technician can be prepared when your call is returned Triton asks you to be patient if you must leave vo...

Page 265: ...WARRANTY POLICY OPERATION MANUAL MODEL 97XX Series C 6 CONTACT INFORMATION TRITON SYSTEMS IN21405 B STREET 21405 B STREET LONG BEACH MS 39560 Sales 800 367 7191 228 868 1317 228 868 0437 FAX Service...

Reviews: