UI SmartSeatPro
II
User Guide. Iss1 06/22
33
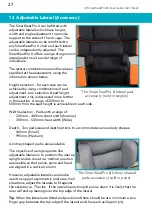
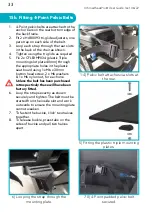
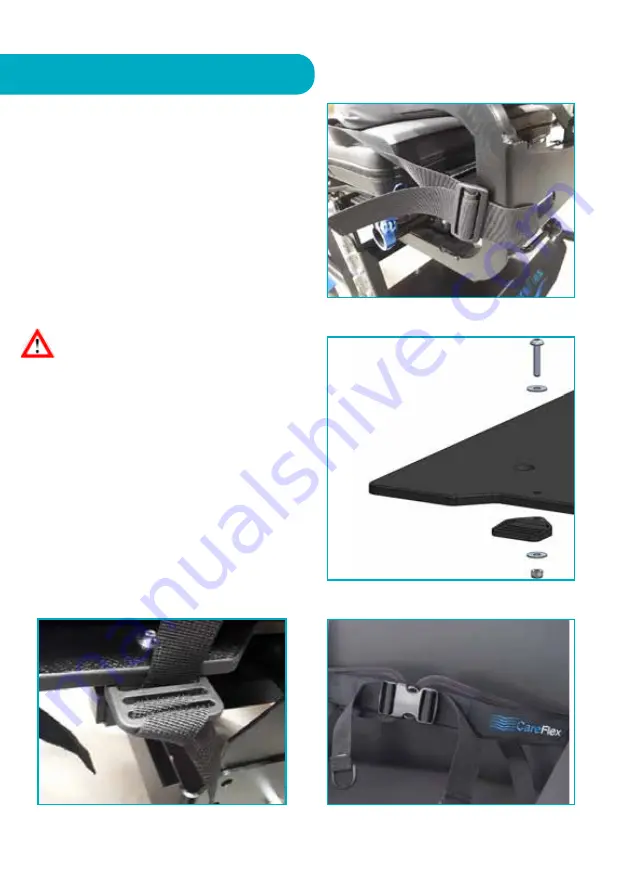
1. 4-Point pelvic belts are attached to the
anchor bars on the rear bottom edge of
the back frame.
2. Fit 2 x HAR0093 tri-glide adjusters, one
per strap on each side of the belt.
3. Loop each strap through the rear slots
in the back of the chair as shown.
4. Tighten using the tri-glide as required.
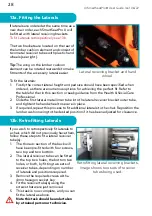
5. Fix 2 x CFLEXMP034 (plastic Triple
mounting slot plate 40mm) through
the appropriate holes in the plastic
seat board using 1 x M6 x 30mm
button head screw, 2 x M6 washers
& 1 x M6 nylon nut, for each one.
Unless the belt has been purchased
retrospectively these will have been
factory fitted.
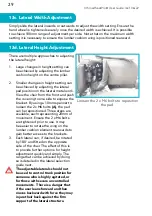
6. Loop the straps exactly as shown
securely and tighten. The belt must be
started from the inside slot and work
outwards to ensure the mounting plate
cannot weaken.
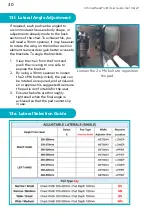
7. To fasten the buckle, ‘click’ two halves
together.
8. To release buckle, press tabs on the
sides of buckle and pull two halves
apart.
15b. Fitting 4-Point Pelvic Belts
5) Fitting the plastic triple mounting
plates.
1-4) Pelvic belt attaches via slots at
the rear.
6) Looping the strap through the
mounting plate.
7-8) 4-Point padded pelvic belt
secured.

