E
CLIPSE
,
OEM Installation
Manual
Carefree of Colorado
14
052547-021
R
EMOVING THE
T
EMPORARY
A
SSEMBLY
P
INS
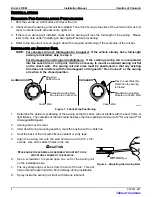
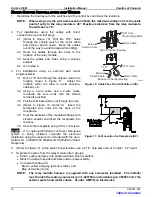
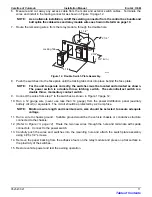
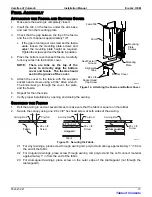
2 pins are inserted into the back of the left (idler) head for lateral stability
during installation. Using a pair of pliers, remove and discard both pins.
NOTE: The awning will operate with the pins in place; for long term
use, the pins must be removed to allow for climate variances.
I
NSTALLING THE
A
LUMAGUARD
T
RACTIONERS
This is only required when the optional Alumaguard metal wrap shield is installed.
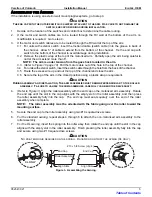
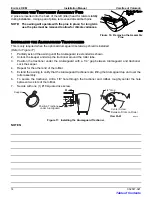
(Refer to Figure 17)
1.
Partially extend the awning until the Alumaguard is extended as shown.
2.
Unlock the keeper and wrap the tractioner around the roller tube.
3.
Position the tractioner under the Alumaguard with a 1/4” gap between Alumaguard and tractioner.
Lock the keeper.
4.
Repeat for the other end of the rollbar.
5.
Extend the awning to verify that the Alumaguard tractioners are lifting the Alumaguard up and over the
roller assembly.
6.
To secure the tractioner, drill a 1/8” hole through the tractioner and rollbar, roughly center the hole
between two slots of the rollbar.
7.
Secure with one (1) #10 square drive screw.
1/4" Gap
A
A
Center Screw
Between Slots on Roller
View
A-A
Position Tractioner
under Alumiguard
Keeper
E0013
Figure 17. Installing the Alumaguard Tractioner.
NOTES:
Figure 16. Removing the Assembly
Pins.
Table of Contents


