background image

Carefree of Colorado 

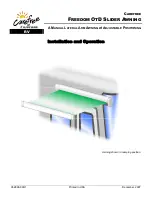
Freedom OtD Slider Awning 

 2 

052896-003r1 

C

OMPONENT 

C

HECKLIST


7

6

FIII011

1

2

3

4

5


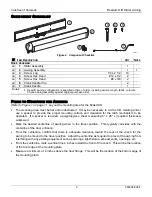
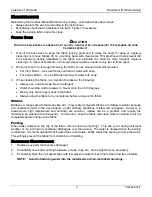
Figure 2.  Component Checklist. 

;

  I

TEM

  D

ESCRIPTION


Q

TY


N

OTE

B

ASIC 

A

SSEMBLY


‰


Slider Assembly 


‰


Awning Assembly 

‰


Screw, Lag 

1/4 x 2 1/2 

10 


‰


Screw, Hex Head 

#12 x 1/2 


‰


Screw, Hex Head 

#8 x 3/8 


‰


Crank Handle Clip 


‰


Crank Handle 


Notes: 

1. 

Specific awning configuration is specified at time of order, including awning length, fabric, color etc.  
Check awning assembly against original purchase order.


P

RIOR TO 

M

OUNTING THE 

A

WNING

(Refer to Figure 1 on page 1.)  

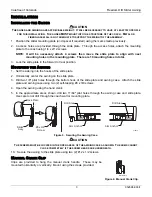
Lay out the mounting area for the Slider OtD. 

  The mounting area must be flat and unobstructed.  It may be necessary to cut the trim molding and or 

use a spacer to provide the proper mounting surface and clearance for the latch mechanism to be 
operated.  If a spacer is required, a polypropylene sheet measuring 6" x 26" x (required thickness) 
works well. 

  Mark the desired centerline of awning when in the travel position.  This typically coincides with the 

centerline of the door entrance. 

  From the centerline, confirm that there is adequate clearance toward the rear of the coach for the 

awning to be moved to the travel position.  Adjust the centerline as required to prevent the awning from 
interfering with any existing equipment such as awnings, light fixtures, exhaust vents, openings, etc. 

  From the centerline, mark a vertical line 4 inches toward the front of the coach.  This will be the location 

of the front edge of the mounting plate. 

  Measure a minimum of 4 inches above the door flange.  This will be the location of the bottom edge of 

the mounting plate. 


Summary of Contents for FREEDOM OTD SLIDER AWNING

Page 1: ...052896 003r1 Printed in USA December 2007 CAREFREE FREEDOM OTD SLIDER AWNING RV A MANUAL LATERAL ARM AWNING W ADJUSTABLE POSITIONING Installation and Operation Awning shown in camping position...

Page 2: ...ROPERTY DAMAGE CAUTION A CAUTION INDICATES A POTENTIALLY HAZARDOUS SITUATION THAT MAY CAUSE MINOR TO MODERATE PERSONAL INJURY AND OR PROPERTY DAMAGE IT MAY ALSO BE USED TO ALERT AGAINST UNSAFE PRACTIC...

Page 3: ...e awning is stored toward the rear of the coach In the camping position the awning can slide forward to provide full coverage over the entrance Freedom Awning Specifications Fully retractable and self...

Page 4: ...or use a spacer to provide the proper mounting surface and clearance for the latch mechanism to be operated If a spacer is required a polypropylene sheet measuring 6 x 26 x required thickness works we...

Page 5: ...NG THE AWNING 1 Set the awning into the hooks of the slide plate 2 Horizontally center the awning on the slide plate 3 Drill two 1 8 pilot holes through the bottom hook of the slide plate and awning c...

Page 6: ...l the rear latch catches OPENING AND CLOSING THE AWNING Insert the manual crank into the gear loop located on the left side of the awning Turn the handle counterclockwise to extend the awning When the...

Page 7: ...ergent Water should be cold to lukewarm Never more than 100 degrees Air dry only Never apply heat to the fabric Always allow the fabric to dry completely before rolling up the fabric Mildew Mildew is...

Page 8: ...ecified product and provide it as requested b Inspect the awning upon purchase to confirm the condition of the canopy hardware and proper operation of the product c Perform Periodic Maintenance as spe...

Reviews: