Carefree of Colorado Installation
Manual
F
REEDOM
RM
P
ATIO
A
WNING
M
OUNT
B
OTTOM
B
RACKETS
The patio awning is equipped with vertical supports. These supports extend from the leading edge of the
awning to a bracket mounted on the wall or may be used in a carport position on the ground.
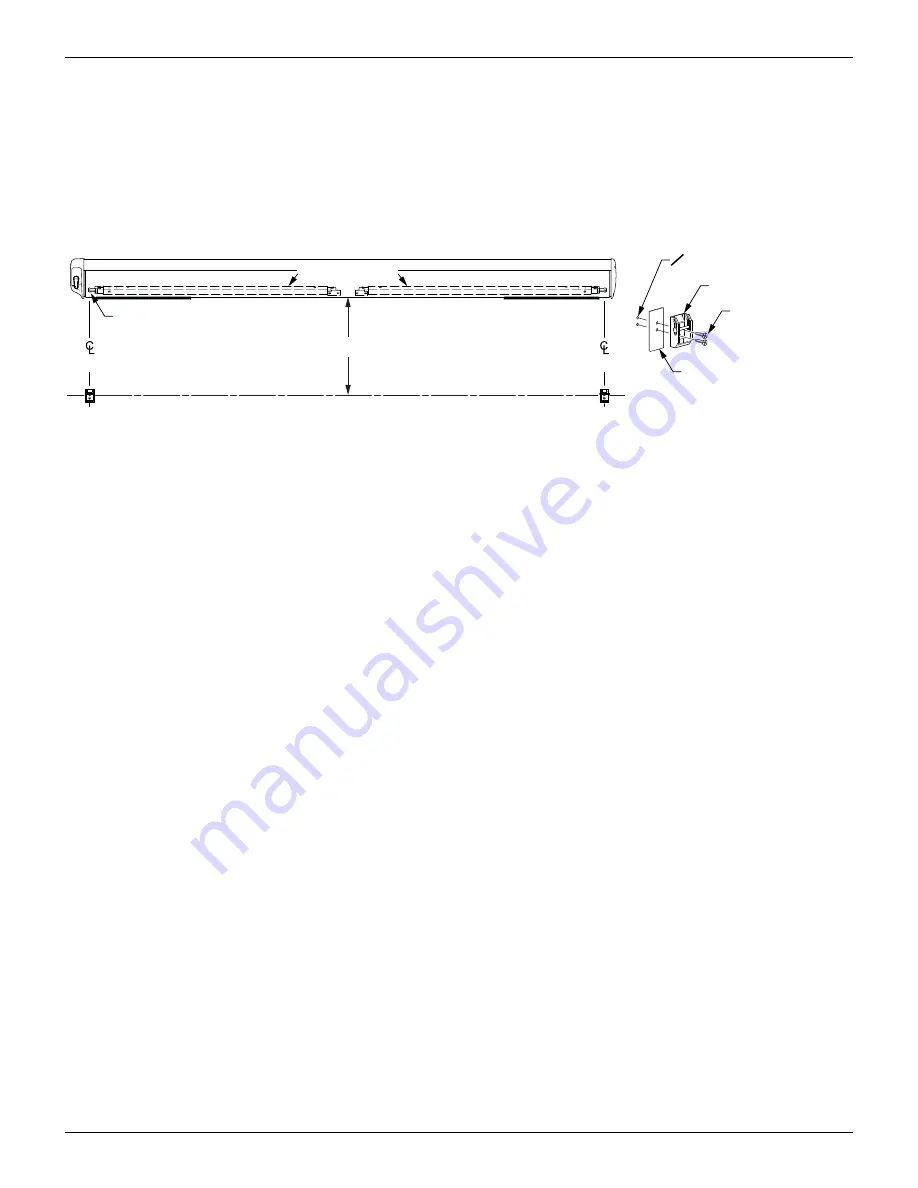
1. Determine the location of the wall brackets:
1.1. Open the awning enough to see the support legs in the leading edge.
1.2. On the coach wall mark the location of the pivot point of the legs.
1.3. From the bottom of the awning, measure down vertically 94-127 cm [37"-50"] and mark the location
of the brackets.
RMF004
94 - 127 cm
[37”-50”]
Bottom Bracket
#10 x 3/4
Flat Head Screws
Leg Pivot
O 4mm [5/32”] Pilot Hole
Support Legs (ref)
Pivot
Pivot
Scratch Guard
(used w/ Black Bracket Only)
Figure 9. Wall Mounted Support Plate.
2. Center the brackets on the location marks, then using the bracket as a template, drill two (2) 4mm
[5/32”] pilot holes. Attach the plate with two (2) #10 x 3/4 flat head screws. For black hardware, a
scratch guard is included. The guard mounts between the bracket and wall as shown.
This completes the installation of the manual awning. For motorized awnings go to "Switch Installation" on
page 8
052978-051r5
7


