Carefree of Colorado
6
R
OOM
S
ETUP
T
HE
F
RONT
P
ANELS
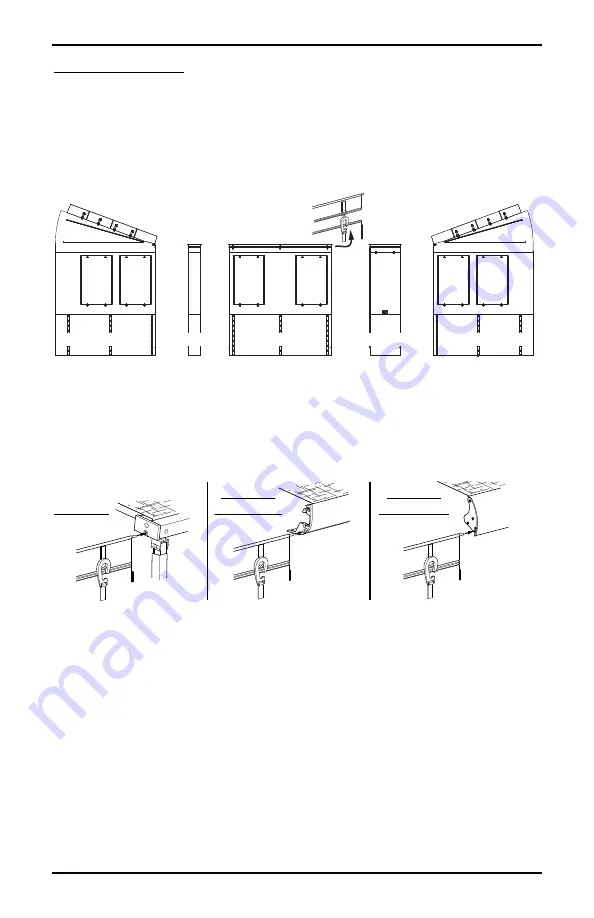
The front panel consists of a window panel, door panel and extension panel. These
panels can be arranged with the door on the right or the left. The extension panel is
included to fit the larger size of the fitting range (i.e. 13' for a 12' to13' room size) and
can be placed on either end or in-between the door and window panel.
NOTE:
The 3meter and 3.5meter rooms do not include an extension panel.
The front panel sections include a removable top piece called the zipper insert. For
convenience, the zipper insert can be removed and slid into the lead rail or roller tube.
Then the panel can be lifted and zipped to the insert.
On the Campout and vertical arm awnings that do not use a pull strap, the zipper insert
can be left in the roller tube and rolled up with the awning.
I
NSTALLING THE
F
RONT
P
ANELS ON
B
OX
A
WNINGS
1. Extend the awning out according to the manufacturer's instructions. If the awning
has vertical support legs, set the legs in the vertical (carport) position.
NOTE:
For the Freedom Wall Mount, leave one leg stored until the front
panel has been installed. This is to allow access to the slot in the lead rail.
Tip: Clean the slot in the lead rail and lightly spray the inside of the slot with a dry
silicone lubricant. This will aid with sliding the panels into the slot.
2.
Slide the front panel sections into the slot of the lead rail. The clear plastic window
goes to the outside, as does the logo on the door.
Tip: For ease of handling, unzip the zipper insert and slide into the lead rail then lift
the panels up and attach to the insert.
3.
Zip the front panels together and center in the lead rail.
4.
Extend and set both of the vertical support legs in the carport (vertical) position.
5.
Go to “Mounting the Side Panels” on page 8.
bv014
Zipper Insert
LH Side Panel
RH Side Panel
Door
Window Panel
Extension
we024
Freedom
Wall Mount
Campout
Freedom
Roof Mount


