Carefree of Colorado
Installation
Manual
F
REEDOM
RM
P
ATIO
A
WNING
052978-051r17
9
S
ETTING THE
M
OTOR
L
IMITS
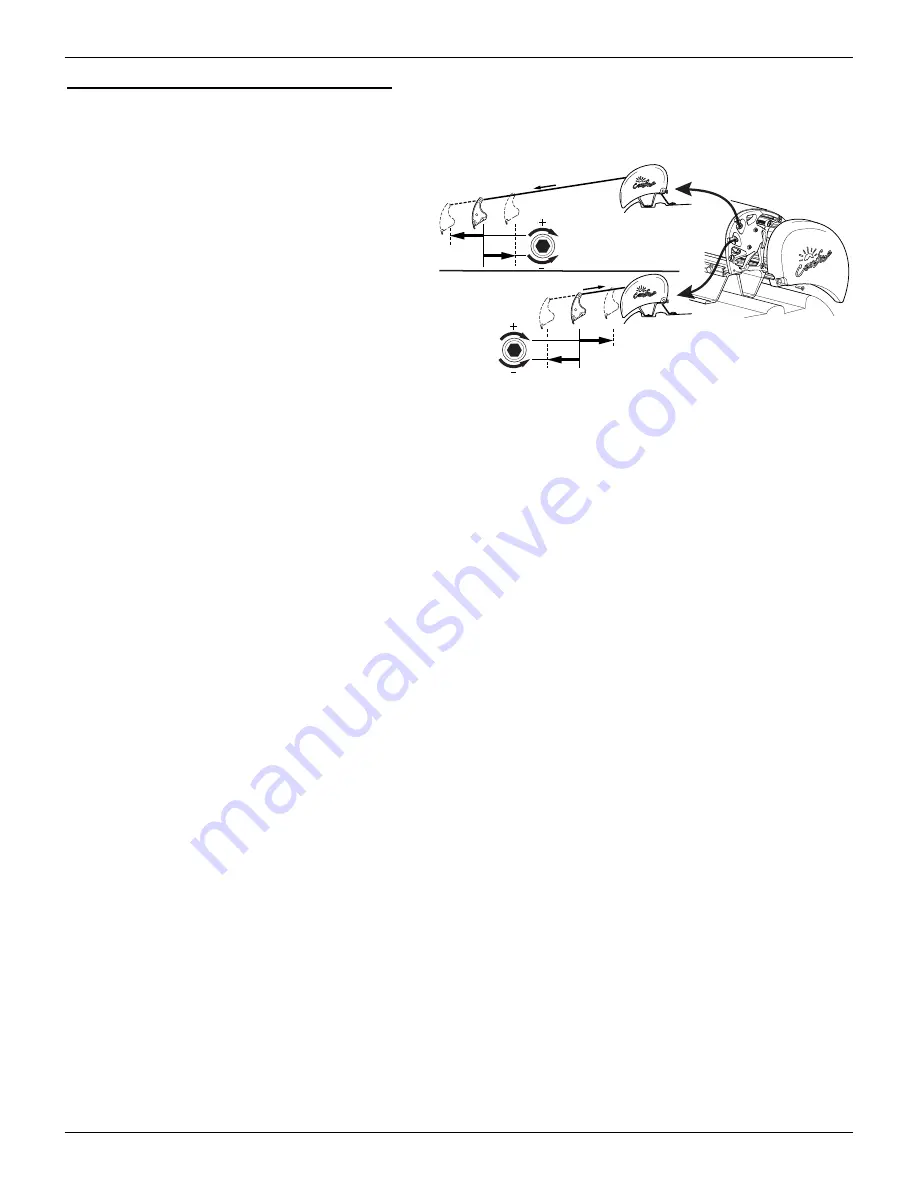
The motor limit switches are preset at the factory for best operation of the awning. It may be necessary to
reset the switches. The “out” limit switch stops the motor when the awning is fully extended. The “in” limit
switch stops the motor when the awning is fully retracted.
The limit switches are located inside LH motor
endcap. To access the switches:
Remove the outer motor endcapn
Use a 4mm hex wrench through the holes of
the inner endcap to adjust the switches.
A
DJUSTING THE
OUT
L
IMIT
S
WITCH
1. Extend the awning out completely.
2. Confirm that the arms are fully extended. The motor should stop and the fabric should be tight. If the
motor continues to run, the fabric will sag; or, if the motor quits before the arms are fully extended, it will
be necessary to adjust the “
OUT
” limit switch.
NOTE:
It is best to make the adjustments in increments of a single turn. 3 full turns of the screw
equals approximately 2” of fabric extension.
3. If the fabric sags:
3.1. Retract the awning until the fabric is tight then retract an addition 10"-12".
3.2. Turn the “
OUT
” limit switch
COUNTERCLOCKWISE
to reduce the time the motor runs.
3.3. Extend to confirm that the adjustment is correct.
3.4. Repeat the procedure until the awning extends correctly.
4. If the arms do not extend completely:
4.1. Retract the awning approximately 10"-12".
4.2. Turn the “
OUT
” limit switch
CLOCKWISE
to increase the time the motor runs.
4.3. Extend to confirm that the adjustment is correct.
4.4. Repeat the procedure until the awning extends correctly.
A
DJUSTING THE
IN
L
IMIT
S
WITCH
1. Retract the awning in completely.
2. Confirm that the arms are fully retracted. The motor should stop when the awning is fully retracted. If
the motor quits before the arms are fully retracted; or, if the motor continues to run after the awning is
closed, it will be necessary to adjust the “
IN
” limit switch.
NOTE:
It is best to make the adjustments in increments of a single turn. 3 full turns of the screw
equals approximately 2” of fabric extension.
3. If the motor stops before the awning is fully retracted:
3.1. Extend the awning 10"-12".
3.2. Turn the “
IN
” limit switch
CLOCKWISE
to increase the time the motor runs.
3.3. Retract the awning to confirm that the adjustment is correct.
3.4. Repeat the procedure until the awning retracts correctly.
4. If the motor continues to run:
4.1. Extend the awning approximately 10"-12".
4.2. Turn the “
IN
” limit switch
COUNTERCLOCKWISE
to decrease the time the motor runs.
4.3. Extend and retract to confirm that the adjustment is correct.
4.4. Repeat the procedure until the awning extends correctly.
RMF020c
“OUT”
“IN”
4mm Hex
4mm Hex


