7
3
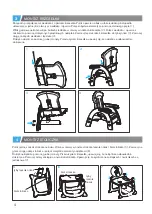
CHAIR ASSEMBLY
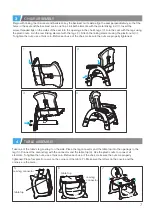
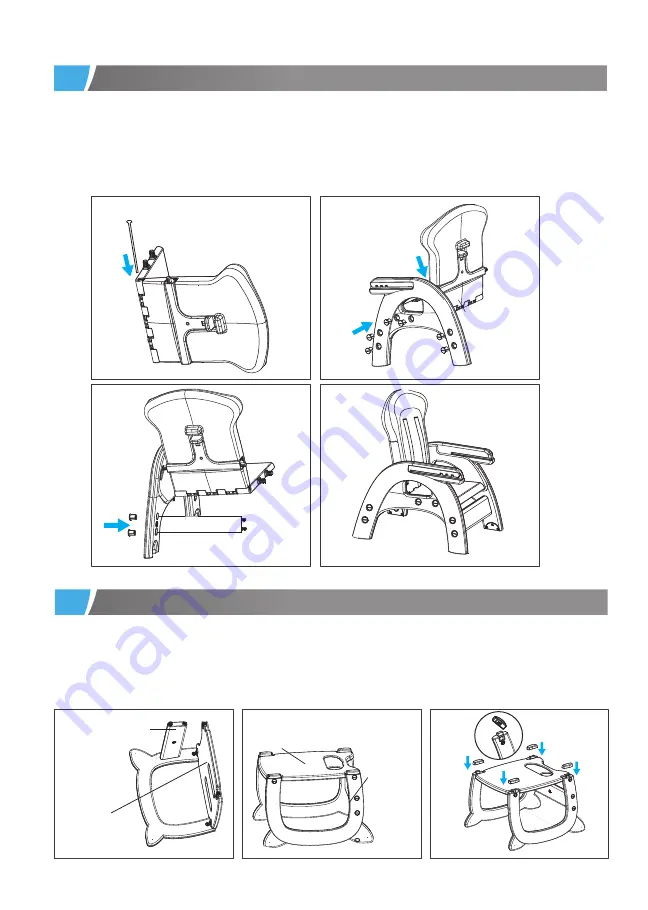
Begin with linking the chair seat and backrest. Lay the backrest on its side, align the seat perpendicularly, so that the
holes in the seat and the backrest are in one line. Link both elements with the metal linking rod (
1
). Insert the
screw-threaded tips on the sides of the seat into the openings in the chair’s legs (
2
). Join the seat with the legs using
the plastic nuts. Join the rear linking element with the legs (
3
). Attach the linking element using the plastic nuts (
4
).
To tighten the nuts, use a thick coin. Before each use of the chair, make sure the nuts are properly tightened.
4
TABLE ASSEMBLY
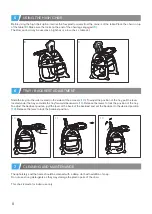
Take one of the table’s leg and lay it on the side. Place the leg connector and the table top into the openings in the
leg (
5
). Connect the second leg with the connector and the table top (
6
). Use the plastic nuts to connect all
elements. To tighten the nuts, use a thick coin. Before each use of the chair, make sure the nuts are properly
tightened. Place four plastic covers on the corners of the table (
7
). Make sure the letters on the covers and the
corners are the same.
3
4
1
2
5
6
7
rear leg connector
rear leg
connector
table top
table top
Summary of Contents for HOMEE
Page 2: ......


