background image

260 BSA

20

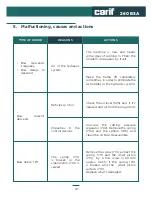
Check their setting as it follows: 

loosen the grub screw (M6), push 

by a tool on the pin (P), in order to 

eliminate every clearance between 

the blade and the tips. Lock the 

grub screw.

Condition of the 

hard metal tips.

The cut is not 

perpendicular.

Check the wearing condition of the 

tips and the bearings. Eventually 

replace them.

ACTIONS

REASONS

TYPE OF ERROR

Summary of Contents for 260 BSA

Page 1: ...dress Tel Fax Email Website Type of machine CARIF SAWING MACHINES S R L Via Tre Salti 1 20029 Turbigo Ml Italia 39 0331 899015 39 0331 898484 carif carif it www carif it SEMIAUTOMATIC HYDRAULIC BAND S...

Page 2: ...260 BSA...

Page 3: ...ical connection 3 5 Coolant filing 4 Operation 4 1 Cutting operation 4 2 Hydraulic Pump 4 3 Saw Blades 4 4 How to Position the material in the vice 4 5 Cutting Speed 5 Malfuctioning causes and actions...

Page 4: ...nd CUTTING PRESSURE Thanks to this system the blade regularly descends with a constant auto regulation for every material type section and thickness ADVANTAGES with Hydraulic Bandsaw Increased product...

Page 5: ...achine without using the provided safety devices may lead to serious injuries It is essential for the operator to run the machine carefully to avoid any risks All functions of the band saw are stopped...

Page 6: ...achine or installation without specific instruction are prohibited The operator must take care that nobody gets near to the moving parts of the machine during cutting Only when machine is turned off s...

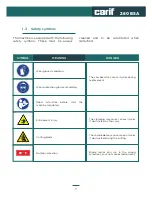
Page 7: ...tart the machine mandatory Cutting blade Wear protection glasses mandatory Entrapment injury Rotation direction The saw band may cause injuries during replacement The saw blade may cause serious injur...

Page 8: ...260 BSA 8 2 1 Main Carachteristics 2 Machine Description 16 18 17 15 12 13 14 11 1 2 3 4 6 5 7 8 9 10 19...

Page 9: ...refilled through this tap 9 Oil level detection An oil level indicator to visualize the oil presence 10 Coolant tap The coolant tap can open and close the coolant flow 11 Blade stretcher Blade stretc...

Page 10: ...tting speed Working Height Electrical data Blade motor Coolant pump motor Operating range Ca 320 Kg 1200 x 700 x 1300h mm 2450 x 27 x 0 9 mm 33 66 m min 830 mm 1 4 Kw 0 1 Kw 2 2 Technical Data 220 150...

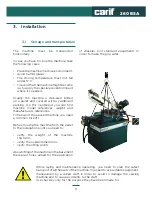
Page 11: ...d machine you need a common fork lift Before moving the machine from the pallet to the installation point you need to verify the weight of the machine Kg 320 verify the overall dimensions verify the l...

Page 12: ...back of the machine at least 800mm from the wall Place the machine on a leveled and straight floor Leveled the machine and eventually make the foundation in the 4 points of the basement as picture be...

Page 13: ...olant liquid water and oil 10 directly from the back of the machine Capacity 50 Lt motor or frame If rotating in the wrong direction exchange connection L1 and L2 3 4 Electrical connection 3 5 Coolant...

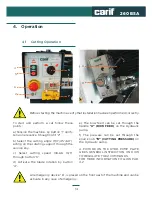
Page 14: ...d can be set through the handle A BOW FEED on the Hydraulic pump f The pressure can be set through the knurl knob B CUTTING PRESSURE on the Hydraulic pump A PICTURE ON THE HYDR PUMP PLATE GIVES GENERA...

Page 15: ...case of cutting full bars the blade encounters different kind of surfaces during its cutting path Thanks to the CUTTING PRESSURE auto regulation of the hydraulic oil passage it can maintain constant t...

Page 16: ...h per Inch variable Tubes or Profiles thickness Full Material To obtain the best performance in terms of durability and cutting precision it is suggested to perform the first cuts with low pressure an...

Page 17: ...ding of the material in the vice thus an much better blade life and cutting quality it is suggested to fix the different material sections as pictures below 4 4 How to Position the material in the vic...

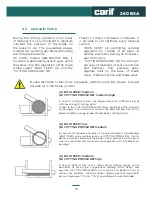
Page 18: ...and if it s needed add oil from the plug 324 Unscrew the cutting pressure regulator 702 Remove the spring 704 and the sphere 705 and clean the oil hole Reassemble Make the frame lift completely somet...

Page 19: ...PORTANT Gear pump substitution and oil replacement Before to start the machine Remove the screw 716 and verify that the oil leaks out to avoid gear pump seizure Close the screw 716 and lock it to avoi...

Page 20: ...tool on the pin P in order to eliminate every clearance between the blade and the tips Lock the grub screw Condition of the hard metal tips The cut is not perpendicular Check the wearing condition of...

Page 21: ...th hands the blade teeth Free the blade from its ways 6 1 Blade replacement 6 Maintenance While you are replacing the blade wear protective gloves and glasses While the casing has been removed a micro...

Page 22: ...d blade ways then repeat the said operations in the opposite order and regulate the blade tension Turn the bolt 1 or the handle for 260 BSA until the sign reaches the centre of the white area 2 on the...

Page 23: ...all the mechanical parts Change completely the cooling water Yearly Maintenance Check the widia inserts and turn them or replace them if worn Check the frame springs and eventually substitute them Ch...

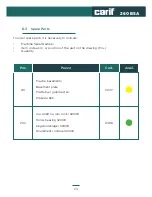
Page 24: ...code and or position of the part on the drawing Pos Quantity 6 3 Spare Parts Piastra basamento Basement plate Platte fuer grundsestell Plate du b ti Cuscinetto a rulli conici 32008 Roller bearing 3200...

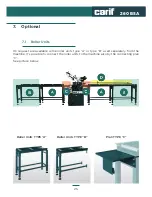
Page 25: ...ler units type A or type B used separately from the machine It s possible to connect the roller units to the machine also by the connecting plan C See picture below Roller Units TYPE A Roller Units TY...

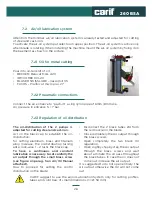
Page 26: ...oil distribution for cutting aluminum brass and titanium alloy increase the oil distribution turning anti clock wise 1 2 turns the black cap To have a continuous and constant lubrication is necessary...

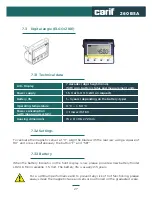
Page 27: ...ibrate the magnetic sensor at 0 align the blade with the rear jaw using a square of 90 and press simultaneously the button F and SET When the battery indicator on the front display is low please provi...

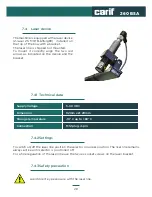
Page 28: ...f For a fine regulation of the laser line use the two ex socket screws on the laser bracket 7 4 Laser device 7 4 1 Technical data 7 4 2 Settings 7 4 3 Safety precaution Avoid direct eye exposure with...

Reviews: