9.
!
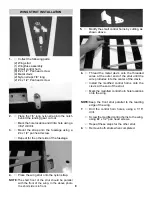
Place the cowl on to the fuselage and install
the spinner and prop.
!
Keeping the cowl 1/16” back from the rear of
the spinner, hold the cowl onto the fuselage
till the strips on the sides of the fuselage are
even.
!
Tape the cowl in place so that it can not
move.
10.
!
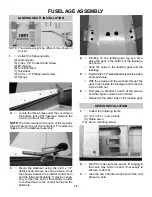
From the end of the cowl, measure foreword
on the top stripe 1-3/8”.make a pencil mark
there.
!
measure down from the first mark 2-1/2” and
make another mark.
11.
!
Measure and mark the other side of the cowl
just like you did above
!
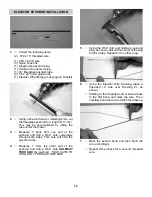
Making sure that the cowl is still straight and
has a 1/16” gap between the spinner, drill a
1/16” hole on each of the marks.
!
Pull the cowl away from the fuselage sides
and redrill the cowl holes with a 3/32” drill.
!
Screw the cowl onto the fuselage using a #4
x 3/8” sheet metal screw and a #4 washer.
1-3/8"
2-1/2"
RADIO SWITCH INSTALLATION
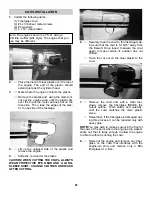
1.
!
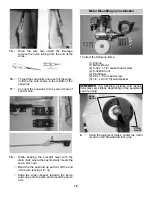
Collect the following items:
(1) Radio switch
(1) Switch mount
(1) Switch mount bolt
(1) Switch cap
(1) Switch push-pull
(2) #2 washer
2.
!
If your radio has a switch cover, remove both
the screw and the cover from the top of the
switch.
!
Using the screw just removed, as well as a
#2 washer, assemble the switch mount as
shown.
3.
!
The switch mount has one slotted hole on
one side and two holes on the other side.
Mount the switch so that it will move back
and forth. It will be possible to feel and hear
the click.
!
Locate the switch on the left side of the fuse,
keeping it out of the engine exhaust.
RECEIVER AND BATTERY INSTALLATION
1.
!
Insert the Y-harness in the aileron plug in the
receiver and then wrap both the receiver and
the battery in foam. Secure with rubber
bands.
2.
!
Plug the switch into both the battery and the
receiver.
!
Next, plug the elevator, rudder, and throttle
servo wires into the receiver.
3.
!
Place the battery and the receiver into the
22
Summary of Contents for decathlon arf
Page 29: ......

