3
ENGINE, PROPELLER & ACCESSORIES
Your plane flies well using any 2-cycle engine size from
.35 to .45, or 4-cycle engine .45 to .61. The numbers .35 to .45
refer to the amount of space the piston moves through inside the
cylinder of the engine. This space is called displacement; larg-
er displacement generally means more power. If you live in a hot
climate, or your flying field is approximately 3,000 feet or more
above sea level, you should stay with a .45 engine. It’s a good
idea to select an engine that is popular at the flying field, so that
if you have any engine problems, other modelers will be familiar
with the engine and be able to help.
The propeller size must be matched to the engine. For
example, a .35 may use a 9” diameter prop while a .45 can use a
10” prop. Refer to the propeller chart below for recommended
propeller sizes. It’s wise to buy a few spare props, as everyone
breaks them occasionally, and particularly often when learning
to fly.
Balancing your propeller helps to protect your radio
from the damaging effects of the market. We recommend sand-
ing the heavy blade on the curved face, out near the tip, rather
than on the flat face. Try to maintain the normal airfoil curvature.
Avoid scratches which may cause the prop to break. Never
carve or cut a prop near the hub for any reason (such as to fit a
spinner).
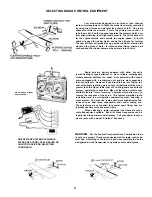
A 2¼” CGP Snap-On Spinner is recommended for the
Eagle. It is a rugged precision molded spinner which does not
require any special mounting nuts or screws. Although a spin-
ner helps reduce the chance of injury from the rotating prop,
extreme caution always must be used when the engine is run-
ning.
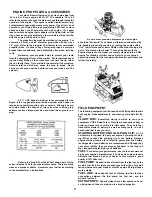
Refer to the Prop & Fuel Tank Chart shown here for the
correct size fuel tank for your particular engine. There are many
sizes and brands available. Assemble your fuel tank according
to the manufacturer’s instructions.
As with other precision equipment, a new engine
should be "broken-in" to enhance performance and extend its
life. Breaking-in usually consists of running the engine with a
"rich" fuel mixture and at lower RPMs until all the moving parts
get to "know each other better." This can be done with the
engine mounted in the model or securely clamped into a CGM
Engine Test Stand or similar device. Refer to your engine's
operating manual for the recommended break-in procedure and
follow it carefully.
FIELD EQUIPMENT
The following equipment will be needed at the flying field to start
your engine, make adjustments, and clean your model after fly-
ing.
FLIGHT BOX:
Something sturdy in which to carry your
equipment. CGP's SuperTote or ProTote are economical, easy to
build, and pack lots of utility into little space. They hold fuel,
transmitter, starter & battery, as well as many tools, in a bal-
anced load that is easy to carry.
STARTING BATTERY AND GLO-PLUG CLIP:
A 1-1/2
volt battery is required to heat your engine's glo-plug for start-
ing. Wires connect the glo-plug clip to the battery. Because
engine starting draws a lot of electric power from the battery,
rechargeable ni-cad batteries are recommended. Although they
cost more initially, they are more economical in the long run
than frequently replacing dry-cell batteries.
FUEL:
For best engine performance, use the fuel recommend-
ed by your engine's manufacturer. 2 and 4-cycle engines require
different fuel blends. Ask your dealer to recommend a good
quality 5-10% Nitro fuel.
FUEL PUMP:
Needed to transfer fuel from the fuel can to the
model's fuel tank. A simple squeeze-type bulb will do for small
tanks, whereas manual crank or electric pumps fill larger tanks
more quickly.
FUEL LINE:
Have about 3 feet of silicone fuel line to make
connections between the fuel pump, the fuel can, and the
model's fuel tank.
EXTRA PROPS:
Experts always have a few spares on hand,
so flying doesn't have to stop due to a broken propeller.
Summary of Contents for Eagle 2
Page 28: ...27 ...

