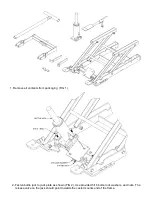
3- Once the jack is fastened to frame,
install the pedal assembly onto the
jack, using the provided pins and
keeper clips. After pins are in place,
install spring onto rod first, then
extend to hole in jack plate. (FIG 3)
(NOTE: You may have to spread
open each end of the spring with a
needle nose pliers).
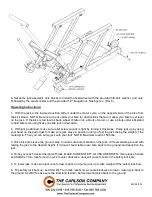
4- With the jack installed, raise the
"H" frames by hand. Being careful
not to pinch fingers, place a board
between the "H" frames to keep
them slightly propped up.
Using the two 3" bolts mount the
jack arm to the front "H" frame as
shown. The head of the bolts must
be towards the bottle jack. Install
the 3 nylon washers, followed by
the safety lock arms. Lastly the
1/2" nylock nut. (FIG 4) (NOTE: the
1/2" nut should be tightened but left
loose enough to allow the safety
arms to pivot freely).
5- Pump the bottle jack up a few inches, then
unscrew the head of the jack roughly 3/4".
By hand pull up the "H" frames and allow the
head of the jack to fit up into the jack keeper.
Jack can be adjusted side to side if it does
not fit properly into jack keeper. Next attach
the jack keeper clip, as shown. use the
provided 1/4" bolts to secure clip. (FIG 5)


