background image

6-789A 

Rev. 08/29/19

PLEASE REVIEW ALL WARNING INSTRUCTIONS PRIOR TO OPERATION. SAVE THIS MAN U AL FOR FUTURE REF ER ENCE.

Locate center of new hole by using a 
center punch. Place drill bit tip in 
punch mark. Hold drill square with 
work and start motor. Apply steady, 
even pressure. Do not force. Too 
much pressure can cause bit to break 
or overheat. Too little pressure will 
keep the bit from cutting and cause it 
to overheat. Reduce pressure just 
before bit cuts through the work. 
When bit has penetrated work and is 
spinning freely, take it from the work 
while the motor is running, then turn 
off the drill. If the drill jams in the 
work, release throttle immediately. 
Disconnect the drill before removing 
bit and determining cause of trouble. 

Do not attempt to free the bit by 
starting and stopping the moto.
Drill bits can bind suddenly and caus-

ing rotation of the work piece or tool, 

causing injury to arms and/or shoul-

ders. Enough torque is generated to 

cause falls. Always use sharp bits. 

Use less downward pressure at 

breakthrough.
Never use dull, chipped or damaged 

accessories.  Never cool a hot 

accessory in water as brittleness 

and early failure can result,  Accessory 

breakage or tool damage may result 

from prying.  Take smaller bites to 

avoid getting stuck.

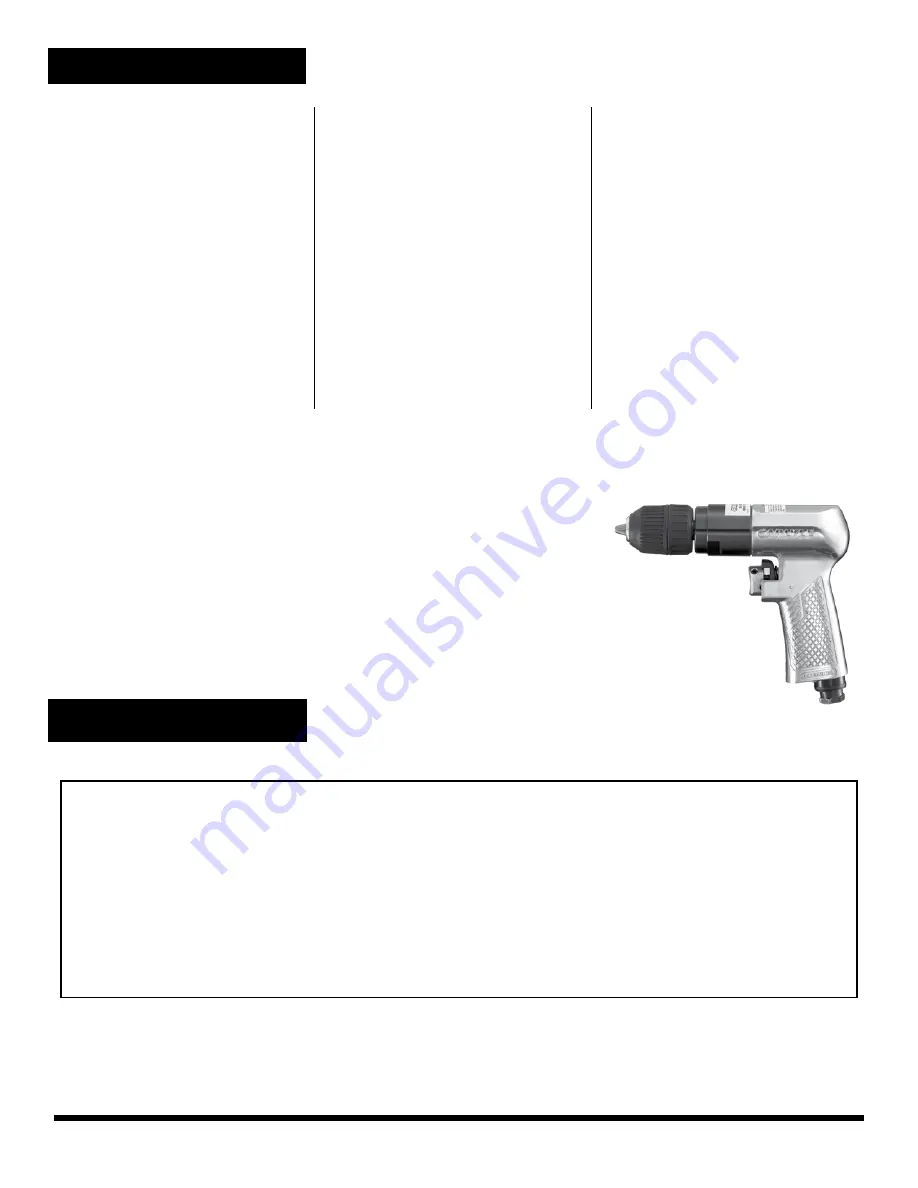
OPERATION

Specifications

Horsepower...............................0.5HP
Max. Free Speed ..............1,800 RPM 
Chuck Cap .................................. 3/8"
Spindle Thread .......................3/8"-24
Air Inlet  ............................... 1/4" NPT
Min. Hose Size  .....................3/8" I.D.
Avg. Air Cons.  ........................ 4 CFM
Recom. Air 

Pressure ................. 90 PSIG (6.2 bar)
Vibration level .....................2.29 m/s2 
Weight .................................... 2.6 lbs.
Length ............................................ 7"
Sound Level ........................90.6 dBA

 WARRANTY

Important:  DO NOT RETURN DEFECTIVE PRODUCT OUTSIDE OF ORIGINAL ONE (1) YEAR WARRANTY PERIOD TO 

PLACE OF PURCHASE. 

WARRANTY POLICY: 


This Carlyle Air Tool is warranted against defects in material and workmanship for a period of One (1) Year 

from the date of original purchase.  We will replace, at our option, any part which proves to be defective in material or workman-
ship.  Repairs or replacements are warranted as described above for the duration of the original warranty period.  In the unlikely 
event a replacement unit is required during this One (1) year period, return the unit to your local NAPA Auto Parts Store for a 
replacement. This warranty does not apply to products which have been subjected to abuse, misuse, modification, neglect, lack of 
maintenance, use in a production-related service, or repaired by anyone other than an Authorized Carlyle Air Tool Service Center.   
For complete listing of Authorized Master Repair Centers, see enclosed Customer Warranty Repair Form, or 
visit www.toolwarrantyrepair.com

Summary of Contents for 6-789A

Page 1: ...d un outil électrique comme le sablage le sciage le meulage et le perçage produisent de la poussière qui contient des produits chimiques De tels produits sont reconnus comme cancérigènes Ils peuvent aussi causer des anomalies congénitales ou nuire d une autre manière à la reproduction Voici quelques exemples de ces produits chimiques le plomb contenu dans les peintures à base de plomb la silice cr...

Page 2: ...afety top performance and maximum durability of parts operate this tool at 90 psig 6 2 bar max air pressure with 3 8 diameter air supply hose Always wear impact resistant eye and face protection when operating or performing maintenance on this tool users and bystanders High sound levels can cause permanent hearing loss Always use hearing protection as recommended by your employer an OSHA regulatio...

Page 3: ...ensate for unusually long air hoses over 25 feet Minimum hose diameter should be 3 8 I D and fit tings should have the same inside dimensions and be tightly secured Always turn off the air supply drain hose of air pressure and detach tool from air supply before install ing removing or adjusting any part or accessory on this tool or before performing any maintenance on this tool Ensure an accessibl...

Page 4: ...N Reverse Retainer 1 12 RS21114 Ball Bearing 626ZZ 2 13 RS79514 End Plate 2 14 RS79515 Rotor 1 15 RS78716 Rotor Blades 5 16 RS78717 Pin Ø2 5 55L 1 17 RS78718 Cylinder 1 REF NO PART NO DESCRIPTION QTY 18 RS79519 Spacer 1 19 RS79522 Internal Gear 1 20 RS79523 Planet Gear 3 21 RS78825 Pin Ø4 13 8L Incl w 23 3 22 RS78525 Bushing 3 23 RS79526 Work Spindle Incl 21 1 24 RS21118 Ball Bearing 6201ZZ 2 25 R...

Page 5: ...eakage or tool damage may result from prying Take smaller bites to avoid getting stuck OPERATION Specifications Horsepower 0 5HP Max Free Speed 1 800 RPM Chuck Cap 3 8 Spindle Thread 3 8 24 Air Inlet 1 4 NPT Min Hose Size 3 8 I D Avg Air Cons 4 CFM Recom Air Pressure 90 PSIG 6 2 bar Vibration level 2 29 m s2 Weight 2 6 lbs Length 7 Sound Level 90 6 dBA WARRANTY Important DO NOT RETURN DEFECTIVE PR...

Page 6: ...ag springs which fail to hold the spindle while the pawl advances YOU SHOULD Have replacement parts installed by an authorized service center TOOL DOESN T RUN RATCHET HEAD INDEXES CRISPLY BY HAND This condition is probably caused by the accumulation of dirt or sludge in motor parts YOU SHOULD Pour a generous amount of air tool oil into the air inlet Operate the throttle in short bursts With the to...

Page 7: ... esta herramienta de acuerdo con el Código de Seguridad del Instituto Americano de Estándares Nacionales para las Herramientas Portátiles Neumáticas ANSIB186 1 ycualquierotrocódigoo regulación aplicables Por seguridad desempeño superior y durabilidadmáximadelasrefacciones opere esta herramienta a la máxima presión de aire al 90 psig 6 2 barg con una manguera de alimentación de aire de 3 8 en diáme...

Page 8: ...ión más cer antes de dejar funcionar la herramienta Limpie el filtro de la entrada de aire semanalmente El procedimiento de conexión recomendado se puede con sultar en la FIG 1 La ventila de admisión de aire empleada para la conexión de abas tecimiento de aire cuenta con la Rosca Estándar Americana NPT 1 4 La pre sión de línea debe ser aumentada para compensar por mangueras excepcio nalmente larga...

Page 9: ...ar su fragilidad y falla temprana El apalancamiento podría ocasionar la rotura del complemento o daños a la herramienta Tome mordidas más pequeñas con el fin de evitar ator arse GARANTÍA Importante NO DEVUELVA UN PRODUCTO DEFECTUOSO AL LUGAR DE COMPRA FUERA DEL PERIODO ORGINAL DE GARANTÍA DE UN 1 AÑO POLÍTICA DE GARANTÍA Esta herramienta neumática de Carlyle Air Tool tiene garantía contra defectos...

Page 10: ...que de la herramienta en el anillo con un movimiento mecedor Con la mano cierre el anillo con un golpe en la ranura DESGASTE PREMATURO DEL YUNQUE Probablemente fue ocasionado por el uso de casquillos al cromo desgastados los cuales no fueron diseñados para usarse con las her ramientas de impacto o por unos casquillos desgastados USTED DEBE dejar de usar los casquillos al cromo Los casquil los al c...

Page 11: ...orizado de servicio para que se lleve a cabo el mantenimiento de ella MARTILLOS PNEUMÁTICOS LA HERRAMIENTA NO SE ENCENDERÁ Esta condición probablemente se haya ocasionado por una válvula circulante obstruida o una válvula estranguladora USTED DEBE revisar la ventila de admisión de aire por cualquier blo queo Eche una cantidad generosa de aceite para herramientas neumáti cas en la entrada de admisi...

Page 12: ...ernelle par l acheteur propriétaire ou toute personne habilitée par lui à le faire en s assurant que l opérateur en comprend bien le contenu Veuillez toujours utiliser inspecter et entretenir cet outil conformément au code de sécurité ANSI sur les outils pneumatiques portatifs ANSI B186 1 et à tout autre loi ou règlement relatif à la sécurité Pour assurer un fonctionnement sécuritaire un rendement...

Page 13: ... pieds Le diamètre intérieur minimal du boyau doit être de 3 8 po Les raccords doivent avoir le même diamètre intérieur et être ser rés solidement Toujours couper l arrivée d air comprimé et débrancher l outil avant d enlever ou de mettre en place une pièce ou un accessoire quelconque ou avant d effectuer une tâche d entretien quelconque LUBRICATION Lubrifiez le moteur pneumatique chaque jour avec...

Page 14: ...îner sa défaillance précoce Éviter tout effort qui ferait plier l accessoire il pourrait se rompre et endommager l outil Afin d éviter de coincer l outil percer par étapes UTILISATION Spécifications Puissance 0 5HP Vitesse max en régime libre 1 800 RPM Taille du mandrin 3 8 po Entrée d air NPT 1 4 po Filet de la broche 3 8 po 24 Taille de boyau recommandée D I de 3 8 po Consomation moyenne d air 4...

Page 15: ... des clés qui peut se détacher et se briser et causer aussi des blessures ou la mort L OUTIL PERD PROGRESSIVEMENT SA PUISSANCE MAIS CONTINUE À TOURNER À PLEIN RÉGIME QUAND IL TOURNE À VIDE Ce problème est probablement causé par des pièces d embrayage usées une lubrification inadéquate ou une came usée CONSEIL CLÉS LUBRIFIÉES AVEC DE L HUILE Vérifiez la présence d huile à embrayage là où il est spé...

Page 16: ...ion en air et répétez les étapes ci dessus Si l outil est tou jours enrayé insérez une tige de 6 po de longueur et de 1 8 po de diamètre dans l embout et tapez légèrement dessus pour ramener le piston en mode de marche arrière Rebranchez la source d alimentation en air et répétez les étapes ci dessus BURIN COINCÉ DANS L EMBOUT Ce pro blème est probablement causé par la déformation d une tige CONSE...

Reviews: