background image


                                          Digital Wireless Microphone    User Manual


5


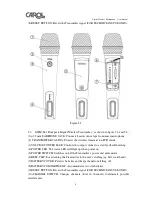
Figure 2.3 


Figure 2.4 


2.4


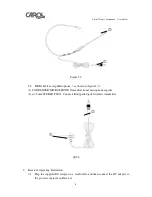
MUD-806 Headset Microphone.

as shown in figure 2.5


(1)


ø 3.5mm STEREO PLUG: Connects Bodypack digital wireless transmitter. 

(2)


CONDENSER MICROPHONE: Uni-directional microphone capsule. 

Summary of Contents for DWR-882

Page 1: ...Bodypack Digital Wireless Transmitter DWM 881 User Manual...

Page 2: ...Tie clip Microphone Optional 1 6 DC 7 5V Power adapter 1 7 6 3mm M XLR M XLR Cable 1 8 User s Manual 2 Parts Identification and Function 2 1 DWR 882 Digital Wireless Receiver as shown in figure 2 1 1...

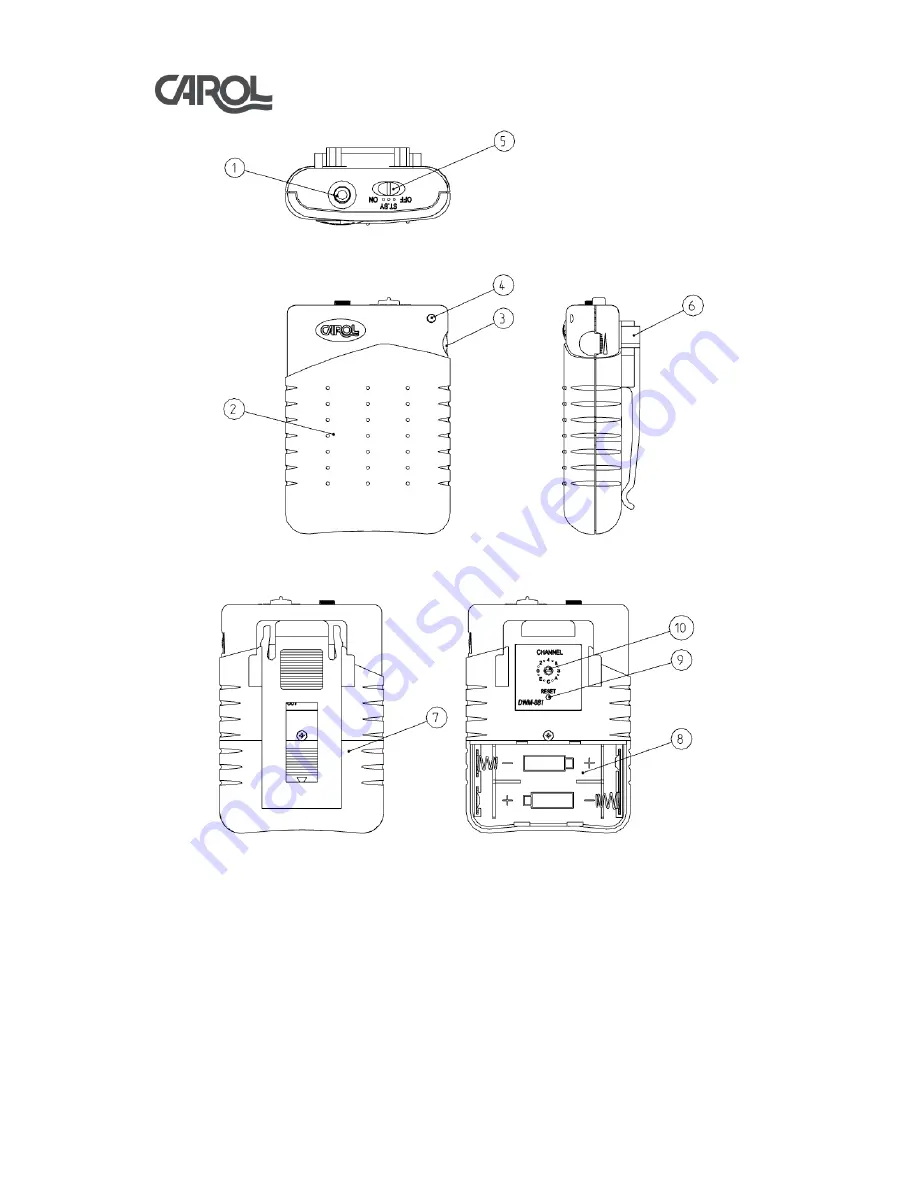
Page 3: ...n off the microphone with status LED 3 HOUSING For easy handling the microphone and protects the wireless transmitting PCB inside 4 LOGO PLATE Protects the antenna and strengthen the transmitting effe...

Page 4: ...CONTROLLER Controls the output volume to avoid feedback howling 4 POWER LED The status LED will light up when power on 5 POWER SWITCH Switches on off the Transmitter s power and mute mode 6 BELT CLIP...

Page 5: ...ophone User Manual 5 Figure 2 3 Figure 2 4 2 4 MUD 806 Headset Microphone as shown in figure 2 5 1 3 5mm STEREO PLUG Connects Bodypack digital wireless transmitter 2 CONDENSER MICROPHONE Uni direction...

Page 6: ...in figure 2 6 1 CONDENSER MICROPHONE Omni directional microphone capsule 2 3 5mm STEREO PLUG Connects Bodypack digital wireless transmitter 2 6 3 Receiver Operating Instruction 3 1 Plug the supplied D...

Page 7: ...hone to the sound source in between 2 to 5 cm 4 2 Turning OFF Keep pressing the microphone power switch for 2 to 3 seconds till the status LED goes off When the microphone is been turned off the micro...

Page 8: ...can be solved by selecting a different channel 4 4 2 When changing the channel it is not necessary to turn the power off Open the battery cover and the channel switch is located next to the battery c...

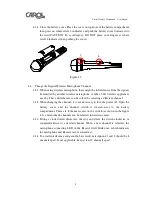
Page 9: ...s up red it indicates the Receiver has already picked up the signals from Microphone so you can now talk to the microphone Figure 5 1 5 3 If a feedback noise appears when the volume is too high or the...

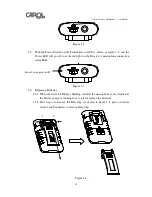
Page 10: ...ver s microphone connection status LED Figure 5 3 5 6 Replacing Batteries 5 6 1 When the status LED keeps blinking red after the microphone is on it indicates the battery energy is running low so plea...

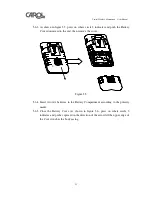
Page 11: ...ownward to the end then remove the cover Figure 5 5 5 6 4 Insert two AA batteries in the Battery Compartment according to the polarity marks 5 6 5 Close the Battery Cover As shown in figure 5 6 press...

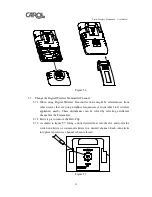
Page 12: ...ghbor frequencies or from other 2 4G wireless appliances nearby These disturbances can be solved by selecting a different channel for the Transmitter 5 7 2 First step is to remove the Belt Clip 5 7 3...

Page 13: ...lease repeat steps 6 3 6 4 and speed up the process 7 Troubleshooting 7 1 No sound 7 1 1 Check if the power to Digital Wireless Receiver is well connected 7 1 2 If the status LED is not lit when the D...

Page 14: ...Digital Wireless Transmitter Model DWM 881 Carrier Frequency 2 404G Hz 2 474G Hz Transmitting Power 10dBm 2dBm Frequency Response 30 18000Hz Current Consumption 95mA Power Supply Two AA batteries Bat...

Page 15: ...any electric devices with CRT monitor as the product might interferes the monitor display 9 6 While using the wireless microphone keep the Receiver away from any interference sources such as computer...

Page 16: ...ply with the regulations of FCC Radiated Emission Limits do not place or operate this Transmitter and its antenna together with another antenna or transmitter 11 3 This device complies with Part 15 of...

Reviews: