background image

8

2b

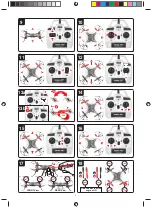
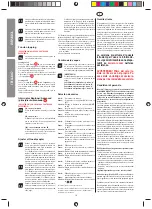
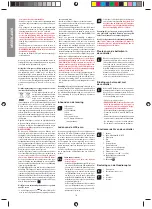
    Push the battery into the compartment and plug 

it into the socket there. 

After use:  Undo the 

plugged connection on the Quadrocopter 
when you are not using the Quadrocopter. 
Failure to observe this precaution may cause 
battery damage!

Note: when supplied, the lipo-battery is already partially 
charged. So the fi rst charging cycle may well take less time.

It is essential to follow the connection sequence given 
above! 

Disconnect the charger cable plug if you are not 

going to be using the Quadrocopter. Failure to observe 
this precaution may cause battery damage!

Inserting the batteries in the

remote control

3

  Open the battery compartment with a screwdriver 

and insert the batteries in the remote control. 
Please keep in mind the correct polarity. After 
having closed the compartment you can check all 
functions of the remote control with the help of the 
power-switch on the front.


With the power switch turned ON and functioning 
correctly, the top centre LED on the remote con-
trol will light up red. 


When the control LED fl ashes rapidly, the batter-
ies in the controller must be changed.

Frequency bind between model 

and remote control

4


The Carrera RC Quadrocopter and the remote 
control are frequency bound at purchase. If initially 
there are any problems with communication be-
tween the Carrera RC Quadrocopter and the remote 
control, please carry out a new frequency bind.


•  Connect the battery in the model.


•  

WARNING! Immediately after switching it on, 
place the Quadrocopter on a fl at and level 
surface. The gyro-system will then set itself 
automatically.


•   The LEDs on the quadrocopter now fl ash rhyth-

mically. 

 • 


Switch on the controller at the ON/OFF switch. 


•  Push the left-hand joystick, i.e. the throttle lever, 

right to the top, then fully downwards into the 
zero position.


•  The binding has now been successfully estab-

lished. The LED on the controller now lights 
continuously.

Range of functions of the 

remote control 

5

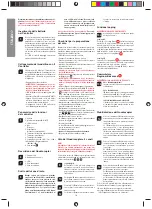
 1. Aerial


2.  Power switch (ON / OFF)


3.   Control LED

 4. 

Gas


Circling


5.  Forwards / backwards


right / left banking


6.  Trimmer for right / left banking


7.  Trimmer for forwards / backwards 


8.  Trimmer for rotation


9.  Looping Button (1x = 180° / 1 sec. = 360°)

 10. 

Beginner/Advanced switch (30% / 60% / 100%)

 11. 

Battery 

compartment 

3


Description of the Quadrocopter

6

 1. Rotor 

system


2.  Rotor protection cage

7

 3. LEDs

 4. 

Battery 

cable

 5. 

Battery 

compartment

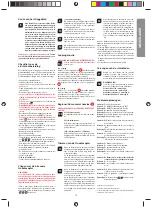
Choosing the fl ight area

8

  When being prepared for the fi rst  fl ight  you 

should choose a closed room which is as 
large as possible without any persons or 
 

obstacles. Due to its size and controllabil-
ity, experienced pilots may be able to fl y the 
Quadrocopter in relatively small rooms. For 
your fi rst fl ights we strongly recommend you 
choose a room with a minimum fl oor space of 
5 x 5 metres and 2.40 metres in height. After 
having trimmed your Quadrocopter for fl ight 
and made yourself familiar with the control-
ler and its functions you may start fl ying  in 
smaller and less open environments. 

To be used in domestic area (house and garden) only. 

There must be no persons or objects such as pillars be-
tween the controller and the Quadrocopter to obstruct 
direct connection.

Checklist for fl ight preparation

This checklist is not a substitute for the contents of the oper-
ating instructions. Although it can be used as a quick-start-
guide, we strongly recommend you fi rst to read the operating 
instructions in detail before you proceed.

•  Check the contents of the package.
•  Connect the charging unit to the source of power.
•  

Charge the lipo-battery as described in the section 
“Recharging the LiPo rechargeable battery”.

•  Fit 6 AA batteries in the controller, making sure their polar-

ity is correct.

•  Look for a suitable environment for fl ying.

•  Read and comply with the legal and safety regulations 

governing the use of your Quadrocopters.

•  Slide the battery into the battery bay on the bottom of the 

Quadrocopter.  

2b

•  

WARNING! Immediately after switching it on, place the 
Quadrocopter on a fl at and level surface. The gyro-
system will then set itself automatically.

•   The LEDs on the quadrocopter now fl ash rhythmically. 
•  Switch on the controller at the ON/OFF switch.

Be sure to 

check the Beginner-Advanced switch (

13b

)

Push the 

left-hand joystick, i.e. the throttle lever, right to the top, then 
fully downwards into the zero position. An audible signal 
is made.

•  Allow the Quadrocopter a few moments until the system is 

correctly initialised and is ready for operation. 

•   Repeat the above points as required, if you wish to fl y more 

Quadrocopters at the same time.

•  Check the control system.
•  Make yourself familiar with the control system.
•  Trim the Quadrocopter as necessary as described under  

14 15 16

, so that when hovering it no longer moves 

from the spot without a command from the controller.

•  The Quadrocopter is now ready to be fl own.
•  If the Quadrocopter displays no functions, retry the above 

binding procedure.

•  Fly the model.
•  The LED lamps on the model start to fl ash shortly before 

the battery is discharged.

•    Land  the  model.
•  

Disconnect the battery plug connection.

•  Always switch off  the remote control last.

Flying the 4-channel Quadrocopter

NOTE! 
Take care particularly in the fi rst few fl ights  to move 
the lever on the controller very gently and not over-
hurriedly. As a rule, only very small movements of the 

respective levers are necessary to carry out the desired 
control commands!

If you notice that the Quadrocopter moves forwards or to the 
side without your touching the respective lever, please adjust 
the trim of the Quadrocopter as described in (

14 15 16

). 

9

  +/- Gas (up / down) 


To start or to fl y higher, push the gas lever on the 
left cautiously forwards. To land or fl y lower, push 
the gas lever on the left cautiously backwards.

10

  To make the Quadrocopter circle to the left or the 

right on the spot, move the lever on the left cau-
tiously to the left or the right.

11

  To fl y the Quadrocopter to the left or the right, 

push the lever on the right cautiously  to the left or 
the right.

12

  To fl y the Quadrocopter forwards or backwards, 

push the lever on the right cautiously forwards or 
backwards.

Looping function

WARNING! ONLY FOR EXPERIENCED PILOTS!

13a

  Before you do this, make sure you have ample 

room on all sides (about 4 m – 13‘).

180° Loop

When you press the looping button 

1


1x

, an audible sig-

nal sounds until you move the right-hand joystick either up 
or down, or right or left. The Quadrocopter then performs the 
180° loop or roll in the respective direction. 
The controller in 180° mode is identical to the controller in 
normal mode. Should you wish to return to normal mode, 
please press the 'Looping Button' 

1

 once more.

3-D looping

Press the 'Looping Button' 

1

 for 

1 second 

and a rapid 

signal tone will sound until you move the right-hand joystick 
up, down or to left or right.
The Quadrocopter will then perform the 3-D looping (360°) 
or a roll in the respective direction.
 

Beginner/Advanced switch 

2


WARNING! 100 % IS ONLY FOR EXPERIENCED PILOTS!

13b 


30 % = beginner mode 


Signal sounds once on switching over. 


60 % = medium mode 


The quadrocopter reacts more sensitively than in 30 
% mode. Signal sounds twice on switching over. 


100 % = advanced mode -> 3D mode.


The Quadrocopter reacts very sensitively to joy-
stick movements. Signal sounds three times on 
switching over.

Trimming the Quadrocopter

14

  When hovering, if the Quadrocopter fl ies to the left 

or right without you moving the lever for left / right 
movement, please proceed as follows: 


If the Quadrocopter moves on its own fast or slow 
sideways to the left, press the lower right trimmer 
for right / left tilt in steps to the right. If the Quad-
rocopter moves right, press the trimmer for right / 
left tilt in steps to the left.

15

  When hovering, if the Quadrocopter fl ies forwards 

or backwards without you moving the lever for for-
wards or backwards movement, please proceed 
as follows:


If the Quadrocopter moves on its own fast or 
slow forwards, press the upper right trimmer for 
forwards / backwards in steps downwards. If the 
Quadrocopter moves backwards, press the trim-
mer for forwards / backwards in steps upwards.

EN

GL

IS

H

Summary of Contents for 370503011

Page 1: ...g Instru es de montagem e modo de utiliza o Monterings och bruksanvisning Asennus ja k ytt ohje Instrukcja monta u i obs ugi Szerel si s haszn lati utas t s Navodila za monta o in uporabo N vod k mont...

Page 2: ...R L R L 10 9 6 8 7 ON ON 2a 5 2b Green Ready LED OFF Charging 3 3 3 3 1 1 1 2 2 2 2 1 11 4 4 5 2 3 7V 380 mAh 1 41 Wh LiPo 6x 1 5 V Mignon AA batteries 6x 1 5 V Mignon AA batteries top side underside...

Page 3: ...1x 2 180 180 360 1Sec 1 1 9 17 18 11 14 15 16 12 10 13a 13b A A B B A A B B R L R L L R R L R L 3 Rotorblade Sideview angle of tilt REAR View FRONT View...

Page 4: ...chsenen erlernen Lesen Sie vor dem ersten Gebrauch die Benutzerinformationen zusammen mit Ihrem Kind Bei unsachgem er Verwen dung kann es zu schweren Verletzungen und oder Sachbe sch digungen kommen E...

Page 5: ...gem er Funktion sollte die LED oben in der Mitte des Controllers rot au euchten Wenn die Kontroll LED schnell blinkt m ssen die Batterien im Controller gewechselt werden Bindung des Modells mit dem Co...

Page 6: ...haben nicht mehr genug Energie L sung Neue Batterien einlegen Problem Der Quadrocopter l sst sich mit dem Controller nicht steuern Ursache Der Powerschalter des Controller steht auf OFF L sung Zuerst...

Page 7: ...removed from the product Do not recharge non rechargeable batteries due to risk of explosion WARNING The charger unit and the USB cable may be used by chil dren eight 8 years and upwards and by person...

Page 8: ...lace the Quadrocopter on a at and level surface The gyro system will then set itself automatically The LEDs on the quadrocopter now ash rhythmically Switch on the controller at the ON OFF switch Be su...

Page 9: ...u en livrant des pi ces neuves ou ayant subi une r vision g n rale La garantie ne s tend pas aux pi ces d usure par exemple la batterie les pales de rotor le recou vrement de cabine la roue dent e aux...

Page 10: ...rature ambiante dans un lieu sec Rechargez votre accu apr s utilisation a n d viter une d charge profonde de celui ci Veillez faire une pause de 20 minutes env entre le vol et la charge Chargez votre...

Page 11: ...ore rapide se fait entendre jusqu ce que vous d placiez la manette de droite vers le haut vers le bas vers la droite ou vers la gauche Le Quadrocopter e ectue ensuite le tonneau ou le looping 3D 360 d...

Page 12: ...cciones de seguridad y normas as como indicaciones relativas al mantenimiento y el manejo del producto Es imprescindible haber le do y comprendido el presente manual antes de la primera puesta en marc...

Page 13: ...Es indispensable que direc tamente tras su encendido ponga el Quadro copter sobre una super cie horizontal recta El sistema gyro se orienta autom ticamente Los leds ahora parpadean r tmicamente Conec...

Page 14: ...trolador no est o no est correctamente vinculado con el receptor del Quadrocopter Soluci n Lleve a cabo el proceso de vinculaci n como se describe en Lista de comprobaci n para la pre paraci n del vue...

Page 15: ...lle sanzioni amministrative di cui al D Lgs n De creto Legislativo N 49 del 14 Marzo 2014 Non usare contemporaneamente tipi di batterie diversi o bat terie nuove e usate Togliere le batterie esauste d...

Page 16: ...izzare eventualmente il Quadrocopter come descritto sotto 14 15 16 in modo che nel volo stazionario non si sposti senza comandi da parte del Controller Ora il Quadrocopter pronto per l uso Se il Quadr...

Page 17: ...De garan tie geldt niet voor slijtageonderdelen zoals bijv accu ro torbladen cabineafdekking tandwielen enz voor schade door een onjuiste behandeling of onjuist gebruik of bij in grepen door derden A...

Page 18: ...minuten Als u een accu die reeds opgezwollen of vervormd is verder laadt of ontlaadt bestaat er brandgevaar Zelfs bij geringe vervorming of bal lonvorming moet een accu buiten werking worden gesteld B...

Page 19: ...Looping Button 1 1 seconde ingedrukt houdt weerklinkt een snel signaal totdat u de rechter joy stick naar boven beneden rechts of links beweegt De Quadrocopter voert dan de 3D looping 360 resp rol vlu...

Page 20: ...eprud nciaeocomando requeralgumascapacidadesmec nicasementais Omanualde instru es cont m indica es de seguran a e prescri es bem como dicas para a manuten o e o funcionamento do produto absolutamente...

Page 21: ...o Quadrocopter Carrera RC e o comando volte a estabelecer a interliga o Ligue a pilha na miniatura AVISO Depois de ligar o Quadrocopter coloque o imediatamente sobre uma super f cie horizontal plana O...

Page 22: ...o comando est em OFF Solu o Primeiro colocar o interruptor do comando em ON Causa Eventualmente a interliga o entre o comando e o receptor do quadrocopter n o est correta Solu o Estabele a a interliga...

Page 23: ...der uppsikt H ll laddaren och anslutningskabeln borta fr n barn under 8 rs lder Batteriet skall laddas under verinseende av en vuxen L mna aldrig batteriet utan uppsikt medan det laddas Anslutningskl...

Page 24: ...ycker man p Looping Button 1 1x ljuder en signalton tills att man r r h ger joystick upp t ned t t h ger eller t v nster Quadrocopter utf r d en 180 looping i resp riktning Styrningen i 180 l get r id...

Page 25: ...imen heikoilla paristoilla V lt alueita joissa on paljon liikennett tai el m Var mista aina ett k yt ss on tarpeeksi tilaa l lenn t helikopteriasi mahdollisuuksien mukaan kadul la tai yleisill alueill...

Page 26: ...osittelemme ett luet t m n k ytt ohjeen ensin kokonaan ennen kuin jatkat Tarkasta pakkauksen sis lt Yhdist laturi virtal hteeseen Lataa LiPo akku kuten kappaleessa LiPo akun lataus on kuvattu Aseta oh...

Page 27: ...poni szych uregulowa e dostarczony Klientowi model Carrera RC Quadrocopter poni ej zwany produktem b dzie pozbawiony wad materia owych lub produkcyjnych w okresie dw ch lat od daty zakupu okres gwara...

Page 28: ...roz adowywanie Wyjmijcie Pa stwo akumulator tak szybko i tak ostro nie jak tylko mo liwe po cie go Pa stwo na bezpiecznej i otwartej powierzchni z dala od palnych materia w i ob serwujcie go Pa stwo p...

Page 29: ...lub w prawo ostro nie przesu cie Pa stwo lew d wigni w lewo lub w prawo 11 Aby lata quadrokopterem w lewo lub w prawo ostro nie przesu cie Pa stwo praw d wigni w lewo lub w prawo 12 Aby lata quadrokop...

Page 30: ...mben t masztott mindennem tov bbi f k nt k rt r t si ig nye kiz rt Ez a garancia nem rinti a Vev mindenkori elad val szemben fenn ll azon szerz d ses vagy t rv nyes jogait ut lagos teljes t s szerz d...

Page 31: ...is ki kell vonni a haszn latb l Az akkut szobah m rs kleten sz raz helyen kell t rolni Az akku n m lykis l s nek megakad lyoz sa rde k ben a haszn lat ut n az akkut felt tlen l jra fel kell t lteni E...

Page 32: ...uadrocopter balra vagy jobbra t rt n reptet s hez mozgassa a jobb oldali kart vatosan balra ill jobbra 12 A quadrocopter el re vagy h tra t rt n reptet s hez mozgassa a jobb oldali kart vatosan el re...

Page 33: ...za obrabo ki je pogojena z uporabo izdelek nima nobenih sledi na podlagi katerih bi bilo mo no sklepati da so bila na izdelku opravljena popravila ali drugi posegi s strani osebja ki za to ni poobla e...

Page 34: ...h rotorjev 6x 1 5 V Mignon AA baterije nepolnilne Polnjenje baterije LiPo Pazite na to da prilo eno baterijo LiPo polnite le s prilo enim polnilnikom za LiPo baterije kabel USB e boste posku ali bater...

Page 35: ...ez premika ro ice za desni levi nagib leti v levo ali desno potem prosimo ravnajte slede e e se kvadrokopter samodejno hitro ali po asi premika bo no v levo pritisnite spodnji trimer za desni levi nag...

Page 36: ...na to aby se va e ruce NEDOSTALY do bl zkosti list rotoru UPOZORN N Nebezpe poran n o Nenechejte Quadrocopter l tat v bl zkosti obli eje aby nemohlo doj t ke zran n Pouze pro dom c pou it D m a zahra...

Page 37: ...ek 360 10 P ep na re imu Beginner Advanced pro za te n ky pokro il 30 60 100 11 P ihr dka na baterie 3 Popis Quadrocopteru 6 1 Syst m rotoru 2 Ochrann klec rotoru 7 3 LED diody 4 Kabel akumul toru 5 P...

Page 38: ...m Quadrocopter se pouze to v kruhu nebo se p i startu p evrhne P ina Nespr vn uspo dan nebo po kozen listy rotoru e en Uspo dejte nebo vym te listy rotoru jak je pops no v bod 17 18 Omyly a zm ny vyh...

Page 39: ...o s nedostatkom sk senost a alebo vedomost ak s pod dozorom alebo boli pou en o bezpe nom pou van a pochopili mo n ne bezpe enstv Deti sa s nab ja kou resp nab jac m k blom USB nesm hra istenie a pou...

Page 40: ...prudko Na vykonanie pr slu n ho riadiaceho poky nu v inou sta ia nepatrn pohyby na pr slu nej p ke Ak by ste si v imli e sa Quadrocopter pohybuje dopredu alebo do strany bez toho aby ste zatla ili na...

Page 41: ...jiva obilje ja koja upu uju na po pravke ili druge zahvate provedenih u radionicama koje nisu autorizirane od strane proizvo a a je proizvod isklju ivo kori ten sa opremom koju je odobrio proizvo a Ja...

Page 42: ...poruke 1 1x Quadrocopter 1x Upravlja 1x USB kabel za punjenje 1x Akumulator 1x Lanyard 1x Komplet zamjenskih rotora 6x 1 5 V minjon AA baterije ne mogu se ponovno puniti Punjenje LiPo akumulatora Pazi...

Page 43: ...ptera 14 Ako Quadrocopter u lebde em letu bez kreta nja poluge za nagib u desno lijevo leti u lijevu tj desnu stranu postupajte molimo Vas na sljede i na in Ako se Quadrocopter samostalno brzo ili spo...

Page 44: ...har alene ansvar for en sik ker omgang slik at verken du eller andre personer eller deres eiendom settes i fare eller skades Du m aldri bruke denne modellen med svake batterier i kontrolleren Unng omr...

Page 45: ...LED lamper 4 Akkumulator kabel 5 Batterirom Valg av yomr de 8 N r du er klar for f rste yvning b r du velge et lukket rom som er s stort som mulig og uten personer eller hindringer P grunn av st r rel...

Page 46: ...ag ved start rsak Feilplasserte eller skadede rotorblad L sning Rotorblader monteres skiftes ut som beskrevet i 17 18 Med forbehold om feil og endringer Farger endelig design med forbehold om endringe...

Page 47: ...r deres sikkerhed ansvarlig person eller af samme er blevet instrueret om hvordan apparatet anvendes og har forst et de deraf resulterende farer B rn m ikke lege med opla deren hhv USB ladekablet Reng...

Page 48: ...gelser af det p g ldende h ndtag for at udf re den p g ldende styrekommando Hvis du bem rker at quadrocopteren bev ger sig fremad eller til siden uden at du bev ger det p g ldende h nd tag skal du tri...

Page 49: ...eya ba ka ekilde m dahale ettiklerini kan tla yan zellikler bulunmuyorsa r n sadece imalat taraf ndan yetkili k l nm aksesaurlar ile kullan ld ysa Garanti kartlar de i tirilemez AB lkeleri i in bilgil...

Page 50: ...nda kalacak olursa hasar g rebilir veya alev alabilir Bilgi Pil geriliminin g c n n d k olmas durumunda Quadrocopter in sallanmamas i in olduk a ayar ve veya kumanda hareketlerinin gerekli olaca n tes...

Page 51: ...R BEL P LOTLAR N 13b 30 Yeni ba layanlar mod s De i tirilirken sinyal sesi bir defa duyulur 60 Medium mod s Quadrocopter 30 mod s ne nazaran daha hassas tepki g stermektedir De i tirilirken sinyal ses...

Page 52: ...rtrieb GmbH Carrera RC Modell Quadrocopter Stadlbauer EG 108 2004 48 2009 TTE R EG 5 1999 carrera rc com 10 8 LiPo LiPo LiPo WEEE II LiPo 3 7 1 41 380 USB LiPo 15 20 2 3 50 5 Quadrocopter 3 Quadrocopt...

Page 53: ...o AA 6 Quadrocopter 2b Quadrocopter Quadrocopter LED Quadrocopter 13b Quadrocopter Quadrocopter Quadrocopter Quadrocopter 14 15 16 Quadrocopter Quadrocopter LED Quadrocopter Quadrocopter Quadrocopter...

Page 54: ...54 LED 4 17 18 A B A B OFF ON OFF ON ON OFF Quadrocopter OFF ON Quadrocopter Quadrocopter Quadrocopter Quadrocopter 17 18...

Page 55: ...55...
Page 56: ...ic Phone 420 284 000 111 Fax 420 284 000 101 Email radim kalo conquest cz Internet www cqe cz DENMARK SWEDEN NORWAY FINLAND ICELAND Tactic Games OY Raumanjuovantie 2 P O Box 4444 28101 Pori Finland Ph...

Page 57: ...interference that may cause undesired operation of the device Le pr sent appareil est conforme aux CNR d Industrie Canada applicables aux appareils radio exempts de licence L exploitation est autoris...

Reviews: