background image

21

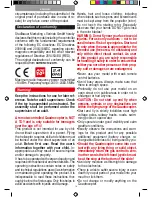
•  The Quadrocopter is now ready to be flown.

•  If  the  Quadrocopter  displays  no  functions, 

retry the above binding procedure.

•  Fly the model.

•  Land the model.

•  

Disconnect the battery plug connection.

•  Always switch off the remote control last. 

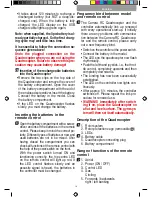
Flying the 4-channel Quadrocopter

NOTE! 

Take  care  particularly  in  the  first  few 

flights to move the lever on the controller 

very  gently  and  not  over-hurriedly.  As  a 

rule, only very small movements of the re-

spective levers are necessary to carry out 

the desired control commands!

If  you  notice  that  the  Quadrocopter  moves 

forwards or to the side without your touching 

the respective lever, please adjust the trim of 

the Quadrocopter as described in 

17

18 19 20

9

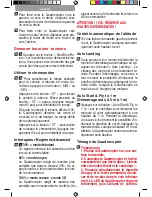
 +/- Gas (up / down) 

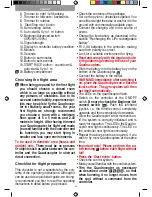
   To start or to fly higher, push the gas le-

ver on the left cautiously forwards. To land 

or fly lower, push the gas lever on the left 

cautiously backwards.

10

 To make the Quadrocopter circle to the left 

or the right on the spot, move the lever on 

the left cautiously to the left or the right.

11

 To fly the Quadrocopter to the left or the 

right, push the lever on the right cautiously  

to the left or the right.

12

 To fly the Quadrocopter forwards or back-

wards, push the lever on the right cautious-

ly forwards or backwards.

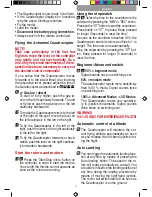
Start the rotors and motors

13


a

 Press the ‘Start/Stop rotors’ button on 

the controller, in order to start the motors. 

You can lift the throttle control upwards as 

soon as the rotors are running.

Using the stopwatch

13


b

 Select the time for the countdown to the 

auto-start by pressing the “MIN” or “SEC” button. 
Press on the “ST” button to start the countdown. 

Press briefly on “ST” to pause. Keep pressed 

for longer (5 seconds) to reset the time.”
As soon as the countdown reaches 0:00, the 

Quadrocopter starts its rotors and flies to 1 m 

height. The time now runs automatically. 
Stop the stopwatch by pressing the “ST” but-

ton. Keep pressed for longer (5 seconds) to 

reset the time.

Beginner/Advanced switch

13


c


30% = beginner mode

   Signal sounds once on switching over.

  60% = medium mode 

   The quadrocopter reacts more sensitively 

than in 30 % mode. Signal sounds twice 

on switching over. 

  100% = Advanced Modus -> 3D Modus

   The  Quadrocopter  reacts  very  sensitive-

ly  to  joystick  movements.  Signal  sounds 

three times on switching over.

 WARNING! 

100 % IS ONLY FOR EXPERIENCED PILOTS!

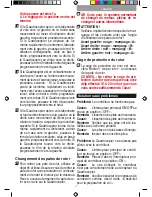
Automatic control of altitude

14


The  Quadrocopter  will  maintain  the  cur-

rent flying altitude automatically as soon 

as you release the left-hand joystick dur-

ing the flight.

Auto Landing

15

   You can trigger the automatic landing func-

tion at any time by means of pressing the 

‘Auto landing’ button. The speed of the ro-

tors will reduce gradually as a result. You 

are able to influence the landing position at 

any time during the landing procedure by 

means  of  moving  the  right-hand  joystick. 

The motor will switch itself off as soon as 

the Quadrocopter is on the ground.

ENGLISH

Summary of Contents for Race Copter

Page 1: ...zioni per il montaggio e l uso Montage en gebruiksaanwijzing Instru es de montagem e modo de utiliza o Monterings och bruksanvisning Asennus ja k ytt ohje Instrukcja monta u i obs ugi Szerel si s hasz...

Page 2: ...de 1 5 V Mignon AA LED OFF Charging DEL OFF En charge LED OFF Cargando Green Ready Vert Pr t Verde Listo 2 a b 2x 1 5 V Mignon AA batteries 2x Accus 1 5 V mignon AA 2x Pilas de 1 5 V Mignon AA 20 3 3...

Page 3: ...8 8 R L R L 9 10 14 16 11 AUTO 10 11 19 AUTO AUTO 1 m 1 m START 12 9 12 START START START START START START START START START START START START START START START START START START START START START ST...

Page 4: ...R L 1 ON R L 1 5 m 3 2 AUTO R L L R R L 1 12 13 a 13 b 16 15 0 17 13 c 1 2 14 START 3 sec 12 OFF AUTO R L 3 2 STOP 4...

Page 5: ...20 23 19 18 21 22 24 A A B B A A B B R L 5 Rotorblade Sideview angle of tilt...

Page 6: ...tadlbauer Marketing Vertrieb GmbH nachfolgend Hersteller garantiert dem Endkunden nachfolgend Kunde nach Ma gabe der nachfolgenden Bestimmungen dass der an den Kunden gelieferte Carrera RC Modell Quad...

Page 7: ...g erforderlich Kinder m ssen dies unter direkter Beaufsichtigung durch einen Erwachsenen erlernen Vor dem ersten Ge brauch Lesen Sie diese Anleitung zusam men mit Ihrem Kind Bei unsachgem er Verwendun...

Page 8: ...abgebildete Symbol der durchgestrichenen M llton nen soll Sie darauf hinweisen dass leere Batterien Akkumula toren Knopfzellen Akku packs Ger te batterien elektrische Altger te etc nicht in den Hausm...

Page 9: ...dabei dass Sie eine Pause von ca 20 Min zwischen dem Flug und dem Ladevor gang einhalten Laden Sie den Akku von Zeit zu Zeit ca alle 2 3 Monate auf Eine Nichtbeachtung der o g Handhabung des Akkus kan...

Page 10: ...mit einem Schraubendreher und setzen Sie die Batteri en in den Controller ein Achten Sie auf die richtige Polarit t Verwenden Sie nie neue und alte Batterien oder von unterschiedlichen Herstellern gem...

Page 11: ...Flugvorbereitung Diese Checkliste ist kein Ersatz f r den Inhalt dieser Bedienungsanleitung Obwohl Sie als Quick Start Guide verwendet werden kann empfehlen wir Ihnen eindringlich zun chst diese Betri...

Page 12: ...vorsichtig nach hinten 10 Um den Quadrocopter auf der Stelle links oder rechts herum zu drehen bewegen Sie den linken Hebel vorsichtig nach links bzw rechts 11 Um den Quadrocopter nach links oder rec...

Page 13: ...igung nach links bzw rechts fliegt gehen Sie bitte wie folgt vor Bewegt sich der Quadrocopter von selbst schnell oder langsam seitw rts nach links dr cken Sie den unteren rechten Trimmer f r Rechts Li...

Page 14: ...ter am Con troller auf ON stellen Ursache Der Controller ist ggf nicht richtig mit dem Empf nger im Quadrocopter gebunden L sung Bitte f hren Sie den Bindevorgang wie unter Checkliste f r die Flugvorb...

Page 15: ...manufacturer warrants to the endconsumer hereinafter referred to as customer that the Carrera RC model Quad rocopter hereinafter referred to as product delivered to the customer shall be free from def...

Page 16: ...uries and damage Hands hair and loose clothing including other objects such as pens and screwdrivers must be kept away from the propeller rotor Do not touch the rotating rotor Especially take care tha...

Page 17: ...y trained in the safe use of the unit and have a proper un derstanding of the dangers it poses Children must not be allowed to treat the charger or the USB cable as a toy Cleaning and user main tenanc...

Page 18: ...r controlling is necessary to avoid that the Quadrocopter starts trundling This usually occurs before reaching a battery voltage of 3 V and it is a good moment to end the flight Instruction Manual Con...

Page 19: ...ith the help of the power switch on the front With the power switch turned ON and functioning correctly the top centre LED on the remote control will light up red If the LED control flashes slowly and...

Page 20: ...k the contents of the package Set up the pylons obstacles supplied You can either weight the base or anchor it to the ground with commercially available pegs Connect the charging unit to the source of...

Page 21: ...order to start the motors You can lift the throttle control upwards as soon as the rotors are running Using the stopwatch 13 b Select the time for the countdown to the auto start by pressing the MIN...

Page 22: ...Quadrocopter moves on its own fast or slow forwards press the upper right trimmer for forwards backwards in steps downwards If the Quadrocopter moves backwards pressthetrimmerforforwards backwards in...

Page 23: ...qu selon des crit res r cents des plus exigeants Nous avons toujours pour ambition d am liorer et de perfectionner nos produits et nous r servons la possibilit de r aliser des modifications techniques...

Page 24: ...r le fabricant Les cartes de garantie ne sont pas rem pla ables Avis destin s aux tats de l Union euro p enne nous attirons l attention sur l obliga tion de garantie l gale du vendeur pour autant que...

Page 25: ...nt les instructions et les avertissements pour ce produit et l quipement suppl mentaire ventuel chargeur accus etc que vous utilisez Si le Quadrocopter entre en contact avec des tres vivants ou des ob...

Page 26: ...avertissements pour l emploi de l accu LiPo Vous devez charger l accu LiPo 3 7 V 1000 mAh 3 7 Wh dans un endroit s r l cart de mat riaux inflammables Ne laissez jamais la batterie se charger sans sur...

Page 27: ...il n est pas possible d inverser la polarit La recharge d un accu d charg non fortement d charg dure environ 120 mi nutes Lorsque l accu est plein la DEL du c ble de charge USB se rallume en vert Rema...

Page 28: ...naison droite gauche 6 Trim pour inclinaison droite gauche 7 Trim avant arri re 8 Trim de rotation circulaire 9 Bouton Start Stop Rotors D marrer les rotors 10 Bouton Auto Landing Atterrissage auto 11...

Page 29: ...e permanente R p tez la proc dure ci dessus si vous d sirez faire voler plusieurs Quadrocopter simultan ment Remarque Veuillez effectuer imp ra tivement l ajustage automatique avant chaque vol 17 Appu...

Page 30: ...ode 3D Le Quadrocopter r agit de mani re tr s sensible aux mouvements de contr le Un signal sonore se fait entendre trois fois lors de la commutation ATTENTION 100 R SERV AUX PILOTES EXP RIMENT S Cont...

Page 31: ...de rotor 21 Pour retirer une pale de rotor utilisez un objet fin et lisse Assurez vous de retirer la pale de rotor avec pr caution et verticale ment en tenant le moteur par le dessous Fixez nouveau fe...

Page 32: ...e garantiza al cliente final en adelante el cliente seg n las disposiciones referidas a continuaci n que el modelo de Quadrocopter de Carrera RC entregado al cliente en adelante el producto estar exen...

Page 33: ...n ser utilizados por ni os a partir de los ocho 8 a os de edad y por personas con capacidades f sicas sensoriales o cognitivas limitadas o con falta de experiencia conocimiento si se les supervisa o i...

Page 34: ...T RACE Countdown Auto Start Fly to 1m 3 20 Compartimento para las pilas Elecci n de la zona de vuelo 8 Si ya est preparado para el primer vuelo deber a elegir un espacio ce rrado sin personas y sin ob...

Page 35: ...la derecha izquierda hacia la izquierda 19 Si el Quadrocopter en vuelo estacionario sin mover la palanca para el avan ce retroceso vuela hacia delante o hacia atr s proceda como sigue Si el Quadrocopt...

Page 36: ...e queste istruzioni insieme con il vostro bambino L uso non appropriato pu causare gravi lesioni e o danni materiali Deve essere comandato con precauzione e accortezza e richiede alcune capacit meccan...

Page 37: ...te con il computer Se un Quadrocopter viene collegato con un accumulatore scarico il LED sul cavo di carica non si illumina pi indicando che l accumulatore del Quadrocopter viene caricato Il cavo di c...

Page 38: ...Ora il tempo scorre automaticamente Premendo il pulsante ST il cronometro viene fermato Una pressione prolun gata 5 sec resetta il tempo Commutatore Beginner Advanced 13 c 30 Modalit principianti Il...

Page 39: ...ht of in uw land een verzeke ringsplicht bestaat voor de door u gekochte modelluchtvaartuig Garantievoorwaarden Bij de Carrera producten gaat het om technisch hoogwaardige produc ten GEEN SPEELGOED di...

Page 40: ...goed verwijderen Oplaadbare batterijen mo gen enkel onder toezicht van volwassenen geladen worden WAARSCHUWING De lader resp USB laadkabel mag door kinderen vanaf een leeftijd van acht 8 jaar en door...

Page 41: ...wij ten zeerste een ruimten met een grondoppervlakte van ten minste 5 x 5 me ter en een hoogte van 2 40 m a an Nadat u de Quadrocopter uitgetrimd hebt en u voldoende met de besturing en mogelijkheden...

Page 42: ...naar voren beweegt drukt u de bovenste rechter trimmer voor de beweging naar voren achteren stapsgewijze naar beneden Als de Quadrocopter naar achteren beweegt drukt u de trim mer voor de beweging naa...

Page 43: ...comandado N O UM BRINQUEDO e s se apropria para jovens a partir dos 14 anos de idade Este produto n o se destina para utiliza o por crian as sem a vigil ncia do res pectivo encarregado de educa o Para...

Page 44: ...grada no Quadrocopter com o respetivo cabo de carga USB ligado a uma porta USB 2a Carregamento atrav s do computador Retire a pilha da miniatura antes de carreg la Ligue o cabo de carga USB porta USB...

Page 45: ...a direita mova o man pulo esquerdo cuidadosamente para a esquerda ou para a direita res petivamente 11 Para pilotar o Quadrocopter para a esquerda ou para a direita mova o man pulo direito cuidadosam...

Page 46: ...anvisning Denna bruks och monteringsanvisning r en del av produkten Om bruksanvisningen och de s kerhetsanvisningar den inneh ller inte f ljs upph r garantin att g lla Spara bruksanvisningen f r senar...

Page 47: ...lutningskl mmor f r inte kortslu tas Endast rekommenderade batterier eller batterier av likv rdig typ f r anv ndas Vid regelbunden anv ndning av laddaren m ste den kontrolleras unders k kabel anslutni...

Page 48: ...ovillkorligen knappen Beginner Advanced 13c Skjut den v nstra joysticken d v s gasspaken hela v gen upp och sedan ned t V nta en liten stund tills att Quadrocopter systemet blir korrekt initialiserat...

Page 49: ...smalt glatt f rem l Se till att dra av rotorbladet f rsiktigt lodr tt upp t och d rvid h lla i motorn underifr n som stabilisering S tt fast rotorbladet igen med skruven p Quad rocopter 22 QR kod f r...

Page 50: ...en kisi valmiuksia Ohjeessa on turvaohjeita ja m r yksi sek tuotteen huolto ja k ytt ohjeita T m ohje on ehdottomasti luettava ennen ensimm ist k ytt nottoa ja ymm rrett v sen sis lt Vain n in voidaan...

Reviews: