5
4
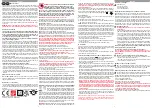
Description of the Quadrocopter
5
1. Rotor system
2. Rotor protection cage
3. LEDs
6
4. Battery cable
5. Quadrocopter connecting plug
6. Battery compartment
7. Anti-collision sensors
NOTE:
The function of the anti-collision sensors can be disrupted by
light and direct sunshine. The sensors are unable to identify window
panes as an obstacle.
Range of functions of the remote control
7
1. Power ON / OFF (OFF = hold for 10 sec.)
2. Index finger loop with button
3. Thumb loop
Choosing the flight area
8
When being prepared for the first flight you should choose a closed
room which is as large as possible without any persons or obstacles.
Due to its size and controllability, experienced pilots may be able to
fly the Quadrocopter in relatively small rooms. For your first flights
we strongly recommend you choose a room with a minimum floor
space of 5 x 5 metres and 2.40 metres in height. After having
trimmed your Quadrocopter for flight and made yourself familiar
with the controller and its functions you may start flying in smaller
and less open environments.
To be used in domestic area (house and garden) only.
There must be
no persons or objects such as pillars between the controller and the
Quadrocopter to obstruct direct connection.
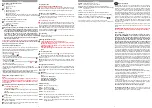
Checklist for flight preparation
This checklist is not a substitute for the contents of the operating instructions.
Although it can be used as a quick-start-guide, we strongly recommend you
first to read the operating instructions in detail before you proceed.
• Check the contents of the package.
• Charge the batteries
2a
.
• Pull on the one-hand controller
3
.
• Look for a suitable environment for flying.
• Slide the battery into the battery bay on the bottom of the Quadrocopter.
2b
• Connect the battery in the model.
• Link as described in
4
.
• To start the quadrocopter, press the button on your index finger
2
(Figure
7
).
• Check the control system.
• Make yourself familiar with the control system.
• The quadrocopter rises automatically to approx. 1.2 m flying height.
• If the Quadrocopter displays no functions, retry the above binding procedure.
• Fly the model.
• Land the model by briefly pressing the power switch on the one-hand controller.
•
Disconnect the battery plug connection on the quadrocopter.
• Always switch off the one-hand controller last (press the power switch for 10 sec.).
Flying the 4-channel Quadrocopter
NOTE!
Take care particularly in the first few flights to make the control move-
ments with your right hand carefully and not over-hurriedly. In most cas-
es, very few movements are sufficient to steer the Quadrocopter in the
required direction.
9
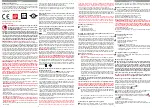
The Quadrocopter is flown using an intuitive one-hand gesture control.
Controlling the altitude
Control the altitude as follows:
Increase the altitude:
Hold the index finger button and tilt your hand
upwards.
Reduce the altitude:
Hold the index finger button and tilt your hand down-
wards.
10
To fly the Quadrocopter to the left or to the right, tilt your hand carefully to
the right or left.
11
To fly the Quadrocopter forwards or backwards, tilt your hand carefully
upwards or downwards.
12
To turn the quadrocopter to the left or right, hold the index finger button
and tilt your hand to the left or right.
Looping function
WARNING! ONLY FOR EXPERIENCED PILOTS!
13
To loop, press the button on your index finger; the Quadrocopter now
flashes. Complete a fast tilt movement with your right hand to the left, right,
front or rear. The Quadrocopter now loops in the direction required by you.
Automatic control of altitude
14
The Quadrocopter maintains altitude automatically after starting. The
Quadrocopter can be steered in any required direction at the same height
using intuitive one-hand gesture control.
Auto-Start & Fly to ≈1.2 m
15
Press the button on the right-hand index finger to start the motors and to
fly automatically at approx. 1.2 m altitude. You are able to influence the
direction of flight at any time during the starting operation by moving your right
hand. The Quadrocopter maintains itself at that altitude automatically as soon
as the altitude of approx. 1.2 m is reached. The altitude can be increased at
any time manually by holding the button on your right-hand index finger. Con-
trol the altitude as described under
9
.
Auto Landing
16
Press the power switch on your palm briefly. The landing operation is
carried out automatically.
Trimming the Quadrocopter
17
1. Place the Quadrocopter on a horizontal surface.
2. Link the Quadrocopter with the controller as described in “Link-
ing the model with the controller”.
3. Briefly press the power switch on the controller once. The LEDs
flash briefly rhythmically.
4. The LEDs light up again continuously. The neutral setting is com-
pleted.
Anti-collision function
18
To activate the anti-collision sensors
7
, press the index finger button 3
times quickly in succession. The LEDs flash 3 times, the sensors are ac-
tive. To deactivate the sensors, press the index finger button again, 3 times
quickly in succession.
NOTE:
The function of the anti-collision sensors can be disrupted by light
and direct sunshine. The sensors are unable to identify window panes as an
obstacle.
Changing the rotor blades
19
Use a screwdriver if it is necessary to remove a rotor blade. Make sure
that you draw the rotor blade with great care vertically upwards, and hold
the motor from below to stabilise it. Screw the rotor blade firmly back on to the
Quadrocopter.
20
WARNING!
Be sure to note the marking and colour, also the tilt angle of the rotor
blades!
Front left: red – marking “A1”
Front right: red – marking “B2”
Rear right: black – marking “A2”
Rear left: black – marking “B1”
Troubleshooting
Problem:
Remote control does not work.
Cause:
The battery is empty.
Solution:
Charge the battery
2a
.
Cause:
The controller is not switched on.
Solution:
Press the power switch
Problem:
The Quadrocopter cannot be controlled with the remote control
Cause:
The remote control is possibly not correctly frequency bound with
the receiver on the Quadrocopter.
Solution:
Please carry out the binding procedure as described in “Checklist
for flight preparation“.
Problem:
The Quadrocopter does not lift.
Cause:
The battery´s power is not sufficient.
Solution:
Charge the battery (see chapter “Charging the battery”).
Problem:
During flight, the Quadrocopter loses speed and height without any
obvious reason.
Cause:
The battery is too weak.
Solution:
Charge the battery (see chapter “Charging the battery”).
Problem:
The quadrocopter only flies in a circle or turns over on starting.
Cause:
Rotor blades incorrectly fitted or damaged.
Solution:
Fit rotor blades / replace rotor blades as described in
19
20
.
Errors and changes excepted · Colours / final design – changes excepted
Technical changes and design-related changes excepted · Pictograms = symbolic photos
Αξιότιμε πελάτη
Συγχαρητήρια για την αγορά του μοντέλου Quadrocopter της Carrera RC,
κατασκευασμένο σύμφωνα με τα σημερινά πρότυπα της τεχνολογίας. Επειδή
προσπαθούμε πάντοτε να βελτιώνουμε την εξέλιξη και ανάπτυξη των προϊ-
όντων μας, επιφυλασσόμαστε για τυχόν τεχνικές αλλαγές στον εξοπλισμό,
στα υλικά και στο σχέδιο του Quadrocopter οποιαδήποτε στιγμή και χωρίς
καμία προειδοποίηση. Μικρές αποκλίσεις του αγορασθέντος προϊόντος από
τα στοιχεία και τις φωτογραφίες αυτών των οδηγιών σε καμία περίπτωση δεν
μπορούν να θεμελιώσουν αξιώσεις οποιασδήποτε μορφής. Αυτές οι οδηγίες
χρήσης και συναρμολόγησης αποτελούν αναπόσπαστο συμπλήρωμα του
προϊόντος. Η εγγύηση παύει να ισχύει αν δεν τηρηθούν οι οδηγίες χρήσης και
οι οδηγίες ασφαλείας που περιέχονται σε αυτές. Φυλάξτε αυτές τις οδηγίες
για να μπορείτε να τις διαβάσετε αργότερα και να τις παραδώσετε μαζί με
το μοντέλο σε τρίτους.
Την τελευταία και πιο ενημερωμένη έκδοση αυτών των οδηγιών χρήσης, όπως
και πληροφορίες για ανταλλακτικά θα βρείτε στο
carrera-rc.com
στον τομέα
Service.
ΠΡΟΕΙΔΟΠΟΙΗΣΗ! Βεβαιωθείτε πριν από την πρώτη πτήση εάν στη χώρα
σας το μοντέλο που αγοράσατε υπόκειται σε υποχρέωση ασφάλισης.
Όροι εγγύησης
Τα προϊόντα Carrera είναι προϊόντα υψηλής ποιότητας και τεχνολο-
γίας (ΟΧΙ ΑΠΛΑ ΠΑΙΧΝΙΔΙΑ), τα οποία πρέπει να αντιμετωπίζονται με
ιδιαίτερη φροντίδα. Προσέχετε απαραιτήτως τις υποδείξεις στις οδη-
γίες χρήσης. Όλα τα τεμάχια ελέγχονται διεξοδικά (με την επιφύλαξη
για τεχνικές αλλαγές και τροποποιήσεις στα μοντέλα, οι οποίες απο-
σκοπούν στη βελτίωση των προϊόντων). Εάν παρ‘ όλα αυτά εμφανιστεί
κάποια βλάβη, αυτή καλύπτεται στα πλαίσια των όρων της εγγύησης:
Η Carrera Toys GmbH (στο εξής αποκαλούμενη „Κατασκευαστής“) εγγυά-
ται στον τελικό πελάτη (στο εξής αποκαλούμενος „Πελάτης“) σύμφωνα με
τους ακόλουθους όρους, ότι το μοντέλο Quadrocopter Carrera RC (στο εξής
αποκαλούμενο „Προϊόν“) που παραδόθηκε στον πελάτη, δεν θα παρουσιάσει
εντός χρονικού διαστήματος δύο ετών από την ημερομηνία αγοράς του (χρό-
νος εγγύησης) βλάβη που να προέρχεται από σφάλμα ή κακή επεξεργασία
υλικού. Ο κατασκευαστής μπορεί βλάβες και σφάλματα να τα αποκαταστή-
σει με δικά του έξοδα και κατά την κρίση του με επισκευή του προϊόντος ή με
την παράδοση νέων ή πλήρως συντηρημένων τεμαχίων. Η εγγύηση δεν κα-
λύπτει φθαρμένα εξαρτήματα (όπως π.χ. την επαναφορτιζόμενη μπαταρία,
πτερύγια έλικα, κάλυμμα καμπίνας, γρανάζια), βλάβες που οφείλονται σε
κακή μεταχείριση/χρήση του προϊόντος ή επεμβάσεις τρίτων. Άλλες αξιώσεις
του πελάτη, ιδιαίτερα ως προς την καταβολή αποζημίωσης, έναντι του κατα-
σκευαστή ρητώς αποκλείονται. Η εγγύηση δεν επηρεάζει τα δικαιώματα που
απέκτησε ο πελάτης από τη σύμβαση ή το νόμο (μεταγενέστερη εκπλήρωση,
ακύρωση της σύμβασης, μείωση τιμήματος, αποζημίωση) έναντι του εκάστοτε
πωλητή, τα οποία ισχύουν, όταν το προϊόν στη μετάβαση του κινδύνου δεν
βρισκόταν σε άψογη κατάσταση.
Αξιώσεις από αυτήν την εγγύηση υφίστανται μόνον όταν
• το σφάλμα δεν αφορά βλάβες, που προκλήθηκαν από μία κατά τις παραδο-
χές στις οδηγίες χρήσης, κακή ή μη σύμφωνη με αυτές χρήση,
• το σφάλμα δεν οφείλεται σε λειτουργικές φθορές,
• στο προϊόν δεν διακρίνονται εξωτερικές επεμβάσεις ή επισκευές από συνερ-
γεία που δεν είναι εξουσιοδοτημένα από τον κατασκευαστή,
• στο προϊόν χρησιμοποιήθηκε μόνο ο εξοπλισμός που έχει εγκριθεί από την
κατασκευαστή και
• το προϊόν αποσταλεί μαζί με τη γνήσια απόδειξη αγοράς (τιμολόγιο / από-
δειξη ταμειακής μηχανής) και την πλήρως συμπληρωμένη κάρτα εγγύησης
χωρίς οποιαδήποτε μεταβολή των στοιχείων της από τον πελάτη.
Δεν είναι δυνατή η αντικατάσταση των καρτών εγγύησης.
Υπόδειξη για κράτη της ΕΕ:
Υποδεικνύεται στον πελάτη ότι ο πωλητής έχει
την υποχρέωση παροχής εγγύησης από το νόμο, η οποία δεν περιορίζεται με
κανένα τρόπο από την ως προς το αντικείμενο εγγύηση.
ΕΛΛΗΝΙΚΆ
ENGLISH


