background image

28

29

GB

GB

How to cut your pet’s hair

NOTES:


•  The fur to be cut must be dry and clean.
•  Brush the fur through to remove any knots.
•  The cutting length may vary depending on the cutting 

angle.

•  First, start with a comb attachment for a longer cutting 

length and then, in the course of the cutting process, use 

shorter cutting lengths step by step.

1.  Switch the appliance on by sliding the on/off switch (

3

) up.

2.  Slowly run the appliance through the fur against the 

direction or hair growth.  Hold the appliance so that 

the comb attachment is as flat as possible against the 

animal.

3.  You can use the taper lever (

2

) to trim the hair step by 

step without replacing a comb attachment.  By removing 

the respective comb attachment, i.e. by cutting with the 

shaving head itself, you can cut clean contours. 

4.  Immediately after use, switch the appliance off by sliding 

the on/off switch down.

5.  Use the hanging loop (

4

) on the power cord to store your 

pet hair clipper.

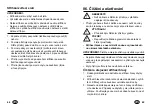
06. Cleaning and care

DANGER!


•  Remove the wall power supply from the socket 

before cleaning the device.

•  The appliance, cord and power plug must never be 

immersed in water or other liquids and must not be rinsed 

under running water.

WARNING!

•  Always switch off the device before cleaning it.

CAUTION!

•  Do not use any harsh or abrasive cleaning agents.
• 

The shaving head must not be cleaned with 

water or any other liquid except for rubbing 

alcohol.

NOTE:

 clean and oil the device after every use.

•  Remove the comb attachment. Rinse the comb attachment 

with water and let it dry before reattaching it to the device.

•  Wipe down the housing of the device with a damp cloth.

How to clean and oil the shaving head

1.  Use the provided brush to remove hair clippings from the 

shaving head.

2.  The shaving head can be disassembled for thorough 

cleaning. In order to do so, loosen the two screws with  

a Phillips screwdriver.

3.  Apply several drops of oil to the cutting edge of the cutting 

attachment. Using a soft cloth, wipe off the surplus oil, 

if necessary. Only use acid-free oil, such as e.g. sewing 

machine oil.

Summary of Contents for 9911922

Page 1: ...Tierhaarschneider Pet Hair Clipper St iha zv ec srsti Stroj ek na strihanie zvieracej srsti Bedienungsanleitung Instruction manual N vod k pou it N vod na obsluhu...

Page 2: ...Hersteller Manufacturer V robce V robca Aquarius Deutschland GmbH Adalperostr 29 85737 Ismaning bei M nchen Germany Art 9911922 Dies ist keine Serviceadresse Bitte beachten Sie das Kapitel Garantie un...

Page 3: ...Sie vor allen Dingen die Sicherheitshinweise Das Ger t darf nur so bedient werden wie in dieser Anleitung beschrieben Bewahren Sie diese Anleitung auf Falls Sie das Ger t einmal weitergeben legen Sie...

Page 4: ...h r au er halb der Reichweite von Kindern auf Das Ger t trocken halten GEFAHR f r Kinder Verpackungsmaterial ist kein Kinderspielzeug Kinder d rfen nicht mit den Kunststoffbeuteln spielen Es besteht E...

Page 5: ...rauf dass das Kabel nicht eingeklemmt oder gequetscht wird Um den Netzstecker aus der Steckdose zu ziehen immer am Netzstecker nie am Kabel ziehen Ziehen Sie den Netzstecker aus der Steckdose nach jed...

Page 6: ...hseln Verstellen der Kammaufs tze WARNUNG vor Schnittverletzungen Schalten Sie das Ger t aus bevor Sie die Kamm aufs tze aufstecken oder wechseln 1 Setzen Sie den jeweiligen Kammauf satz mit den Zacke...

Page 7: ...4 an der Netzanschlussleitung kann das Tierhaarschneideger t zur Aufbewahrung aufgeh ngt werden 06 Reinigung und Pflege GEFAHR Ziehen Sie den Netzstecker aus der Steck dose bevor Sie das Ger t reinige...

Page 8: ...Sie immer den Netzstecker aus der Steckdose wenn eine St rung auftritt Problem berpr fen Sie Folgendes Keine Funktion Stromversorgung sichergestellt Scherkopf l uft schwer Scherkopf gereinigt und ge l...

Page 9: ...ingeschr nkt HINWEIS Bitte beachten Sie dass die Garantie bei missbr uchlicher oder unsachgem er Behandlung bei Nichtbeachtung der f r das Ger t geltenden Sicherheits vorkehrungen bei Gewaltanwendung...

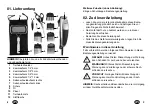
Page 10: ...02 About these instructions 21 03 Safety instructions 22 04 Overview 26 05 Operation 27 06 Cleaning and care 29 07 Storage 30 08 Troubleshooting 30 09 Technical data 31 10 Declaration of conformity 3...

Page 11: ...n manual carefully and ensure you comply with the safety instructions The device should only be used as described in these instructions Keep these instructions for reference If you pass the device on...

Page 12: ...must not play with packaging material Do not allow children to play with plastic bags There is a risk of suffocation Keep the small oil bottle out of children s reach DANGER Risk of electric shock du...

Page 13: ...leaning the device and during thunderstorms To avoid any risk do not make any changes to the device or accessories Do not replace the cable yourself either Repairs should only be carried out by a spec...

Page 14: ...the respective comb attachment with the teeth up and place it on the shaving head 1 Firmly press the fixing clip of the comb attachment onto the lower metal edge of the shaving head see figure below E...

Page 15: ...o store your pet hair clipper 06 Cleaning and care DANGER Remove the wall power supply from the socket before cleaning the device The appliance cord and power plug must never be immersed in water or o...

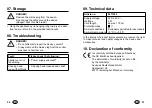
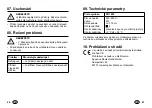
Page 16: ...ly ensured Shaving head runs with difficulty Shaving head cleaned and oiled 09 Technical data Article no 9911922 Supply voltage Wattage Cord length Protection class Ambient conditions Ambient temperat...

Page 17: ...warranty NOTE please note that the warranty lapses in the case of misuse or improper handling non compliance with the safety precautions that apply to the device the use of force or interventions whi...

Page 18: ...dod vky 36 02 O tomto n vodu 37 03 Bezpe nostn pokyny 38 04 P ehled 42 05 Obsluha 43 06 i t n a o et ov n 45 07 Uschov n 46 08 e en probl m 46 09 Technick parametry 47 10 Prohl en o shod 47 11 Likvida...

Page 19: ...p e t te tento n vod k pou it a p edev m se i te bezpe nostn mi pokyny P stroj m ete obsluhovat jen tak jak je pops no v tomto n vodu Tento n vod uschovejte Budete li p stroj p ed vat dal mu u ivatel...

Page 20: ...d ti D ti si nesm hr t s plastov mi s ky Hroz nebezpe udu en Lahvi ku s olejem uchov vejte mimo dosah d t NEBEZPE razu elektrick m proudem v d sledku vlhkosti Nepou vejte tento p stroj v bl zkosti van...

Page 21: ...y se p ede lo rizik m neprov d jte na p stroji a d lech p slu enstv dn zm ny Sami nesm te vym ovat ani kabel Opravy sm prov d t pouze odborn k V STRAHA p ed zran n m v d sledku po ez n Ost st ihac hla...

Page 22: ...u n stavc p stroj vypn te 1 P slu n h ebenov n stavec nasa te na st ihac hlavu 1 zoubkov n m nahoru a pot silou zatla te na lamelku h ebenov ho n stavce a na spodn kovovou hranu st ihac hlavy viz obr...

Page 23: ...p pojce 06 i t n a o et ov n NEBEZPE Ne za nete s i t n m p stroje vyt hn te nap jec d l ze z suvky P stroj kabel a s ov z str ka se nesm no it do vody ani jin tekutiny a nesm se om vat pod tekouc vo...

Page 24: ...sleduj c Nefunguje Je p stroj napojen do s t St ihac hlava b zt ka Je st ihac hlava vy i t n a naolejovan 09 Technick parametry slo v robku 9911922 S ov nap t V kon D lka kabelu Ochrann t da Okoln po...

Page 25: ...to z rukou nijak omezena UPOZORN N Respektujte pros m e z ruka zanik v p pad nep pustn nebo neodborn manipulace s p strojem p i nedodr en p slu n ch bezpe nostn ch p edpis p i pou it n sil nebo v p pa...

Page 26: ...2 02 K tomuto n vodu 53 03 Bezpe nostn upozornenia 54 04 Preh ad 58 05 Obsluha 59 06 istenie a o etrovanie 61 07 Uskladnenie 62 08 Rie enia probl mov 62 09 Technick daje 63 10 Vyhl senie o zhode 63 11...

Page 27: ...na obsluhu a dodr iavajte bezpe nostn pokyny ktor s v om uveden Pr stroj smiete obsluhova len tak ako je to op san v tomto n vode Tento n vod si starostlivo uschovajte Ak pr stroj v bud cnosti odovzd...

Page 28: ...EBEZPE ENSTVO pre deti Obalov materi l nie je hra ka Deti sa nesm hra s plastov mi vreckami Hroz nebezpe enstvo udusenia F a ti ku s olejom uchov vajte mimo dosahu det NEBEZPE ENSTVO z sahu elektrick...

Page 29: ...stroj isti a po as b rky Aby sa predi lo rizik m nevykon vajte na pr stroji a pr slu enstve iadne zmeny Sami nevymie ajte ani k bel Opravy zverte len odbornej firme V STRAHA pred poranen m v d sledku...

Page 30: ...stavcov pr stroj vypnite 1 Pr slu n hrebe ov n sadu nasa te z bkami nahor naj sk r na strihaciu hlavu 1 a lamelu hrebe ovej n sady potom silno pritla te na spodn kovov hranu strihacej hlavy pozri obr...

Page 31: ...akto ulo en ke sa nepou va 06 istenie a o etrovanie NEBEZPE ENSTVO Vytiahnite sie ov z str ku zo z suvky sk r ne budete pr stroj isti Stroj ek k bel a z str ku nepon rajte do vody ani do in ch kvapal...

Page 32: ...ntrolujte nasledovn Stroj ek nefunguje Je zapojen v sieti Strihacia hlava ide a ko Je hlava vy isten a naolejovan 09 Technick daje slo polo ky 9911922 Sie ov nap tie V kon D ka k bla Trieda ochrany Ok...

Page 33: ...ZORNENIE Majte pros m na pam ti e v pr pade nedovolen ho a nespr vneho zaobch dzania s v robkom nedodr ania bezpe nostn ch opatren pre pr stroj pri pou it n silia alebo v pr pade z sahov ktor neboli v...

Page 34: ...66 67 SK SK...

Page 35: ...Zem p vodu na Krajina p vodu na Made in China Ausgabe 07 2014 PO140003...

Reviews: