4-7
4.7 COMPRESSOR MODEL 06DR REPLACEMENT
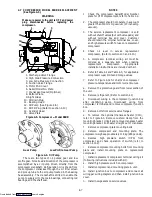
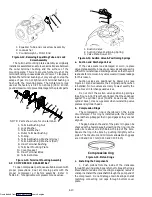
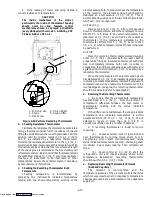
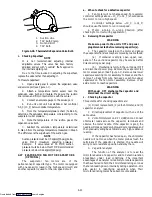
(See Figure 4-5.)
WARNING
Make sure power to the unit is OFF and power
plug disconnected before replacing the
compressor.
1
2
3
4
5
6
7
8
10
11
12
13
14
15
1. Discharge Valve Flange
2. High Side Pressure Connection
3. Low Side Pressure Connection
4. Suction Valve Flange
5. Motor End Cover
6. Serial/Model No. Plate
7. Crankcase Heater (Optional)
8. Bottom Plate
9. Sight Glass
10. Oil Drain Plug
11. Bearing Head
12. Oil Pump (See Figure 4-6)
13. Oil Fill Plug (Refer to section 4.10)
14. Cylinder Head
15. Valve Plate
9
Figure 4-5. Compressor --- Model 06DR
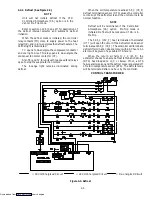
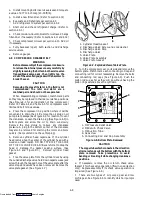
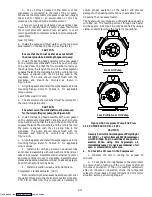
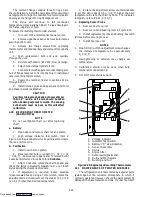
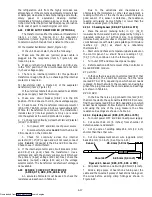
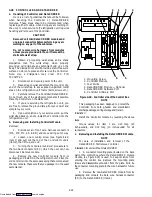
Gear Pump
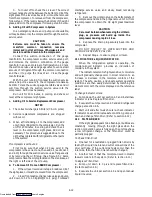
Low Profile Gear Pump
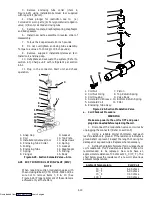
Figure 4-6. Oil Pump
There are two types of oil pumps; gear and low
profile gear. Force-feed lubrication of the compressor is
accomplished by a oil pump driven directly from the
compressor crankshaft. Refrigeration oil is drawn from
the compressor crankcase through the oil filter screen
and pick up tube to the oil pump located in the bearing
head assembly. The crankshaft is drilled to enable the
pump to supply oil to the main bearings, connecting rod
bearings, and the shaft seal.
NOTES
1. Check the compressor Serial/Model Number
plate for CFM displacement, refer to Table 1-2.
2. The compressor should not operate in a vacuum
greater than 500 mm Hg vacuum (20 inches Hg
vacuum).
3. The service replacement compressor is sold
without shutoff valves (but with valve pads), and
without terminal box and cover. Customer
should retain the original terminal box, cover,
and high pressure switch for use on replacement
compressor.
4. Check oil level in service replacement
compressor. (Refer to sections 1.3 and 4.10.)
5. A compressor terminal wiring kit must be
ordered as a separate item when ordering
replacement
compressor.
Appropriate
installation instructions are included with kit.
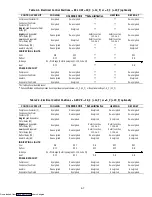
6. Refer to Table 4-4 and Table 4-5, for applicable
compressor wear limits and torque values.
7. Refer to Figure 4-32 for charts on compressor
pressure-temperature and motor current curves.
a. Remove the protective guard from lower section of
the unit.
b. Remove refrigerant. (Refer to section 4.3)
c. Disconnect wiring in the compressor junction box
after identifying same. Disconnect wiring from
compressor terminals and remove compressor junction
box.
d. Remove bolts from service valve flanges.
e. To remove the optional crankcase heater (CCH),
refer to Figure 4-5. Remove cushion clamp from the
mounting bracket. Unbolt and remove crankcase heater
mounting bracket. Pull heater straight out of crankcase.
f. Remove compressor plate mounting bolts.
g. Remove compressor and mounting plate. The
compressor weighs approximately 118 kg (260 pounds).
h. Remove high pressure switch (HPS) from
compressor and check operation of switch (refer to
section 4.13.2).
i.
Remove compressor mounting bolts from mounting
plate and install mounting plate on replacement
compressor.
j.
Install replacement compressor terminal wiring kit
(following instructions included with kit).
k. Install high pressure switch on compressor.
l.
Install compressor and mounting plate in unit.
m. Install junction box to compressor and connect all
wiring per wiring diagram and then install junction box
cover.
n. Install new gaskets on service valves.
Downloaded from

