6-29
T-294-01
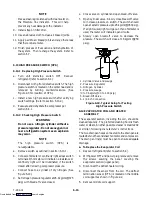
3. Place strap on wrist and attach the ground or clip
end of the wrist strap to any exposed unpainted
metal area on the refrigeration unit frame (bolts,
screws, etc.).
4. Carefully remove the Controller/DataCORDER.
Do not touch any of the electrical components if
possible. Place the module on the static mat.
5. If you are servicing the refrigeration unit, you are
free to remove the ground strap from your wrist and
complete your work.
6. Upon completion of your service work, put the
wrist strap back on, and re-install the module into
the refrigeration unit.
b. Removing and Installing the
Controller/DataCORDER Module
Removal:
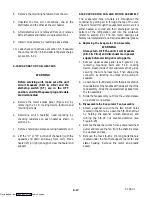
1. Disconnect all front wire harness connectors (MA,
MB, MC, KA & KB) and move wiring out of way.
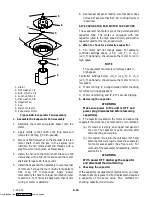
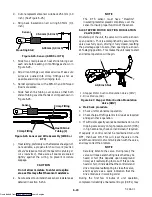
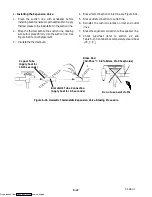
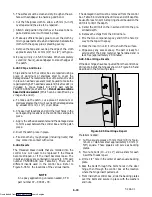
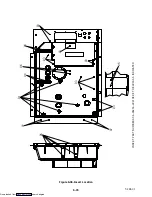
2. Loosen one mounting screw (see Figure 6-32, item
1) and pull out the top of the module (item 2). Lift up
and out.
3. Turning the module around will give access to the
two back connectors (EC) which can be
disconnected. Remove module.
4. Remove the new Controller/DataCORDER module
from its packaging and install it in the refrigeration
unit. Place the old module into the same packaging
that accompanied the new module.
Make sure that
you package it in the exact manner that you received
it.
NOTE
This packaging has been designed to protect the
Controller/DataCORDER module from both
physical and electrostatic discharge damage
during storage and transit.
Installation:
Install the module by reversing the steps in section
6.27.b.
Torque values for mounting screws (item 1,
Figure 6-32) are 0.23 mkg (20 inch-pounds), and 0.12
mkg (10 inch-pounds) for all connectors (MA, MB,
MC, KA & KB).
1
2
3
4
1. Controller/DataCORDER Software
Programming Port
2. Mounting Screw
3. Controller/DataCORDER Module
4. Test Points
Figure 6-32. Controller side of the Control Box
6.27.1 Controller/DataCORDER
Programming
Procedure
To load new software into the module, the
programming
card
is
inserted
into
the
programming/software port.
WARNING
The unit must be OFF whenever a
programming card is inserted or removed
from the programming/software port.
The metal door on the programming card
must be facing to the left when inserting.
a. Procedure for loading Operational Software
1. Turn unit OFF, via start-stop switch (ST).
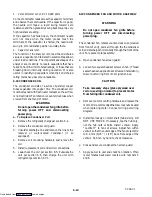
2. Insert the programming card for Operational
Software into the programming/software port. (See
Figure 6-32)
3. Turn unit ON, via start-stop switch (ST).
4. The Display module will read:
(a.) If the correct card is being used the digital
display will alternate back and forth between
the messages “rEV XXXX” and “Press EntR.”
(b.) If a defective card is being used: the Display
will blink the message “bAd CArd.” (Turn
start-stop switch OFF and remove the card.)
Downloaded from


