6-19
T-292
4. If no change in suction pressure is detected, check
for resistance (refer to step 6.18.2), and check con-
nections for proper continuity and retest. If the valve
is functioning and all connections and motor resist-
ance are good, check the controller and expansion
module.
CAUTION
DO NOT disassemble piston from NEW suc-
tion modulating valve powerhead assem-
bly. Doing so may result in damage to pis-
ton.
5. If the valve is determined as faulty after completing
the above steps, perform a low side pump down
(units with standard piping) or remove charge (units
with semi--hermetic piping).
Remove valve powerhead assembly, and replace
with a NEW valve powerhead assembly, torque nut
to 35 ft-lb.
For units with standard piping: Evacuate low side,
open all service valves and leak test unit.
For Units with semi--hermetic piping: Leakk test unit,
evacuate, dehydrate and recharge.
6.19 AUTOTRANSFORMER
If the unit does not start, check the following:
a. Make sure the 460 vac (yellow) power cable is
plugged into the receptacle (item 3, Figure 4-1) and
locked in place.
b. Make sure that circuit breakers CB-1 and CB-2 are in
the “ON” position. If the circuit breakers do not hold in,
check voltage supply.
c. There is no internal protector for this transformer
design, therefore, no checking of the internal protec-
tor is required.
d. Using a voltmeter, and with the primary supply circuit
ON, check the primary (input) voltage (460 vac).
Next, check the secondary (output) voltage (230
vac). The transformer is defective if output voltage is
not available.
6.20 CONTROLLER AND EXPANSION MODULE
6.20.1 Handling Modules
CAUTION
Do not remove wire harnesses from module
unless you are grounded to the unit frame
with a static safe wrist strap.
CAUTION
Unplug all module connectors before per-
forming arc welding on any part of the con-
tainer.
The guidelines and cautions provided herein should be
followed when handling the modules. These
precautions and procedures should be implemented
when replacing a module, when doing any arc welding
on the unit, or when service to the refrigeration unit
requires handling and removal of a module.
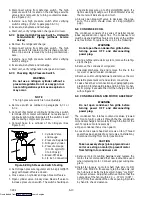
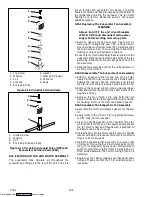
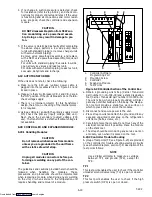
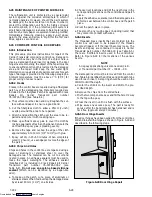
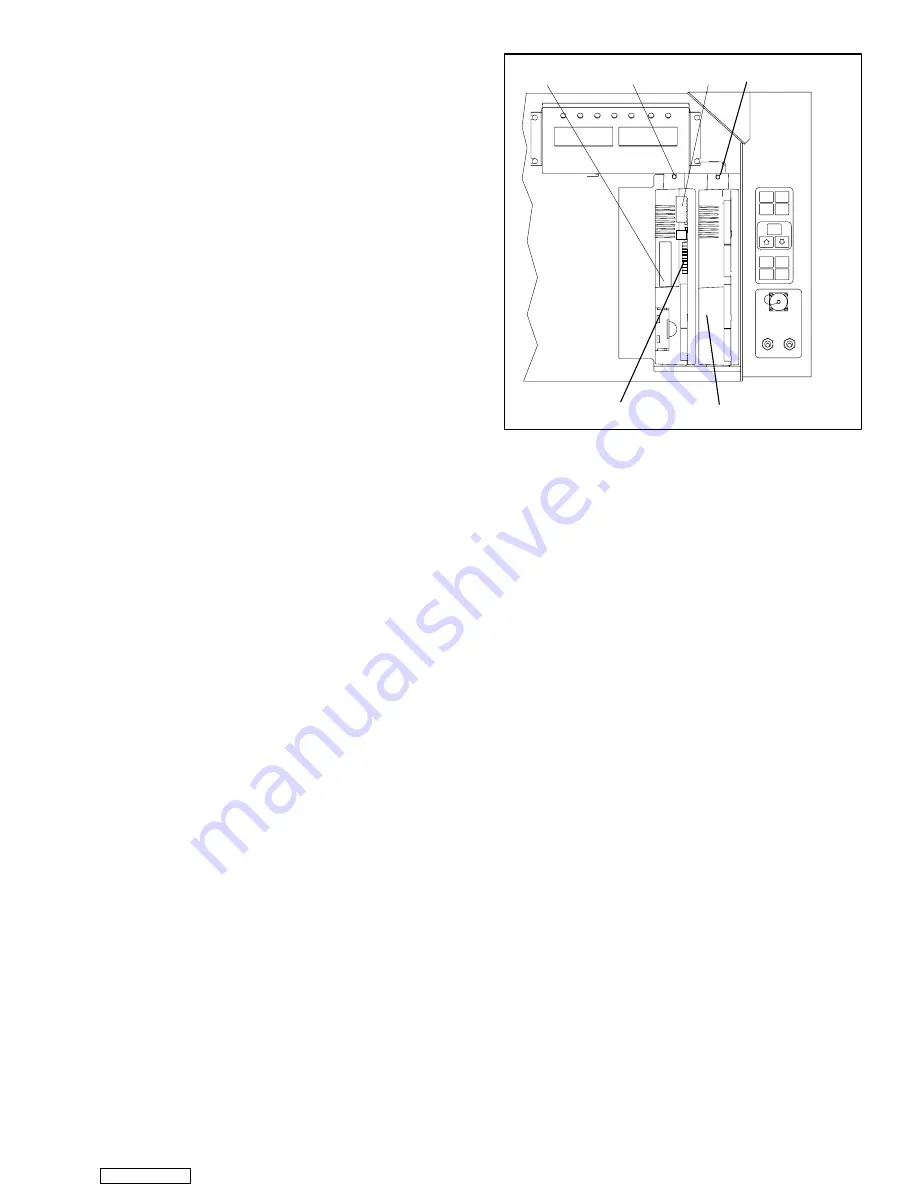
1
2
3
4
5
2
1. Controller Software
Programming Port
2. Mounting Screw
3. Controller
4. Expansion Module
5. Test Points
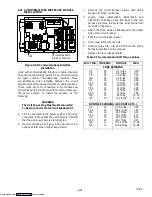
Figure 6-20 Controller Section of the Control Box
a. Obtain a grounding wrist strap (Carrier Transicold
part number 07--00--304--00)and a static dissipation
mat (Carrier Transicold part number 07--00304--00.
The wrist strap, when properly grounded, will dissi-
pate any potential buildup on the body. The dissipa-
tion mat will provide a static-free work surface on
which to place and/or service the modules.
b. Disconnect and secure power to the unit.
c. Place strap on wrist and attach the ground end to any
exposed unpainted metal area on the refrigeration
unit frame (bolts, screws, etc.).
d. Carefully remove the module. Do not touch any of the
electrical connections if possible. Place the module
on the static mat.
e. The strap should be worn during any service work on
a module, even when it is placed on the mat.
6.20.2 Controller Trouble-Shooting
A group of test points (TP, see Figure 6-20) are provided
on the controller for trouble-shooting electrical circuits
(see schematic diagram, section 7). A description of the
test points follows:
NOTE
Use a digital voltmeter to measure ac voltage
between TP’s and ground (TP9), except for
TP8.
TP1
This test point enables the user to check if the controller
unloader solenoid valve relay (TU) is open or closed.
TP2
This test point enables the user to check if the high
pressure switch (HPS) is open or closed.
Downloaded from
Summary of Contents for 69NT40-531 Series
Page 2: ...Downloaded from ManualsNet com search engine ...
Page 4: ...Downloaded from ManualsNet com search engine ...
Page 8: ...Downloaded from ManualsNet com search engine ...
Page 16: ...Downloaded from ManualsNet com search engine ...
Page 57: ...Downloaded from ManualsNet com search engine ...
Page 104: ...Downloaded from ManualsNet com search engine ...
Page 106: ...7 2 T 292 Figure 7 2 SCHEMATIC DIAGRAM Downloaded from ManualsNet com search engine ...


