62-12023
5-8
5.6.1
Checking the Refrigerant Charge
Start unit in cooling mode. Run approximately ten minutes. Partially block off air flow to condenser coil increase the
area blocked until compressor discharge pressure is raised to approximately 325 psig (22 Bars).
The charge is correct if there are no bubbles at the liquid line sight glass.
5.6.2
Installing a Complete Charge
NOTE
The ambient (air entering the condenser) air temperature should be above 40°F (4.4°C)
1. Evacuate the refrigeration circuit and leave in a deep vacuum (refer to
).
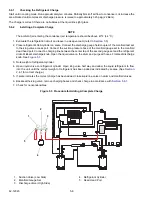
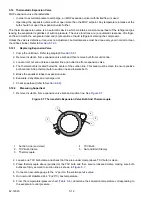
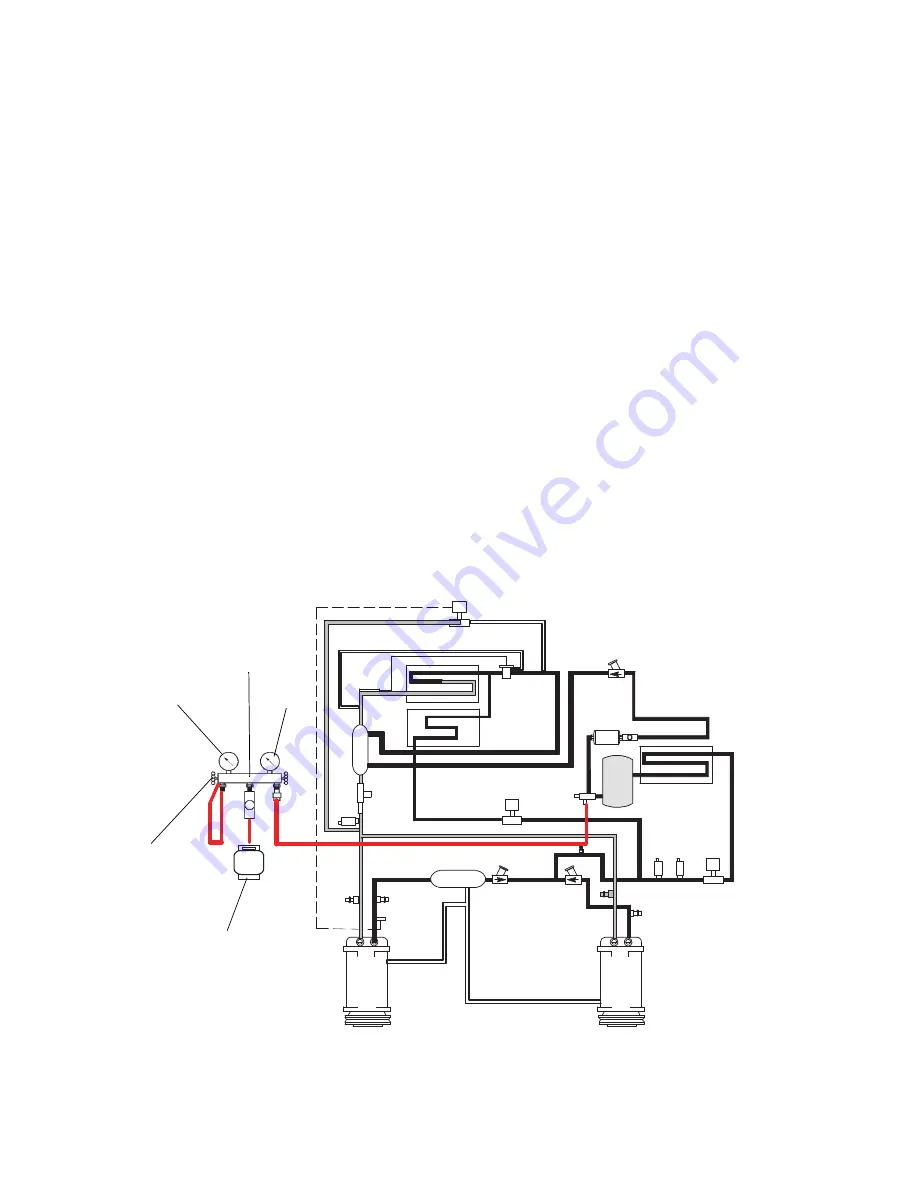
2. Place refrigerant 404A cylinder on scale. Connect the discharge gauge field coupler of the manifold test set
to the king valve access port. Connect the suction pressure hose of the manifold gauge set to the manifold
dead head port. Connect a charging line between the center tap of the second gauge set and the refrigerant
drum. Midseat discharge knob. Open the liquid valve on the drum and purge all hoses. Frontseat discharge
knob. See
3. Note weight of refrigerant cylinder.
4. Open liquid valve on refrigerant cylinder. Open king valve half way and allow the liquid refrigerant to flow
into the unit until the correct weight of refrigerant has been added as indicated by scales. (See
for correct charge.)
5. If scale indicates the correct charge has been added, close liquid line valve on drum and manifold valves.
6. Backseat the king valve, remove charging hoses and check charge in accordance with
7. Check for noncondensibles.
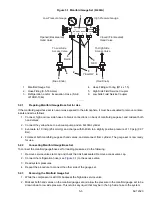
Figure 5.3 Procedure for Adding A Complete Charge
1. Suction Valve (Low Side)
2. Manifold Gauge Set
3. Discharge Valve (High Side)
4. Refrigerant Cylinder
5. Dead Head Port
27
Summary of Contents for Integra 35X
Page 2: ......
Page 8: ......
Page 12: ......
Page 68: ......
Page 69: ...wiring schematics ...
Page 70: ......
Page 71: ...wiring schematics ...
Page 72: ......
Page 73: ...wiring schematics ...
Page 74: ......
Page 75: ...wiring schematics ...
Page 76: ......
Page 79: ......


