T-372
7–22
7.18.2
Cleaning Procedure
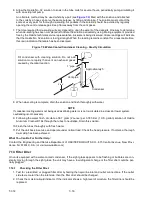
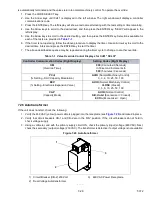
1. Remove the upper evaporator access panel inside of the unit.
2. Spray the surface with water before applying the cleaning solution. This helps the cleaner work better.
3. Liberally apply the prepared cleaner solution (5 parts water and 1 part cleaner).
4. Allow the cleaner to soak in for five to seven minutes.
5. Assess area for rinsing. Follow all local regulations regarding disposal of waste water.
6. Thoroughly rinse the cleaner and surrounding area, floor, etc. When rinsing where heavy foaming solution is
present, it is very important to take the time to thoroughly rinse the equipment and surroundings.
7. Always rinse the empty coil cleaner bottle, cap tightly and dispose of properly.
7.19 Electronic Expansion Valve (EEV)
The electronic expansion valve (EEV) is an automatic device which maintains required superheat of the refrigerant
gas leaving the evaporator. The valve functions are: (a) automatic response of refrigerant flow to match the evapo
-
rator load and (b) prevention of liquid refrigerant entering the compressor. Unless the valve is defective, it seldom
requires any maintenance.
7.19.1
Removing an EEV
WARNING
!
Always turn OFF the unit circuit breakers (CB-1 & CB-2) and disconnect main power supply
before working on moving parts.
1. Pump down the compressor (see
) and frontseat both suction and discharge valves.
2. Turn unit power off and remove power from the unit.
3. Remove the coil.
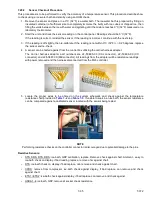
4. Remove the valve. The preferred method of removing the valve is to cut the connection between the brazed
section and the valve, using a small tube cutter. Remove the valve.
Alternatively, use a wet rag to keep the valve cool. Heat inlet and outlet connections to valve body and
remove valve.
5. Clean the valve stem with mild cleaner, if necessary.
7.19.2
Installing an EEV
1. Install the valve and a new strainer with the cone of the strainer / screen pointing into the liquid line at the
inlet to the valve.
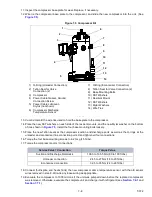
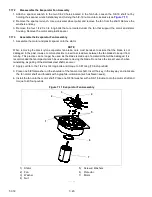
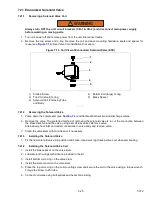
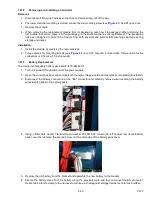
2. During installation, make sure the EEV coil is snapped down fully, and the coil retention tab is properly
seated in one of the valve body dimples. Also, ensure that coil boot is properly fitted over valve body. See
3. Replace the filter drier.
4. Evacuate to 500 microns by placing the vacuum pump on the liquid line and suction service valve.
5. Open the liquid line service valve and check refrigerant level.
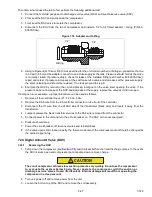
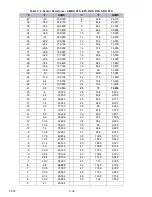
6. Check superheat. See


